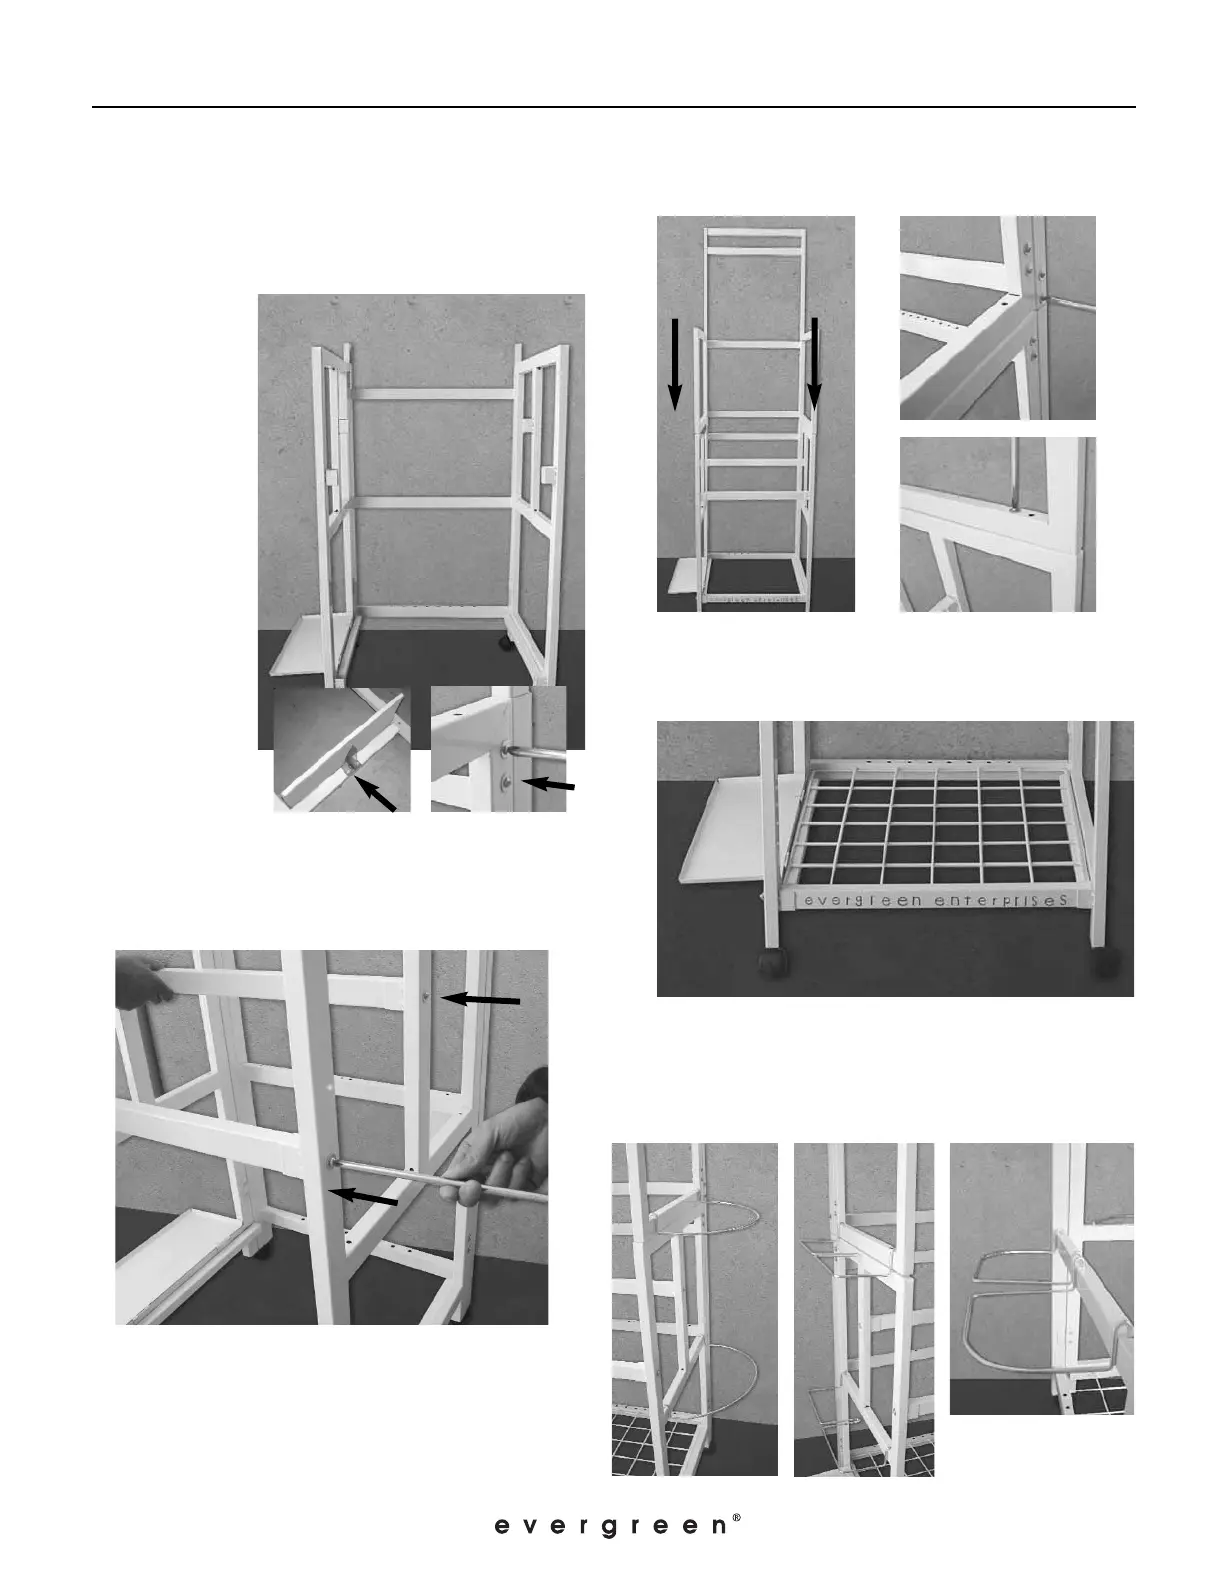
5. Install the Shelf Grid at the bottom of the
display. (Fig. F)
6. Install C-Brackets on the right side of the
display. Install the E-Bracket on the left side of
the display. Install the D-Brackets on the back of
the display.
Page 2
Instructions for “Junior” metal flag display (05092)
Rev. 04/07
1. Remove everything from packaging and verify
that all parts are present.
2.
Secure Side
Install wheels
at the bottom
of side left and
side right.
Left (SL) to
Side Right (SR)
with screws.
(Fig.A)
4. Place the Upper Frame (UF) onto the
assembled Bottom Frame (Fig. C). Secure with
screws on the sides of the display (Fig. D) and
screw them together from the inside of the
display (Fig. E).
Fig. A
Fig. B
ASSEMBLY INSTRUCTIONS
Fig. C
Fig. D
Fig. E
Fig. F
side left (SL).
3. Install cross bars in the middle of the bottom
frame. Secure by screws. Install the cross bar with