BULB INSTALLATION
CAUTION: Always handle PAR38 bulbs with a soft cloth.
Do not touch the bulb with your bare hand as
it will shorten the life of the bulb.
(1) Do not touch the floodlight while it is in use or still
hot. Allow it to cool (about 5 minutes) before
touching it.
(2) Do not use PAR38 bulb rated higher than 150 watts.
(3) Disconnect the power source or wall switch. Screw
two floodlight bulbs into the lamp holders. Use a
maximum of 150 watt PAR 38 bulb for each lamp
holder.
Note: Do not over tighten the bulbs.
INSTALLATION
To facilitate installation, it is essential to get a drill and a
screwdriver ready. Select a location for the unit based on
the coverage angles shown in FIGURE 3.
FIGURE 3
Install a wall switch adjacent to the power source.
(FIGURE 4). This will help you operate this motion
sensor floodlight with ease. See OPERATION for further
information.
Note: Keep the bulb away from the wall at least 50mm
(FIGURE 5).
2
.
FIGURE 5
WIRING INSTRUCTION
(1) Switch off the power source or wall switch.
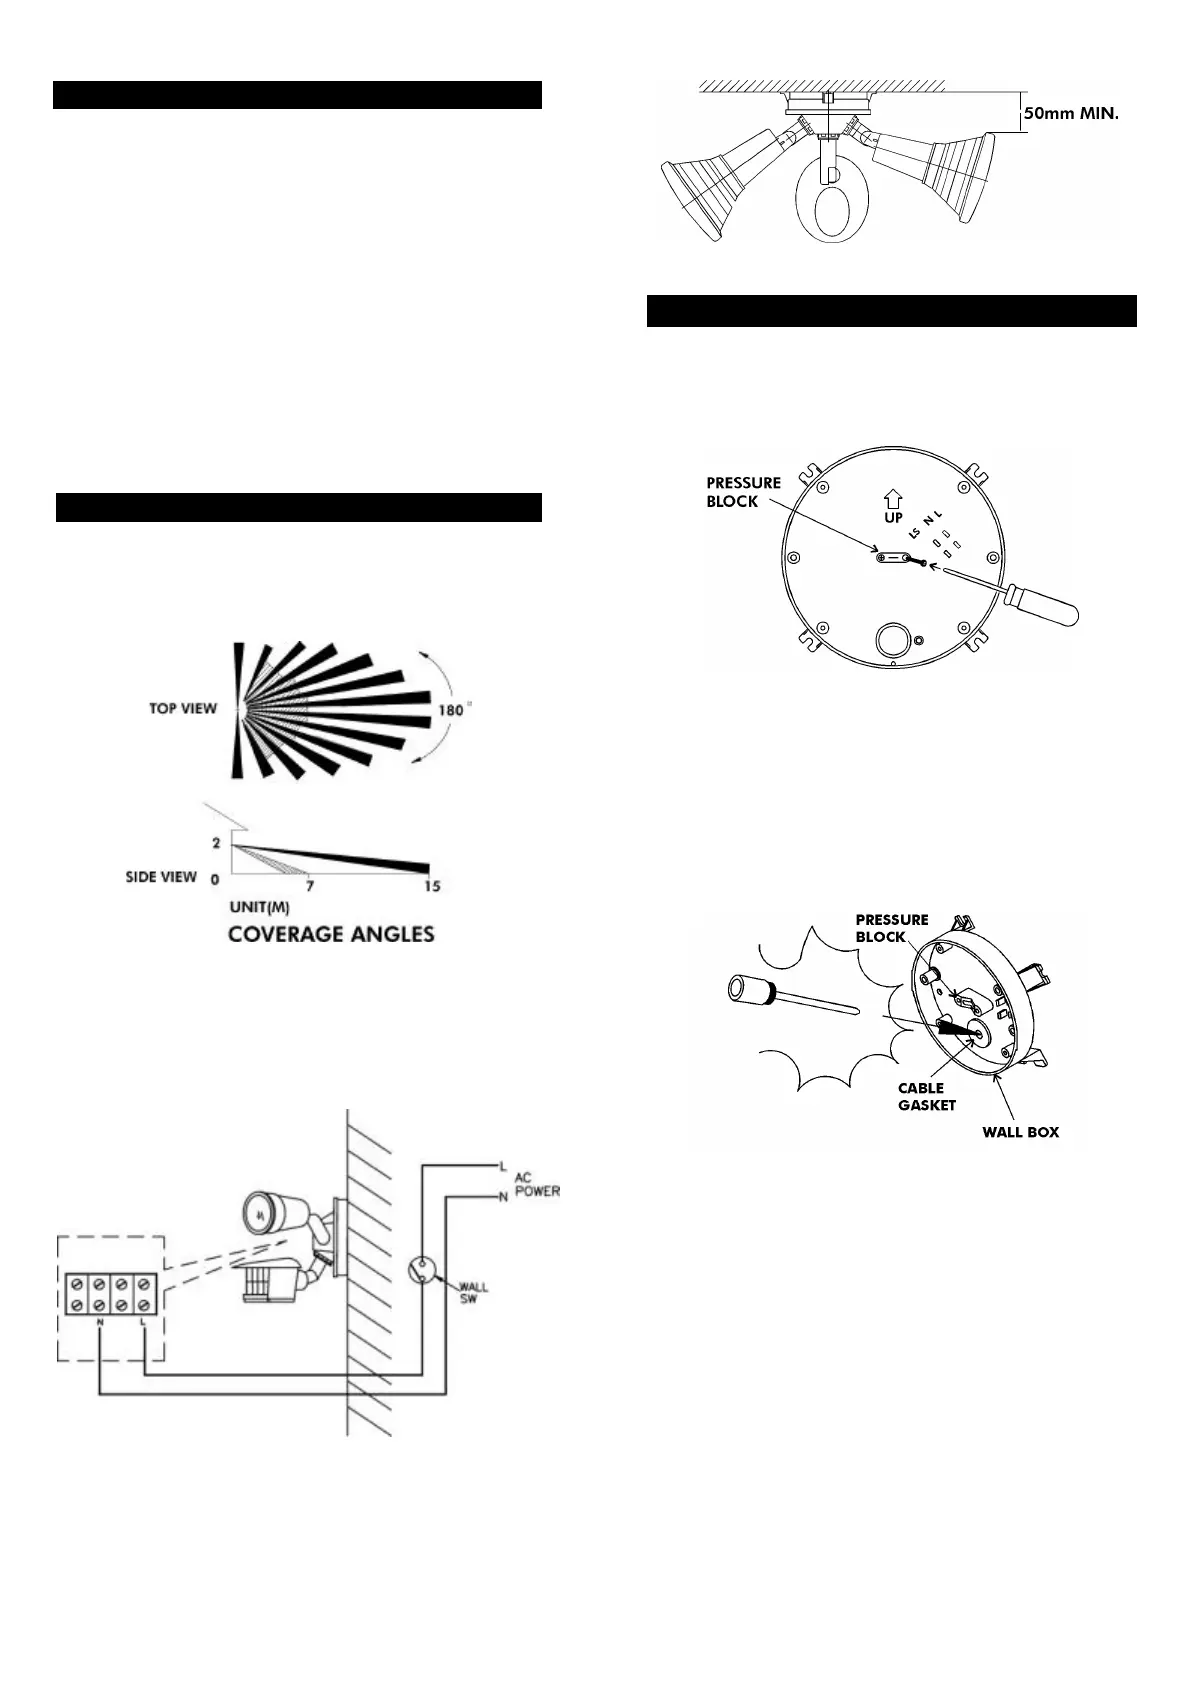
(2) Remove the wall box’s back plate then unscrew two
screws on the pressure block (FIGURE 6).
FIGURE 6
Note: There is a “UP” mark shown on the interior wall box.
Be sure to have “UP” mark shown upwardly when
fixing the wall box on the wall.
(3) Use a screwdriver to break a small hole on the cable
gasket, enabling the power cord to enter into the
wall box (FIGURE 7).
FIGURE 7
(4) Route the power cord through the cable gasket.
Note: The power cord must meet H05RN-F, 3G, 1.0mm²
requirement.
(5) Fix the wall box to the pre-determined mounting
location by making use of the two screws provided.
Note: Ensure that the position of two screws to fix on the
wall should be inserted diagonally (FIGURE 8).
3
 Loading...