Version: 988 TK-366-V1.0
EW-988TK Operation Manual
Thank you for choosing Ewelly instruments. This product combines a wide range of refrigeration
technology, which is simple to operate with accurate temperature control and strong anti-interference
ability. It is suitable for a variety of refrigeration, heating equipment and automatic intelligent control
systems. The sensor produced by our company is packaged by a precise process, which has moisture-
proof function and stable performance.
Product Specification
1. Operating Voltage:AC220V±10%; 50HZ/60HZ
2. Output:10A/220V/AC; 10A/220V/AC
3. Power Consumption:≤3W
4. Working Environment:-10℃~50℃;RH≤90%
5. Control Range:-20℃/-5℉~105℃/220℉; (Factory setting: 12℃)
6. Resolution:-20~99.9℃ is 0.1℃; Accuracy: ±0.5℃ ; 100~105℃ is 1℃; Accuracy: ±1℃
-5℉~220℉ is 1℉; Accuracy:2℉
7. Input Signal:1-Off temp. sensor, standard cable length 20K×2m
8. Overall Dimension:80(Width)×32(Height)×70(Depth)mm;
9. Mounting Size:71(Width)×29(Height)mm;
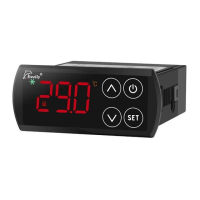
Display Panel
Installation Requirement
1. Please make sure that the power supply voltage meets the required voltage of the instrument. The
deviation should be less than ±10%.
2. The sensor should be kept away from the power cable.
3. Strictly distinguish the interfaces of the sensor, power cable and the relay output.
Operation Instruction
1. Standby function:
Hold “ON/OFF” key for 3 s to enter standby mode, then it displays “ ”and all outputs are
disconnected.
In standby mode, press and hold the “ON/OFF” key for 3s to return to normal operation.
2. Locking function:
Under “Lock” mode, press and hold the “▲” key for 3 s to unlock along with buzzer sounds. This
meter would lock itself automatically after 30s without any actions.
3. Fast temperature setting
Under normal operation, press the "Set" key to display the control temperature (the value flashes).
Press “▲” and “▼” to adjust the parameter values.
Hold “▲” and “▼” key to adjust the parameter value quickly. (This is a general operation).
4. Parameter adjustment
Hold "Set" for 6s until the parameter code "HC" turns on, indicating that the system setting menu has
been entered. Switch the corresponding parameter codes by pressing “▲” and “
▼
”.
Press " Set" to display the parameter value of the corresponding parameter code (the value flashes);
Press “▲” and “▼” to adjust the parameter value.
Press "Set" to confirm the modified parameter value and return to the upper menu.
Under the system setting status, press "ON/OFF" to exit the menu setting and return to the normal
operation.
Under the system setting status, it returns to normal operation automatically when there is no action
in 6s.
5. One-click restore of preset parameters
Under normal operation, press and hold the “▼” key for 6s or more, the display panel flashes, and
all parameters will be reset to factory settings. (please make sure to record the setting parameters
in advance)
6. Stop/Silence buzzer alarm
Press any key to cancel the current buzzer alarm sounds, but the indicator light will not turn off until
the fault is removed.
7. System Menu
Code Description Setting Range
Factory
Setting
Explanation
HC
Cooling
/Heating
C=
Cooling
H
=Heating
C -
CF
Temp. Unit
Switch
C=Centigrade;
F=Fahrenheit
C -
d
Temp. Return
Difference
0.1~15℃
1~60℉
2℃/5℉
The target temp. can be controlled
to be stable in a certain setting
range.
CA
Temperature
Calibration
-15~15℃ -60~60℉ 0
This parameter corrects the temp.
when there is an error
Pt Time Delay
0 ~ 10 min
1
Protect the meter from frequent
start-up
HS
Temp. Upper
Limit
Set temp. +1℃ ~ 80℃
/220℉
80℃ Prevent temp. is set too high
LS
Temp. Lower
Limit
-20℃/-5℉ ~ Set
temp.-1℃
-20℃
Prevent temp. is set too low
Up key
Down key
On/Off key
Set/Confirm/
Return key
Symbol
Description
Status
Explanation
Symbol
Description
Status
Explanation
Cooling
Off Cooling stops
Fahrenheit
Degree
- -
On Cooling on
Parameter
Setting
On
Parameter
Setting
Flashing
Cooling stops
under cooling
mode
Alarm Signal On Faulty
Heating
Off Heating stops
Standby
Signal
On
Standby
Mode
On Heating on
Lock
Off Unlocked
On Locked
Flashing
Heating stops
under heating
mode
Centigrade
Degree
- -