PRODUCT INFORMATION
Dear customer,
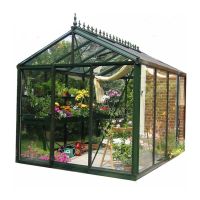
Thank you for buying a Janssens high-quality aluminium greenhouse.
REMARKS
In this manual, you will find the assembly instructions for all basic/standard-model greenhouses.
However, this manual also contains page which apply to optional accessories that may not be included
with your kit. This greenhouse is designed for cultivation of plants/flowers. Therefore leakage, water
drops and condensation inside the building are allowed. The building may only be entered by competent
persons during cultivation or maintenance. Aluminium profiles that are not painted may show black
stains, these stains are not a production error: they can be easily removed with a aluminium cleaner available
at a home improvement store. The rubber strips have been treated with oil/silicone on the interior to
facilitate the assembly. The building should be mounted on a solid concrete foundation deep enough to
get a solid and frost-free ground. Anchoring of the foundation should be made by the owner or
operator and should be checked periodically. During winter, the roof will need to be cleared of snow or
supported in a suitable way. The greenhouse should be built in a location protected from strong winds.
Protective gear (such as protective gloves) should be used during assembly in order to avoid injuries. One
should at all times pay attention to the local building regulations.
ASSEMBLY ORDER
The assembly procedure is the same for all our greenhouses.
- Sorting of the profiles/extrusions according to the model/size of greenhouse. The aluminum profiles
(extrusions) are identified by their cross-section and length.
- Assembly of the complete aluminium framework.
- Leveling of the construction using a level
- Anchoring/securing of the
greenhouse to the
ground
- Glazing installation
REQUIRED TOOLS
- Metric or Combination Measuring Tape
(highly recommended)
- Socket wrench or spanner 10mm
- Level
- Screwdriver
- Drill + drill bit 4.2 mm
- Scissors (to cut the rubber).
We reserve the right to change the construction without prior notice!
Questions? Need Assembly Support?
Please call Exaco at 877-760-8500, ext. 701 or email
customerservice@exaco.com.
 Loading...