10
d) Lower deck to cutting position and lock deck locking pins. See section 4.1.3,
Lowering the Mower Deck to the Operation Position.
4.2.2 Check mower blades
.
Service Interval: Daily
a) Stop engine, wait for all moving parts to stop, and remove key. Engage parking
brake.
b) Fold deck and secure in raised position as stated in Section 4.1.1, Raising the Mower
Deck to the Service Position.
c) Inspect blades and sharpen or replace as required.
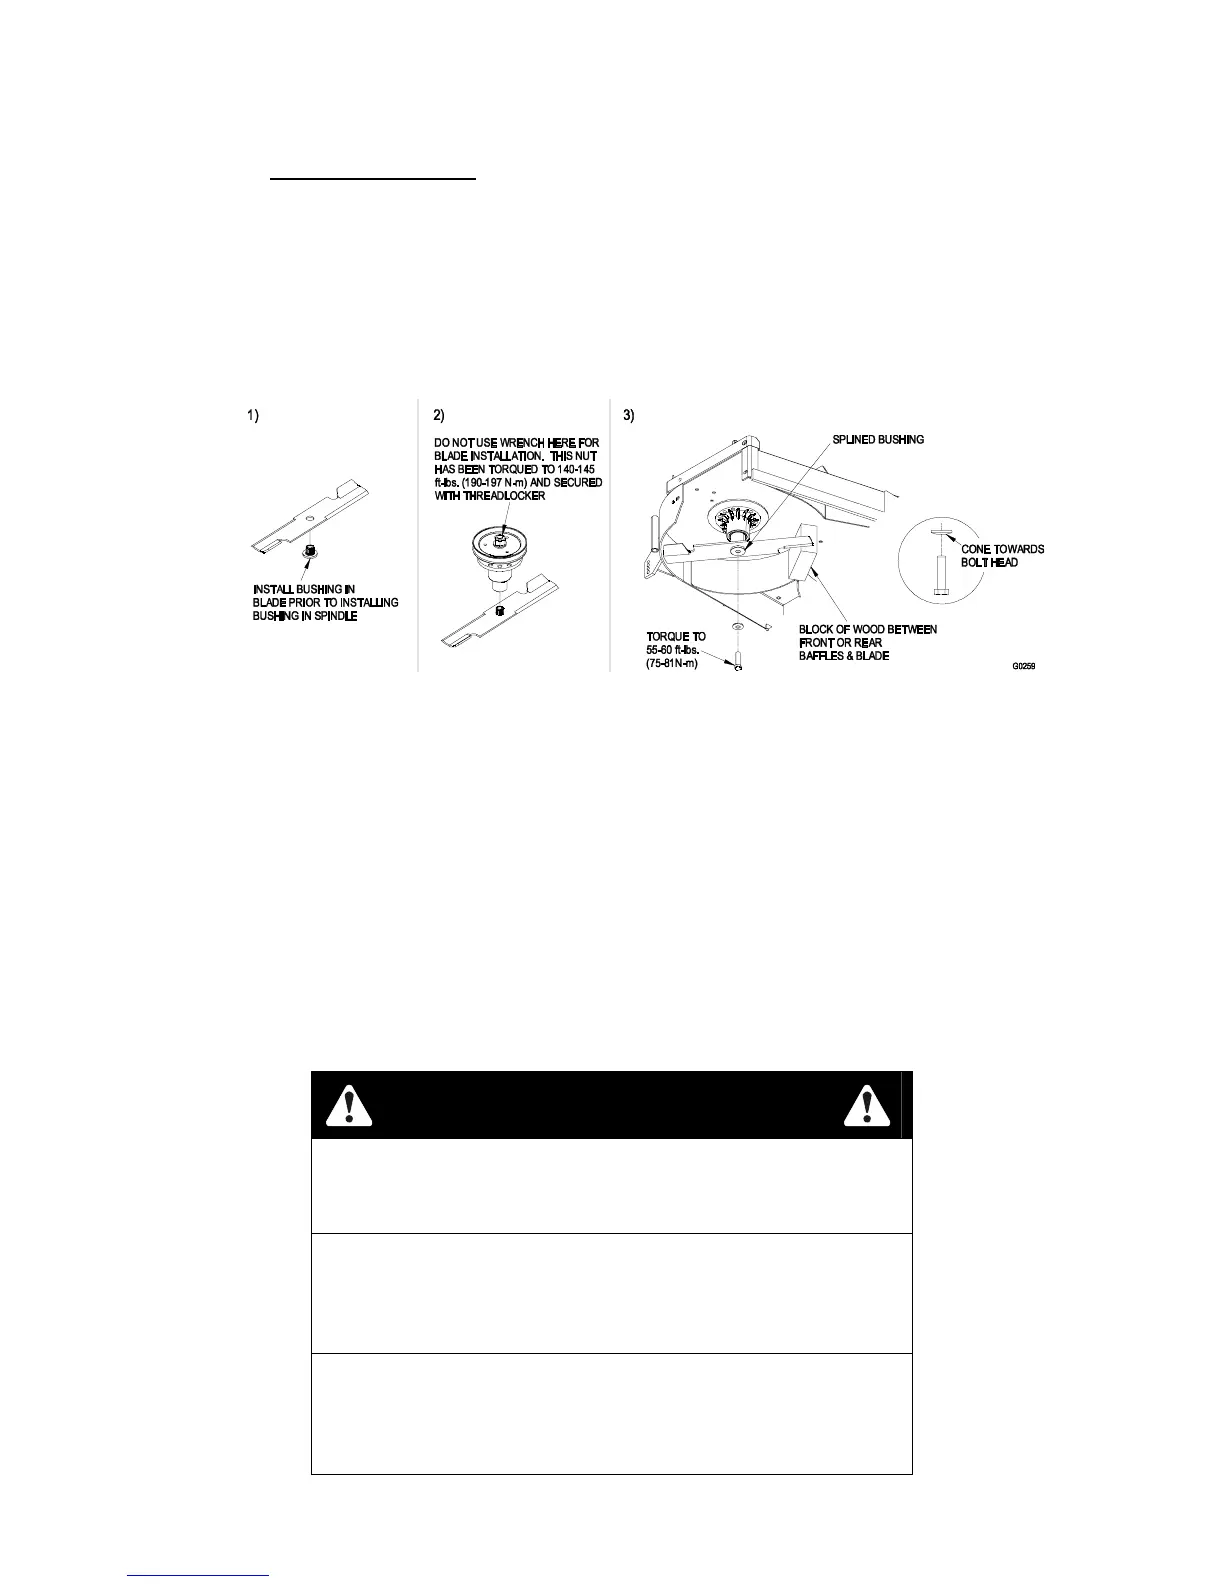
d) Reinstall the blades (if they were removed) in the following order (See Figure 9):
FIGURE 9
d) Install bushing through blade with bushing flange on bottom (grass) side of
blade.
e) Install bushing/blade combo into spindle.
f) Install blade bolt and spring disc washer. Be sure the spring disc washer cone is
installed towards the bolt head. Place a block of wood between front or rear
baffles and the blade then torque the blade bolts to 55-60 ft-lbs. (75-81 N-m).
g) Lower the mower deck to the operation position. See section 4.1.3, Lowering the
Mower Deck to the Operation Position.
IMPORTANT: DO NOT use components other than the original blade, blade bushing,
spring disc washer, and blade bolt supplied with the unit. Failure to use all original
components and assembled as shown will increase the risk of a blade bolt becoming
loose or weak after striking a foreign object.
CAUTION
POTENTIAL HAZARD
♦ Operating a mower deck with loose or weakened blade
bolts can be dangerous.
WHAT CAN HAPPEN
♦ A loose or weakened blade bolt could allow a blade
rotating at a high speed to come out from under the
deck, causing serious injury or property damage.
HOW TO AVOID THE HAZARD
♦ Always reinstall original Exmark blades, blade
bushings, spring disc washers, and blade bolts in the
correct positions as shown.
 Loading...