A B
1
2
3
4
5
6
7
8 10
9 11
FRANÇAIS / FR
Contents
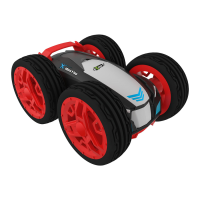
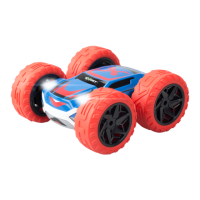
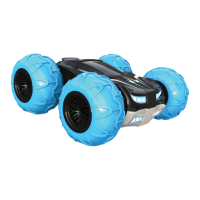
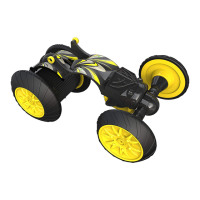
1
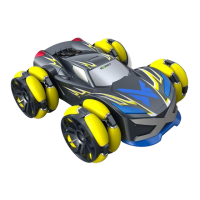
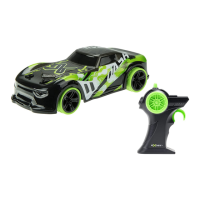
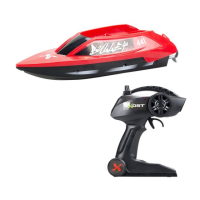
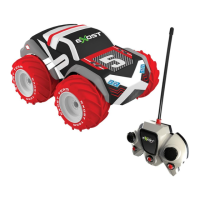
Voiture x1
2
Emetteur x1
3
Bouton on/OFF
4
Commandes de direction
5
OFF : La télécommande s’éteint seule après
quelques minutes hors utilisation.
6
Voyant lumineux
7
Boîtier du câble de recharge
8
Avancer
9
Tourner à 360°
10
Reculer
11
Tourner à droite (inversement pour tourner à gauche)
A
Placement des piles et charge de la
voiture
1 – Placer les piles AA en respectant la polarité.
2 – Eteindre la voiture : la lumière sur la voiture doit
être éteinte.
- Ouvrir le boîtier de la télécommande et connecter le
l à la prise de la voiture. Le témoin de charge clignote
sur la télécommande.
- La charge dure entre 30 et 45min, la lumière s’éteint
lorsque la charge est terminée
B
1 - Pour déplacer le véhicule vers l’avant ou vers l’ar-
rière poussez respectivement la manette des gaz vers
l’avant ou vers l’arrière.
2 - Pour faire tourner le véhicule vers la gauche ou
vers la droite appuyez respectivement sur le levier
de direction vers la gauche ou la droite. Ou encore
placez les 2 leviers en sens inverse pour eectuer une
rotation.
3 - Pour arrêter le véhicule relâcher le levier d’accélé-
ration
ENGLISH / EN
Contents
1
Car x1
2
Transmitter x1
3
ON / OFF button
4
Movement control and steering control
5
OFF: It will turn o automatically (sleep mode) af-
ter a while of not playing.
6
Light indication
7
Charging cable compartment
8
Move forward
9
Turn 360 °
10
Move backward
11
Turn right (reverse to turn left)
A
Battery placement and car charge
1 – Insert AA batteries, respecting the + and – pola-
rities
2 – Switch-o the car, the light of car goes out.
- Connect the charge plug of transmitter into the
charge port of car to launch the charge. Light indica-
tion is ashing on the transmitter.
- Wait about 30 to 45 minutes for a full battery char-
ging, light indication of transmitter goes out.
B
1- To move the car forwards or backwards, push the
throttle lever forwards.
2 - To turn the vehicle left or right, press the steering
lever to the left or right. Or move the 2 levers in oppo-
site directions to turn.
3 - To stop the vehicle, release the throttle lever.
ITALIAN / IT
Contenu
1
Auto x1
2
Transmettitore x1
3
Tasto ON / OFF
4
Comando di movimento di direzione
5
OFF : Il telecomando si spegne dopo pochi minuti
quando non in uso.
6
LED indication
7
Ricarica della cella cavi
8
In avanti
9
Ruotare di 360 °
10
Indietro
11
Girare a destra (indietro per girare a sinistra)
A
Immissione di pile e di carico auto
1 – Posizionate le pile AA rispettando le polarita + e -
2 – Scollegare la auto : la luce deve essere spegnere.
- Aprire la telecommando e collegare il cavo sulla
vettura. L’indicatore di carica lampeggia sul teleco-
mando.
- La carica dura dai 30 ai 45 minuti, la luce si spegne
quando la carica è completata
B
1 - Per fare spostare il veicolo in avanti o all’indietro
spingere rispettivamente la levetta del gas in avanti
o indietro oppure premete il grilletto (secondo il mo-
dello)
2 - Per fare girare il veicolo a sinistra o a destra premete
rispettivamente la leva di direzione verso sinistra o ver-
so destra. Oppure, a seconda del modello, ruotare la
rotellina di direzione, o ancora posizionate le 2 leve in
senso contrario per eettuare una rotazione.
3 - Per arrestare il veicolo rilasciare la leva di accele-
razione
ESPAGÑOL / ES
Contenido
1
Coche x1
2
Emisora x1
3
El botón ON / OFF
4
Control de movimiento y de dirección
5
OFF : El control remoto se apagará sólo después
de unos minutos cuando no esté en uso.
6
luminoso indicación
7
Compartimento de cable de carga
8
Avanzar
9
Girar 360 °
10
Retroceder
11
Girar a la derecha (invertir para girar a la izquierda)
A
Colocar las pilas y cargar el coche
1 – Colocar as pilhas AA, respeitand as polaridades + e –
2 – Desconectar el coche: la luz en el coche debe estar
apagado.
- Abrir la carcasa remota y conectar el cable sobre el
coche. El indicador de carga parpadea en el control
remoto.
- La carga dura entre 30 y 45 minutos, la luz se apaga
cuando la carga está completa
B
1- Para desplazar el vehiculo hacia adelante o hacia
atras, mueva respectivamente la palanquita de ace-
leracion hacia adelante o hacia atras, o presione el
gatillo (segun el modelo).
2 - Para girar a la izquierda o a la derecha, mueva
respectivamente la palanquita de la direccion a la
izquierda o a la derecha. En otros modelos, gire la rue-
decilla de la direccion, o posicione las dos palancas en
sentido contrario para hacer una rotacion.
3 - Para detener el vehiculo, suelte la palanquita de
aceleracion.
PORTUGUÊS / PT
Conteúdo
1
Carro x1
2
Comando x1
3
Botão ON / OFF
4
Comando de movimento e direcção
5
OFF : O controle remoto irá desligar-se só depois
de alguns minutos, quando não em uso.
6
Indicador luminoso
7
Compartimento de carga
8
Frente
9
Vire 360 °
10
trás
11
Vire à direita (vice-versa para virar à esquerda)
A
Insira as pilhas e carregar o carro
1 – Colocar as pilhas AA, respeitand as polaridades +
e –
2 – Desligue o carro: a luz deve estar desligado.
- Abrir o controle remoto e ligar o cabo para o carro. O
indicador de carga pisca no controle remoto.
- O carregamento demora 30 a 45 minutos, a luz se
apaga quando o carregamento estiver concluído
B
1- Para andar com o carro para a frente ou para tras,
empurre
alavanca de aceleracao para a frente ou puxe-a para
tras, respectivamente.
2 - Para virar o carro para a esquerda ou direita, em-
purre a alavanca de direccao para a esquerda ou direi-
ta. Rode a roda de direccao ou coloque as 2 alavancas
no sentido inverso para efectuar a rotacao.
3 - Para parar o carro, solte a alavanca de aceleracao.
NEDERLANDS / NL
Inhoud
1
Wagen x1
2
Zender x1
3
ON / OFF-knop
4
Bewegingsbediening
5
OFF : Het zal automatisch uitgeschakeld (slaaps-
tand) na een tijdje niet speelt schakelen.
6
Leuchtanzeige
7
Oplaadkabel
8
Vooruit
9
Draai 360 °
10
Achteruit
11
Biegen Sie rechts ab (umgekehrt links zum Drehen)
A
Legen Sie die Batterien und das Auto
auaden
1 – Die Batterien AA unter Beachtung der Polaritat (+
und –) einsetzen.
2 – Schakel de auto: het licht op de auto moet uit zijn.
- Open de behuizing van de afstandsbediening en
sluit de draad aan het nemen van de auto. De laadin-
dicator knippert op de afstandsbediening.
- Het opladen duurt 30 tot 45 minuten, het licht gaat
uit wanneer het opladen is voltooid
B
1 - Om de auto naar voor of naar achter te bewegen,
duwt u
de gashendel respectievelijk naar voor
2 - Om de auto naar links of naar rechts te laten
draaien, duwt u de richtingshendel respectieve-
lijk naar links of rechts. Om de twee hendels in
omgekeerde richting te plaatsen om een rotatie uit
te voeren.
3 - Om het voertuig stop te zetten, laat u de versnel-
lingshendel los.
DEUTSCH / DE
Inhalt
1
Wagen x1
2
Sender x1
3
ON / OFF-Taste
4
Bewegungssteuerung und Steuerung
5
Es schaltet sich automatisch aus (Sleep-Modus)
schaltet sich nicht nach einer Weile spielen.
6
Verklikkerlicht
7
Ladekabel
8
Vorwärts
9
Turn 360 °
10
Rückwärts
11
Biegen Sie rechts ab (umgekehrt links zum Drehen)
A
Batterieplatzierung und Fahrzeugla-
dung
1 – Plaats de AA-batterijen en let hierbij op de pola-
riteiten + en -
2 – Trennen Sie das Auto
- Önen Sie das Gehäuse der Fernbedienung und
verbinden Sie das Kabel, das Auto zu nehmen. Die
Ladeanzeige blinkt auf der Fernbedienung.
- Der Ladevorgang dauert 30 bis 45 Minuten, das
Licht erlischt, wenn der Ladevorgang abgeschlossen
B
1 - Um das Fahrzeug nach Vorn oder Hinten zu bewe-
gen, ist der Beschleunigungshebel resp. nach Vorn
oder Hinten zu bewegen.
2 - Um das Fahrzeug nach Links oder Rechts zu len-
ken, resp. den Richtungshebel nach Links oder Rechts
bewegen. Oder die beiden Richtungshebel in entge-
gengesetzte Richtungen legen, um das Fahrzeug zu
drehen.
3 - Zum Stoppen des Fahrzeugs den Beschleunigung-
shebel loslassen.
RUSSIAN / RU
Содержимое
1
Автомобиль x1
2
Пульт дистанционного управления х1
3
Кнопка ON / OFF
4
Управление движением pулевой привод
5
OFF : Он будет автоматически выключается
(спящий режим)
6
свет индикатор
7
Зарядка кабельного отсека
8
Перемотка вперед
9
повернуть на 360 °
10
назад
11
Поворот направо
(наоборот для поворота налево)
A
Размещение батареи и нагрузки
автомобиля
1 – Установите батарейки AA в соответствии с
полярностью + и -
2 – Отсоедините автомобиль
- Откройте корпус пульта ДУ и подключите кабель,
чтобы взять машину. Индикатор зарядки мигает на
пульте дистанционного управления.
- Зарядка занимает от 30 до 45 минут, свет
выключается, когда зарядка завершена
B
1 - Для того чтобы автомобиль двигался вперед
или назад, следует перемещать рычаг газа
соответственно вперед или назад.
2 - Для того чтобы повернуть автомобиль налево
или направо, следует перемещать рычаг рулевого
управления соответственно влево или вправо.
или перемещать два рычага в противоположном
направлении, чтобы повернуть.
3 - Чтобы остановить автомобиль, отпустите рычаг
газа
Kundenservice-Hotline 0800-3967800 kundensupport@exost.de
CZECH REPUBLIC / CZ
Obsah
1
auto x1
2
vysílač x1
3
Tlačítko ON/OFF (ZAP/VYP)
4
řízení pohybu a ovládací prvky řízení
5
VYPNUTO : po chvíli nehraje To se automaticky
vypne (režim spánku).
6
kontrolka
7
Nabíjecí kabel přihrádka
8
záloha
9
Otočit o 360 °
10
ustoupit
11
Odbočit vpravo (reverzní doleva otočit)
A
umístění baterie a nabíječka do auta
1 - Vložte baterie AA, s ohledem na polarita + a -
2 - Vypínací vozu, světlo auta zhasne.
- Zapojte nabíjecí konektor vysílače do nabíjecího
portu automobilu zahájit náboj. Světelná signalizace
bliká na vysílači.
- Počkejte asi 30 až 45 minut pro plné nabití baterie,
světelné signalizace vysílače zhasne
B
1 Chcete-li přesunout auto dopředu nebo dozadu,
stiskněte páčku škrticí klapky dopředu.
2 - Chcete-li vozidlo vlevo nebo vpravo, stiskněte
řídící páku doleva nebo doprava. Nebo přesunout 2
páčky v opačných směrech se obrátit.
3 - Chcete-li zastavit vozidlo, uvolněte páčku plynu.
HUNGARIAN / HU
Tartalom
1
autó x1
2
adó x1
3
ON/OFF gomb
4
A mozgás ellenőrzése és kormánykerék
5
KI : Ez automatikusan kikapcsol (alvó üzemmód)
egy idő után nem játszik.
6
jelzőlámpa
7
Töltőkábel rekesz
8
előleg
9
Turn 360 °
10
visszavonulás
11
Jobbra (fordított balra)
A
helyét az akkumulátor és autós töltő
1 - Insert AA elem tekintetében a polaritás + és -
2 - Kikapcsolási az autó, a fény a kocsi megy ki.
- Csatlakoztassa a töltés dugót adót a töltés port az
autó, hogy indítsa el a díjat. Világos jelzés villog az
adó.
- Várjon 30-45 percet a teljes akkumulátor töltés, kön-
nyű jelzése adó kialszik
B
1- mozgatni az autót előre vagy hátra tolja a gázkart
előre.
2 - be szeretné kapcsolni a jármű balra vagy jobbra,
nyomja meg a kormánykerék kart balra vagy jobbra.
Vagy mozgassa a 2 kar ellenkező irányba fordulni.
3 - a jármű megállítására, engedje el a gázkart.
SWEDISH / SU
Innehåll
1
Bil x 1
2
Sändare x 1
3
Knappen ON/OFF
4
Rörelsekontroll och styrkontroll
5
AV: Bilen stängs av automatiskt (viloläge) när den
inte används på ett tag.
6
ljusindikator
7
Fack för laddningskabeln
8
Kör framåt
9
Snurra 360 °
10
Kör bakåt
11
Sväng åt höger (backa för att svänga åt vänster)
A
Batteriplacering och billaddning
1 – Sätt i AA-batterier och respektera polariteterna för
+ and –
2 – Stäng av bilen och bilens lampa slocknar.
- Anslut laddningskontakten i sändaren till bilens
laddningsport för att starta laddningen. Ljusindika-
torn blinkar på sändaren.
- Vänta ca 30 till 45 minuter för en fullständig batte-
riladdning och ljusindikatorn på sändaren slocknar
B
1- För att köra bilen framåt eller bakåt, tryck gasregla-
get framåt eller bakåt.
2 - För att köra åt vänster eller höger, tryck styrspaken
åt vänster eller höger. Eller tryck de 2 spakarna i mot-
satt riktning för att svänga.
3 - För att stoppa fordonet, släpp gasreglaget.
NORWEGIAN / NO
Innhold
1
Bil x 1
2
Sender x 1
3
PÅ/AV-knapp
4
Bevegelseskontroll og styringskontroll
5
AV: Den vil skrus automatisk av (dvalemodus) et-
ter en periode med inaktivitet.
6
lysindikator
7
Rom til ladekabel
8
Kjør forover
9
Snu 360°
10
Kjør bakover
11
Snu til høyre (motsatt for å snu til venstre)
A
Batteriplassering og opplading av bil
1 - Sett inn AA-batteriene, med polene plassert riktig
2 - Skru av bilen (billysene vil skrus av).
- Koble senderens ladekabel i ladeporten på lekebilen
for å starte oppladingen. Lysindikatoren vil blinke på
senderen.
- Lad i ca. 30 til 45 minutter for å fullade batteriet (ly-
sindikatoren på senderen slukkes)
B
1 - For å bevege bilen forover eller bakover: Dytt
gasspaken forover.
2 - For å bevege bilen til venstre eller høyre, dytt
styrespaken til venstre eller høyre. Eller beveg de 2
spakene i motsatte retninger for å snu.
3 - Slipp gasspaken for å stoppe bilen.
DANISH / DN
Indhold
1
Bil x 1
2
Sender x 1
3
ON/OFF-knap
4
Bevægelseskontrol og styringskontrol
5
SLUK: Den slukker automatisk (dvaletilstand), når
den ikke anvendes i et stykke tid.
6
lysindikation
7
Rum til opladerkabel
8
Kør fremad
9
Drej 360 °
10
Kør bagud
11
Drej til højre (omvendt for at dreje til venstre)
A
Batterianbringelse og bilopladning
1 - Indsæt AA-batterier, og vær opmærksom på + og
- poler
2. – Sluk bilen, og lysene på bilen går ud.
- Tilslut senderens ladestik i bilens ladeport for at
starte opladning. Lysindikation blinker på senderen.
- Vent omkring 30 til 45 minutter for en fuld batterio-
pladning; senderens lysindikation går ud
B
1- For at få bilen til at køre fremad eller bagud skubbes
gashåndtaget fremad.
2 - For at dreje køretøjet til venstre eller højre trykkes
på styrehåndtaget til venstre eller højre. Eller yt de to
håndtag i hver sin retning for at dreje.
3 - Slip gashåndtaget for at standse køretøjet.
FINNISH / FI
Sisältö
1
Auto x1
2
Lähetin x1
3
Virtakytkin
4
Liikkeiden hallinta ja ohjaus
5
OFF: Laite sammuu automaattisesti (lepotila), kun
sitä ei käytetä hetkeen.
6
merkkivalo
7
Latauskaapelin lokero
8
Aja eteenpäin
9
Käänny 360°
10
Aja taaksepäin
11
Käänny oikealle (käänny vasemmalle käänteisesti)
A
Paristojen asettaminen ja auton la-
taaminen
1 – Aseta AA-paristot napaisuudet oikein päin
2 – Sammuta auto, jolloin auton valo sammuu.
– Aloita lataaminen kytkemällä lähettimen lataus-
pistoke auton latausporttiin. Lähettimen merkkivalo
vilkkuu.
– Akun lataaminen täyteen kestää noin 30–45 mi-
nuuttia, minkä jälkeen lähettimen merkkivalo sam-
muu
B
1 – Liikuta autoa eteen- tai taaksepäin työntämällä
kaasuvipua.
2 – Käännä ajoneuvoa vasemmalle tai oikealle paina-
malla ohjausvipua vasemmalle tai oikealle. Tai käännä
liikuttamalla kahta vipua vastakkaisiin suuntiin.
3 – Pysäytä ajoneuvo vapauttamalla kaasuvipu.
Ce produit
est conforme
à la norme
2009/48/CE
Avertissement concernant les piles :
- Ne pas recharger les piles non-rechargeables.
- Les piles rechargeables doivent être retirées avant rechargement. (émetteur
uniquement)
- Les piles rechargeables doivent être rechargées sous la surveillance d’un adulte.
- Ne pas mélanger diérents types de piles ou des piles neuves avec des
piles usées. (émetteur uniquement)
- Utilisez uniquement des piles du même type que celui recommandé ou d’un
type équivalent.
- Insérez les piles en respectant la polarité. (+ et –)
- Les piles usagées doivent être retirées du produit (émetteur uniquement)
- Ne pas mettre en court-circuit les bornes d’alimentation
- Ne pas mélanger des piles neuves avec des piles usées. (émetteur uniquement)
- Ne pas mélanger Alcalines, piles standards (carbon-zinc) ou piles rechar-
geables (nickel-cadmium) (émetteur uniquement)
Précision sur la technologie Infrarouge :
La voiture fonctionne en infrarouge, en extérieur les rayons UV peuvent in-
terférer sur la connexion entre l’émetteur et le récepteur. Une utilisation en
intérieur est fortement recommandée. Bien orienter la télécommande vers
la voiture pour une meilleure réactivité des commandes. Portée maximum
conseillée 8m.
Piles requises pour l’émetteur:
Alimentation
DC 6V / 0,5W ; 4x 1,5 V « AA » / LR6 / AM3
non incluses
+
+
+
+
Piles requises pour la voiture :
Alimentation
Li-ion battery 3.7V / 5W / 90mAh incluse
FRANÇAIS / FR
The symbol showing a crossed-out rubbish bin indicates
that ordinary batteries, rechargeable batteries, button bat-
teries, battery packs etc. should not be disposed of with
household waste. Batteries are dangerous for health and
the environment. Help to protect the environment against
health risks. Ask your child to dispose of batteries cleanly
by taking them to your local collection points. In this way,
batteries can be recycled safely.
Accuracy on infrared technology:
Car may not work properly under sunlight. It is recommended to play
indoor only. Direct the remote control towards the car for a better res-
ponsiveness of the controls. Recommended maximum range 8m.
Batteries required for the transmitter:
Power supply
DC 6V / 0,5W ; 4x 1,5 V AA / LR6 / AM3
not included
+
+
+
+
Batteries required for the car:
Power supply
Li-ion battery 3.7V / 5W / 90mAh included
ENGLISH / EN
SILVERLIT SAS
80, rue Barthelemy Danjou
92100 Boulogne-Billancourt
France
FR
GB
IT
ES
PT
NL
DE
RU
CZ
HU
SU
NO
DN
FI
EI-7505a
Fabricant
Silverlit Toys Mfy Ltd.
Rm 1102, 98 Granville Road,
Kowloon, Hong Kong
Importeur :
SILVERLIT SAS
80, rue Barthelemy Danjou
92100 Boulogne-Billancourt France
Le symbole d’une poubelle barrée indique que les piles simples,
rechargeables, bouton, blocs de piles, etc. ne doivent pas être jetés
à la poubelle ménagère. Les piles sont dangereuses pour la santé et
l’environnement. Aidez à
protéger l’environnement contre les risques sanitaires. Demandez à
votre enfant de mettre au rebut les piles proprement en les déposant
aux points de collecte de la commune. Les piles sont, de cette sorte,
recyclées sans risque.
Déchets électriques et électroniques (DEEE):
Lorsque cet appareil est en n de vie, veuillez retirer toutes les piles et les jeter
séparément. Rapportez les appareils électriques à un centre de collecte des ap-
pareils électroniques et électroménagers. Les autres composants peuvent être
jetés avec les ordures ménagères.
Soin et entretien :
- Retirez toujours les piles du jouet lorsqu’il reste longtemps hors service.
- Essuyez le jouet délicatement avec un chion propre.
- Gardez le jouet à l’écart de toute source directe de chaleur.
- Ne pas immerger le jouet dans l’eau ceci pouvant endommager les composants électroniques.
Conseil pratique :
Pour une performance optimale, il est recommandé d’utiliser des piles alcalines neuves
pour alimenter la voiture.
Précautions de sécurité :
- Parents : veuillez lire les instructions d’emploi avec vos enfants avant la première utilisation.
- Arrêter le véhicule avec la radiocommande avant de le prendre en main
- Gardez les mains, les cheveux et vêtements éloignés des parties mobiles lorsque le
jouet est en fonction.
- Ne pas utiliser le véhicule radiocommandé dans la rue. Ne pas heurter les personnes, les
animaux et le mobilier de maison.
- Avertissement : Toute transformation ou modication eectuée sur ce produit, non ex-
pressément approuvée par la partie responsable de la conformité, pourrait entraîner l’an-
nulation de l’autorisation d’utilisation concédée à l’utilisateur.
- Les ls ne doivent pas être insérés dans des prises électriques
- Ce jouet (voiture) contient une pile non remplaçable
L’utilisation du produit peut être perturbée par des interférences électromagné-
tiques. Si cela ce produit, éteindre et rallumer l’appareil ensuivant les instruc-
tions du manuel utilisateur. Dans le cas où les fonctions ne se réinitialiseraient
pas, changez de lieu.
CIRCUIT DE SÉCURITÉ :
Pendant l’utilisation, la puissance contenue dans le circuit électrique peut être très
élevée (par exemple lors d’une rotation à 360°). Dans un tel cas, un circuit de sécurité
arrête le véhicule environ 1 minute. Pendant cette période, la voiture ne répondra
pas aux signaux provenant de l’émetteur. Ce n’est pas un défaut mais une mesure
de sécurité pour protéger les circuits électroniques internes. Après cette période, la
voiture reprendra son fonctionnement normal.
Waste electrical and electronic equipment (WEEE):
When this device reaches the end of its life, please remove all batte-
ries and dispose of them separately. Take electrical devices to a col-
lection centre for electronic equipment and household appliances.
Other components can be disposed of with household waste.
Safety precautions:
- Parents: please read the instructions with your children before using the product
for the rst time.
- Stop the vehicle with the remote control before picking it up.
- Keep hands, hair and clothing away from moving parts when the toy is operating.
- Do not use the vehicle with the radio control in the street. Avoid collisions with
people, animals and furniture.
- Warning: any change or modication made to this product that is not expressly ap-
proved in the relevant section of the declaration of conformity may terminate the
usage authorisation granted to the user.
- This toy (car) contains battery that is non-replaceable
Battery warning:
- Do not recharge non-rechargeable batteries.
- Rechargeable batteries must be removed before recharging. (Transmitter only)
- Rechargeable batteries should be charged under adult supervision.
- Do not mix dierent types of batteries or new batteries with old batteries.
(Transmitter only)
- Only use batteries of the recommended type or an equivalent type.
- Batteries are to be inserted with correct polarity. (+ and –)
- Exhausted batteries are to be removed from the toy. (Transmitter only)
- Do not short-circuit the power terminals.
- Do not mix old and new batteries. (Transmitter only)
- Do not mix alkaline batteries, standard batteries (carbon-zinc) and rechargeable
batteries (nickel-cadmium). (Transmitter only)
Care and maintenance:
- Always remove the batteries from the toy if it is not used for a long time.
- Wipe the toy gently with a clean cloth.
- Keep the toy away from direct sources of heat.
- Do not immerse the toy in water, as this could damage electronic components.
- Replace batteries when they become less powerful.
SAFETY CIRCUIT :
During use, the internal power in the electric circuit can get quite high (for example
during a 360 spin). In such a case safety circuit will shut down the vehicle for approxi-
matively 1 minute. During this period the car will not respond to signals from the
transmitter. This is not a defect but a safety measure to protect the electronic circuits.
After this period, the car will resume normal operation.
The use of the product may be disrupted by electromagnetic interference. If this
is the case, switch the device o and on again following the instructions in the
user manual. If the functions are not reset, move to another location.
Conservez le mode d’emploi et l’emballage car ils
contiennent des informations importantes.
Catégorie d’âge : 5+
ATTENTION
Instruction sheet and packaging must be
retained since it contains important information.
Manufacturer:
Silverlit Toys Mfy Ltd.
Rm 1102, 98 Granville Road,
Kowloon, Hong Kong
Importer:
SILVERLIT SAS
80, rue Barthelemy Danjou
92100 Boulogne-Billancourt
France
This product
complies with
the 2009/48/
EC standard
WARNING:
CHOKING HAZARD - Small Parts.
Not for Children Under 3 years.
Age category: 5+
#TE143_IM_r05.indd 1#TE143_IM_r05.indd 1 14/12/2020 9:52 AM14/12/2020 9:52 AM