15
ASCOM
5
6. On the ASCOM-Standards.org website, using the menu on the upper left corner of the page,
navigate to the Downloads page.
7. Using the menu on the upper left corner of the page, select Telescope/Mount Driver Downloads
8. Scroll down the Telescope/Mount Driver page and locate the Explore Scientific PMC-Eight™
Section. Press the Visit Site button to go to the Explore Scientific PMC-Eight™ webpage.
9. On the PMC-Eight™ ASCOM Driver webpage, hit the ASCOM driver download link and download
the setup program.
10. Run the PMC-Eight™ ASCOM Driver setup program, and follow the directions in the program.
11. After installing the PMC-Eight™ ASCOM Driver, restart your computer system.
12. Connect your mount’s motors to the PMC-Eight™ System and power up the PMC-Eight™
controller.
NOTE: If you desire to test your PMC-Eight™ System using the ASCOM driver, then
perform steps 13-30.
13. After your system restarts, bring up your network settings and find the PMC-Eight™ SSID, i.e.,
“PMC-EIGHT-XX” where XX is a two character alpha-numeric such as “C5”
NOTE: Your device may ask for a network password when connecting to the PMC-Eight SSID. The
default password is “PMC-Eight”.
14. Connect to the PMC-Eight™ network. Note that the connection will show LIMITED since it is a
local AD HOC network connection to the PMC-Eight™ controller.
15. Locate the icon on your desktop or in your programs list for the ASCOM Diagnostics and
start the program.
16. On the diagnostic programs’ top menu find “Choose Device” and “Choose and Connect to Device”.
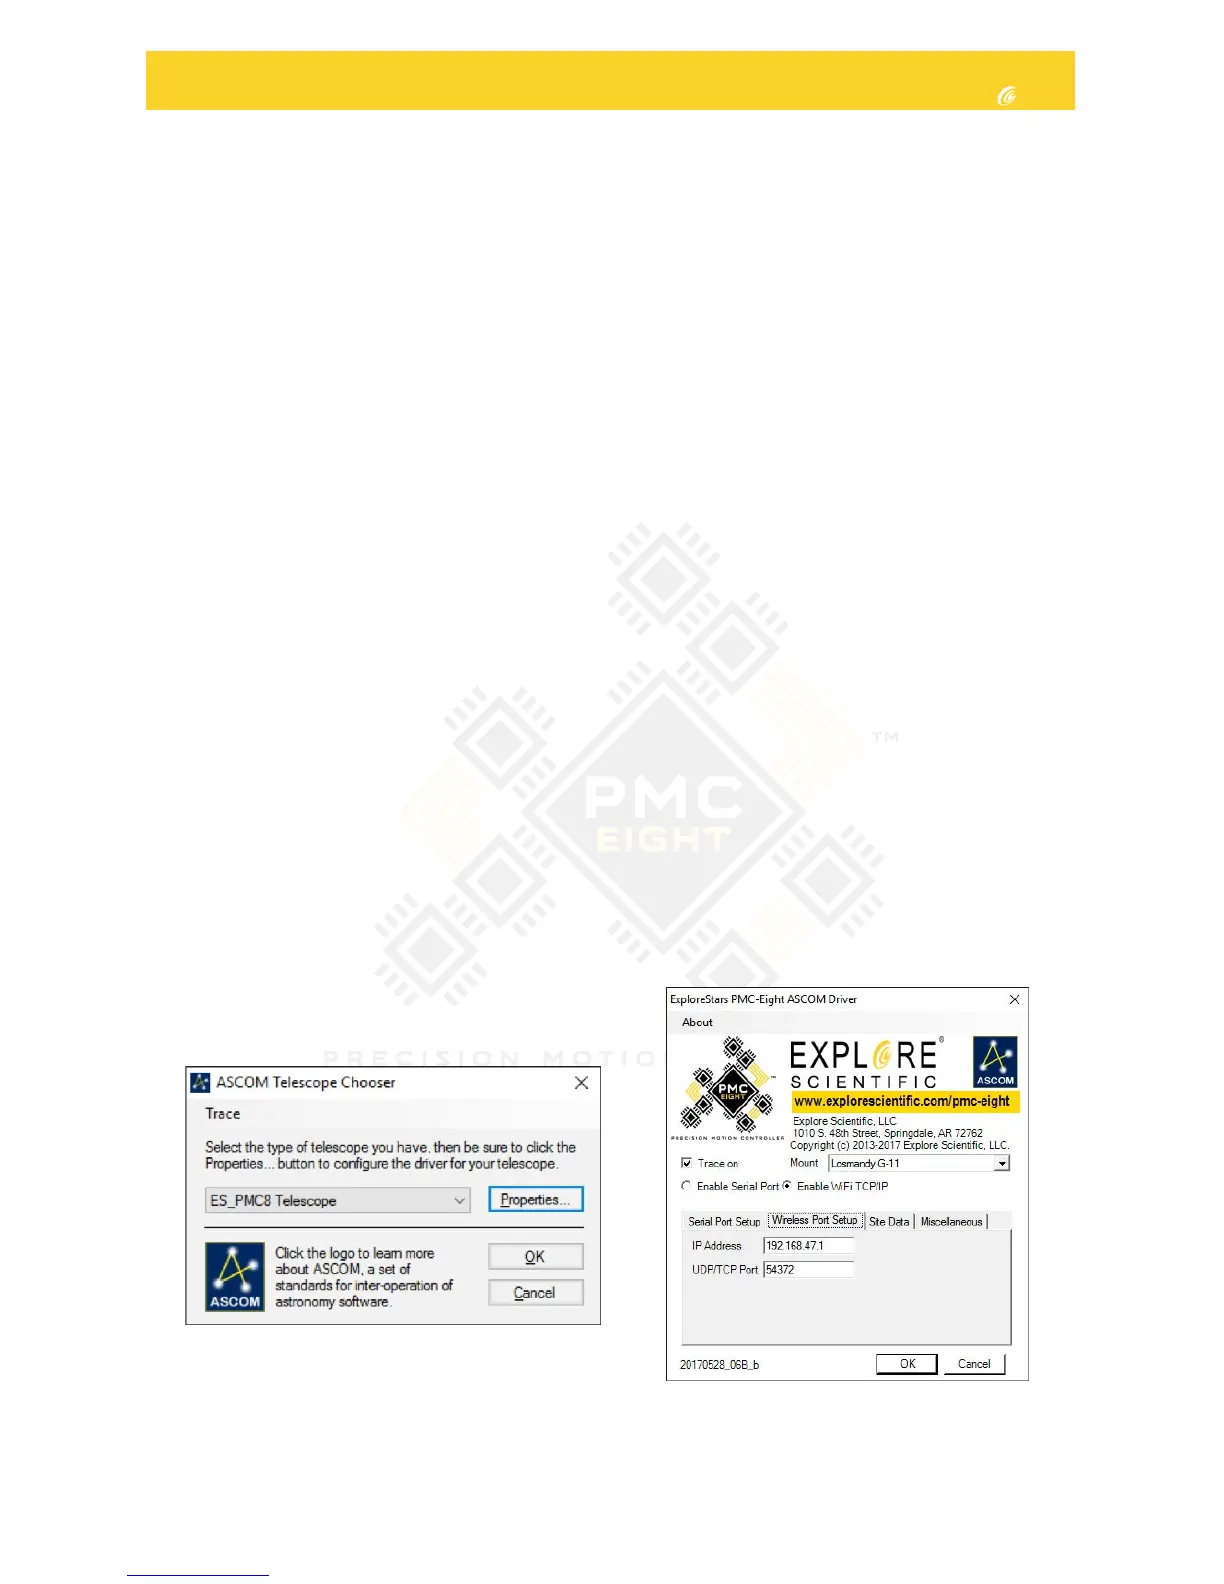
17. This will bring up the programs window. Find and push the “Choose” button.
Figure 1. ASCOM Telescope Chooser window.
Figure 2. Explore Scientific PMC-Eight™ ASCOM
configuration window.
19. Push the “Properties” button and display
the PMC-Eight™ ASCOM Driver
Configuration window. (Figure 2.)
18. The ASCOM Chooser window will display.
Find and select “ES_PMC8.Telescope” in
the drop-down list. (Figure 1.)