Extron Headquarters
+800.633.9876 Inside USA/Canada Only
Extron USA - West Extron USA - East
+1.714.491.1500 +1.919.850.1000
+1.714.491.1517 FAX +1.919.850.1001 FAX
Extron Europe
+800.3987.6673
Inside Europe Only
+31.33.453.4040
+31.33.453.4050 FAX
Extron Asia
+65.6383.4400
+65.6383.4664 FAX
Extron Japan
+81.3.3511.7655
+81.3.3511.7656 FAX
Extron China
+86.21.3760.1568
+86.21.3760.1566 FAX
Extron Middle East
+971.4.299.1800
+971.4.299.1880 FAX
Extron Australia
+61.8.8113.6800
+61.8.8351.2511 FAX
Extron India
1800.3070.3777
(Inside India Only)
+91.80.3055.3777
+91.80.3055.3737 FAX
© 2017 Extron Electronics All rights reserved. All trademarks mentioned are the property of their respective owners. www.extron.com
68-2166-50 Rev. D
06 17
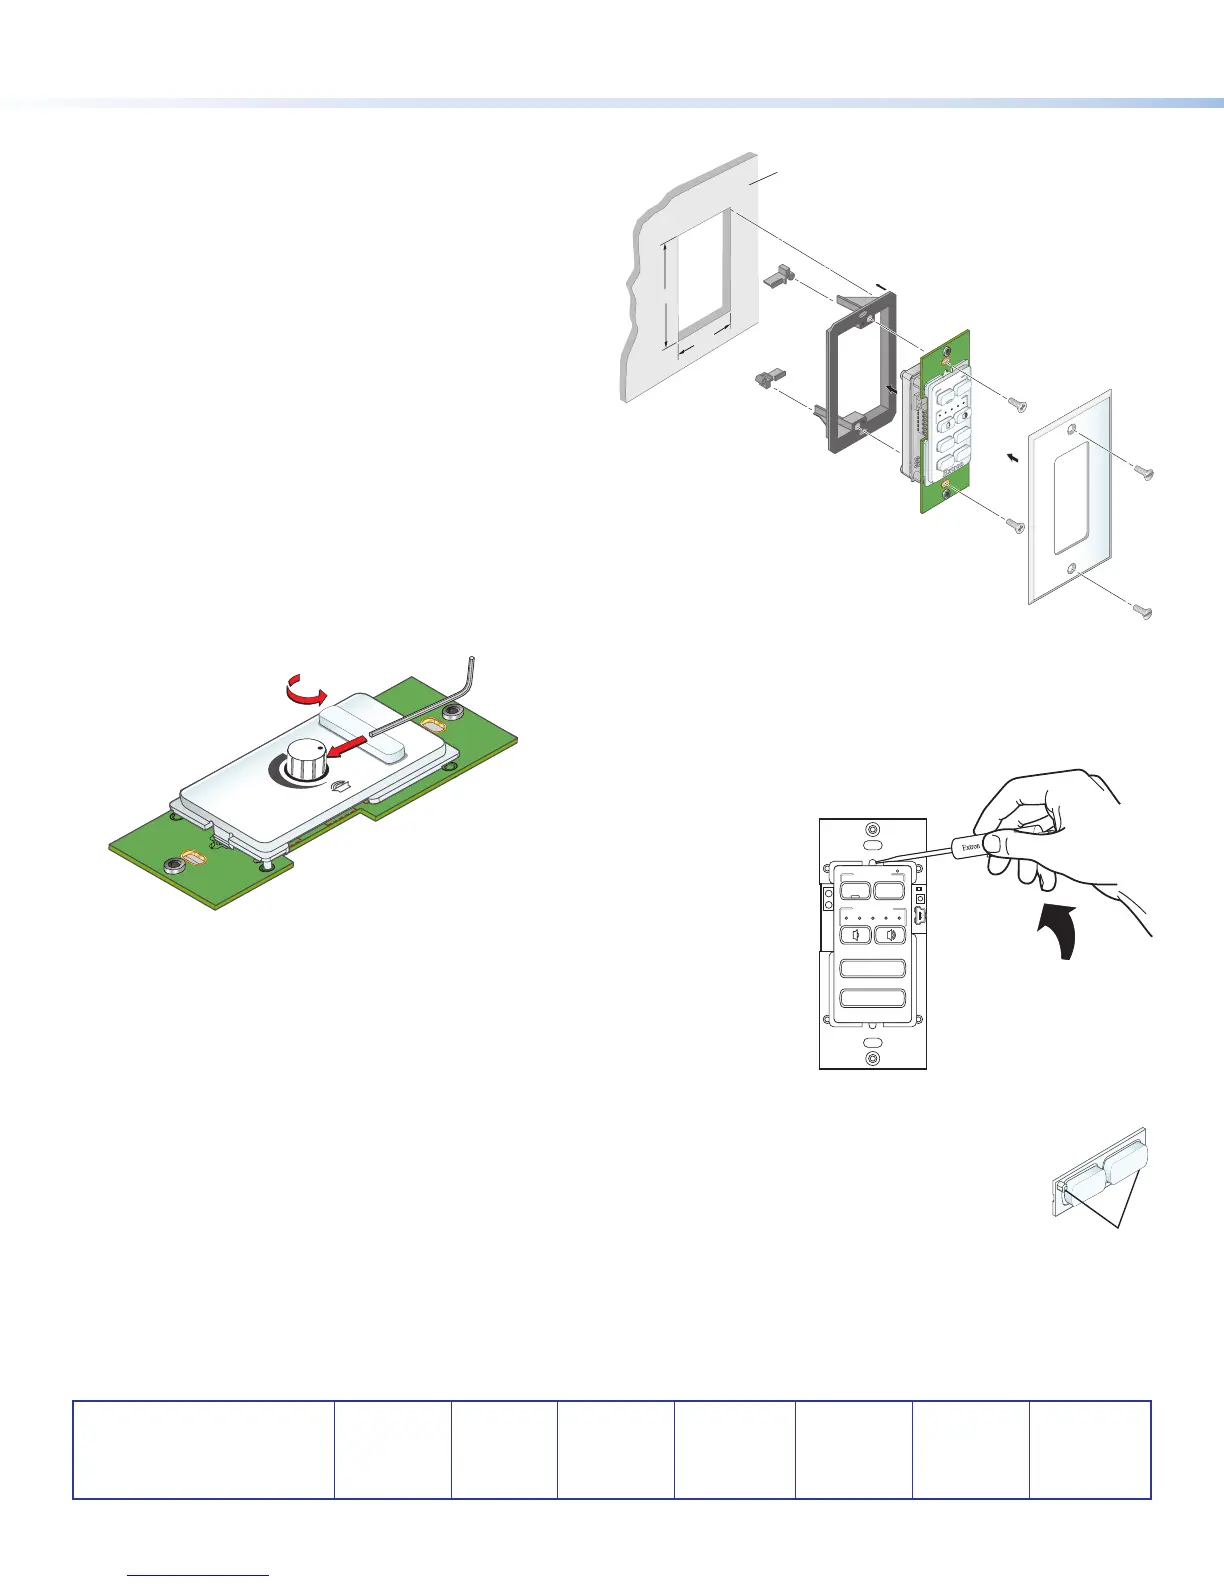
7. Mount the MLC to an electrical box or a mounting bracket.
• Secure the MLC unit into a mounted electrical box
using the provided screws in the oval slots at the
top and bottom of the unit (follow the instructions
provided with the electrical box), or
• Mount the MLC to a mounting bracket (see the
illustration at right). For the detailed procedure,
see the MLC 60 Series User Guide, available at
www.extron.com.
Removing the Volume Control Knob
1. Rotate the knob until the dot on the knob is aligned with
the bottom edge of the volume icon on the faceplate. The
notches in the edge of the knob and the notch in the edge
of the hole in the faceplate should be aligned, enabling
you to access the hex screw that holds the knob in place.
2. Insert the small Allen wrench (provided) into the opening.
3. Rotate the Allen wrench one-half turn counterclockwise to
loosen the hex screw, then lift off the knob.
MUTE
VOLUME
Turn Knob to
Expose Screw
to Loosen Screw
Removing the Faceplate
1. Insert the at end of a small screwdriver into each of the holes at the top and
bottom of the faceplate.
2. Press each tab inward until the faceplate is released (see the illustration at right).
Replacing the Buttons
1. From the front of the faceplate, press the button membrane to be replaced backward through its slots in the
faceplate until it comes free. If replacing the faceplate, repeat this step until all the buttons are removed.
2. On the back of the faceplate, set the new button membrane at the desired location, with the two pegs in the
upper-left and lower-right corners of the membrane (shown at right) in the holes at opposite corners of the row.
Press the pegs and buttons of the membrane into the faceplate.
Wall
2.16"
3.88"
Wall Mounting
Bracket
VOLUME
DISPLAY
OFF
ON
MUTE
LAPTOP
VIDEO
PC
Wallplate
MLC 62 RS D
VOLUME
Extron
DISPLAY
VIDEO
PC
ON
OFF
MUTE
LAPTOP
4
 Loading...

