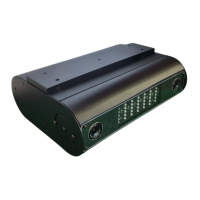
The WIZ-I Launch Monitor is a dual-cam golf launch monitor designed and developed by CPGA professionals in Canada, with engineering and assembly in South Korea. It utilizes a dual gigabit connection to enhance sensor connectivity and is equipped with two high-speed cameras, each recording at 500 frames per second (FPS), for a total of 1000 FPS. Fairway Sims, a development company founded in 2021, is responsible for the WIZ-I Launch Monitor. Initially launched exclusively for WizGolf, an indoor golf facility in Okotoks, AB, Canada, in 2021, its success there served as a foundation for improvements and preparation for a public release.
Key Features and Specifications:
- Dual-Cam System: Employs two high-speed cameras for precise ball and club data capture.
- High Frame Rate: Each camera records at 500 FPS, combining for a total of 1000 FPS, ensuring detailed analysis of golf shots.
- Dual Gigabit Connection: Enhances sensor connectivity for reliable data transmission.
- Designed by Professionals: Developed by CPGA professionals, indicating a focus on accuracy and performance relevant to serious golfers.
- Canadian Design, Korean Engineering: Combines Canadian design expertise with South Korean engineering and assembly quality.
Included Components (What's in the Box):
The WIZ-I Launch Monitor package includes everything necessary for installation and operation:
- WIZ-I Launch Monitor (with power cord included)
- Dual Port LAN Card
- Calibration Mat
- 1 x Serial Cable
- 2 x Ethernet Cables
- Installation Manual & Software (provided on a USB flash drive)
Installation Requirements and Setup:
The WIZ-I Launch Monitor is designed for ceiling installation, requiring specific placement for optimal performance:
- Placement: The monitor should be installed 4 feet back from the teeing area and at a height of 8.5 to 10.5 feet from the ground.
- Centering: It is crucial to install the WIZ-I centered to the tee spot. Users are advised to mark their tee spot on the turf with a marker or tape, as the tee area cannot be moved once the monitor is calibrated.
Hardware Installation Steps:
- Install the Bracket on the Ceiling: Secure the provided bracket to the ceiling at the specified distance and height from the tee.
- Attach WIZ-I to Bracket: Insert the WIZ-I unit into the installed bracket.
- Secure WIZ-I: Insert and tighten the bracket screws (A6) on both sides to firmly attach the monitor.
- Connect Cables to WIZ-I:
- Connect both Ethernet Cables to the CAM 1 and CAM 2 ports on the WIZ-I.
- Connect the Power cord to the WIZ-I and then to an electrical outlet.
- Connect the Serial Cable to the WIZ-I. This cable also controls the automatic power on/off function.
- The WIZ-I's indicator light will show its status:
- Red: Not Ready
- Green: Ready
- Blue: Shot
- LAN Card Installation (into PC):
- Lay the PC on its side with the case screws facing up.
- Unscrew and slide open the PC cover.
- Remove the metal cover from the desired PCI slot by pushing from outside to in.
- Locate an available PCI Slot.
- Insert the LAN Card with its ports facing outside until you hear a 'click'.
- Close the PC cover and replace the screws.
- Connect WIZ-I to PC:
- Connect both LAN Cables from the WIZ-I (CAM 1 and CAM 2 ports) to the newly installed LAN Card in the PC.
- Connect the USB end of the Serial Cable from the WIZ-I to an open USB slot on the PC.
Software Installation:
- Turn On the PC: Connect all necessary accessories (keyboard, mouse, monitor, HDMI, power cord, etc.) and set up the PC as instructed.
- Insert USB: Insert the provided USB drive into an open USB slot on the PC.
- Transfer Software: Drag the "Wiz-I Launch Monitor" folder from the USB drive to the Desktop.
- Remove USB: Once the transfer is complete, the USB can be removed and used for other purposes.
- Open Folder and Follow Guide: Open the "WIZ-I LAUNCH MONITOR" folder and follow the video installation guide for step-by-step instructions.
Troubleshooting and FAQ:
- "READY" sign not showing: If the ball is on the mat but the "READY" sign doesn't appear, try moving the ball to a different spot on the mat. If the issue persists, exit the software and restart it.
- "Ready" sign shows, but no registration on hit:
- White/Matte-top clubs: If using a white-top or matte-top driver, wood, or putter, the WIZ-I might detect the reflection/white top as a golf ball, causing misreads. Apply a piece of masking tape to your club to resolve this.
- Ball placement: When using an iron or wood, if the ball placement is too close to the teeing area, move the ball closer toward the golfer.
System Set-Up and Support:
Fairway Sims offers support for system setup. Users are instructed to:
- Turn on the TeamViewerQS provided on the USB drive.
- Send the following information to info@fairwaysims.com:
- Your Name
- TeamViewer ID
- Product Code
This allows Fairway Sims to provide remote assistance for setup.
- Email: info@fairwaysims.com
- Phone: 587-998-9913 (Canada Only)
- Website: fairwaysims.com
Copyright © 2022 Future Distribution Inc. All Rights Reserved.