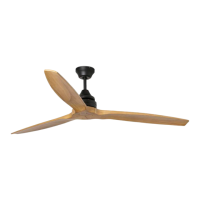
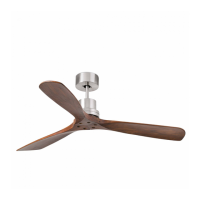
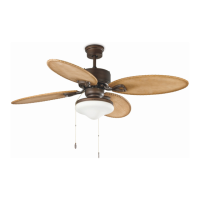
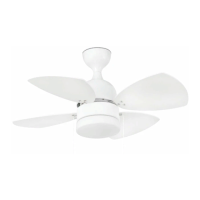
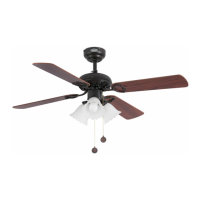
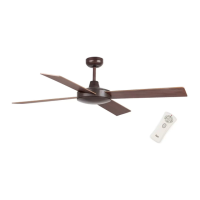
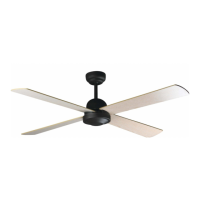
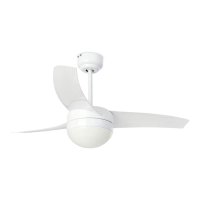
This document describes the Faro Barcelona Alo ceiling fan, available in two models: Ref. 33718 and Ref. 33719. The manual provides comprehensive instructions for installation, operation, maintenance, and troubleshooting.
Function Description
The Faro Barcelona Alo ceiling fan is designed to provide air circulation for both warm and cold weather conditions. It features a reversible motor that allows for two modes of operation:
- Hot Weather (Downward Airflow): The fan rotates counter-clockwise, creating a downward airflow that produces a cooling effect. This allows for setting the air conditioner to a higher temperature without compromising comfort.
- Cold Weather (Upward Airflow): The fan rotates clockwise, creating an upward airflow that moves warm air trapped at the ceiling downwards. This allows for setting the heating to a lower temperature without compromising comfort.
The fan is controlled via a remote control, which includes buttons for:
- HI: Maximum fan speed.
- MED: Medium fan speed.
- LOW: Minimum fan speed.
- OFF: Turns the fan off.
- Light (Ref. 33719 only): Controls the intensity and on/off function of the integrated light.
- CODES: Used for pairing the remote control with the fan, especially for multiple fan installations.
Important Technical Specifications
- Protection Class: Class I (earthed appliance). The earth wire (yellow/green) must be connected to the terminal marked with the earth symbol.
- IP Rating: IP20 (Ref. 33718) and IP20 (Ref. 33719). This means the appliance should only be installed in rooms where direct contact with water is impossible.
- Voltage: 220V-240V.
- Minimum Installation Height: The fan blades must be at a minimum height of 2.30 meters (90.55 inches) from the floor.
- Minimum Clearance: A minimum clearance of 1 meter (39.37 inches) from the fan blades to any wall or obstruction is required.
- Maximum Ceiling Angle: The fan can be installed on ceilings with a maximum angle of 25 degrees (Ref. 33718) or 20 degrees (Ref. 33719).
- Weight Capacity: The mounting structure must be capable of supporting at least 60 kg (132 lb).
- Motor: Features permanently lubricated bearings, eliminating the need for oiling.
- Wiring: All wiring must be in accordance with the National Electrical Code and local electrical codes. An isolator switch, compliant with installation regulations, must be incorporated to ensure omnipolar cutoff, directly connected to the power terminals, with a contact separation at all poles, providing total disconnection under Category III overvoltage conditions.
Usage Features
- Reversible Function: The fan includes a sliding switch on the motor housing to change the direction of rotation, allowing for seasonal use (hot or cold weather). It is important to turn off the fan and wait for the blades to stop completely before changing the switch position.
- Remote Control Operation: The fan is operated using the provided remote control. The remote allows for adjusting fan speed (HI, MED, LOW) and turning the fan on/off. For Ref. 33719, it also controls the light.
- Multiple Fan Installation: The manual provides instructions for pairing multiple fans with individual remote controls using a "CODES" setting on the remote and a DIP switch on the receiver unit. This ensures that each remote controls only its designated fan.
- Settling Period: New fans may produce some noise initially. A 24-hour settling period is recommended, after which most noises associated with a new fan should disappear.
Maintenance Features
- Regular Inspections: Due to the natural movement of the fan during operation, some connections may loosen. It is recommended to check the supporting screws, brackets, and blade attachments twice a year to ensure they are secure and properly tightened.
- Cleaning: To maintain the fan's appearance for years, it should be cleaned regularly. Use a soft brush or lint-free cloth to prevent scratching the surface. Do not use water for cleaning, as it can damage the motor or blades and may cause electrocution.
- Chrome Finish: The chrome components are sealed with a lacquer layer to minimize discoloration and tarnishing.
- No Oiling Required: The motor features permanently lubricated bearings, so no additional oiling is necessary.
Troubleshooting Guide
The manual includes a troubleshooting section for common issues:
- Fan Does Not Start:
- Check fuses and circuit breakers.
- Review terminal block connections. Ensure the main power is off before checking.
- Verify the sliding switch is firmly in the "up" or "down" position; the fan will not work if the switch is in the middle.
- Ensure that the motor's stabilizing tongue-pieces have been removed.
- If the fan still does not work, consult a qualified electrician. Do not attempt to repair internal electrical connections without expertise.
- Fan Is Noisy:
- Check that all screws in the motor casing are securely attached.
- Check that the screws fastening the blade brackets to the motor are properly tightened.
- If an optional light fitting is used, ensure the glass is properly fitted and the screws holding it are firm. Ensure the light bulb is securely seated and does not touch the glass. If vibration persists, remove the glass, install a 1/4" rubber strip around the neck of the glass as an insulator, and then reattach the glass, tightening the screws against the rubber strip.
- Allow a 24-hour settling period; most noises associated with a new fan will disappear after this time.
- Fan Wobbles:
- Check that all blades are securely fastened to their holders.
- Check that the blade holders are tight on the motor.
- Ensure the mounting bracket is properly screwed to the ceiling.
- Wobble is often caused by uneven blade levels. Measure the distance from the ceiling to the tip of each blade. All blades should be at the same height (within 1/8"). If not, adjustments can be made by gently bending the blade and bracket. For major adjustments, a washer (not provided) can be inserted between the blade and its holder at the screw closest to the motor (to adjust the blade tip downwards) or at the two screws furthest from the motor (to adjust the blade tip upwards).
- If wobble persists, interchange two adjacent blades to redistribute the weight, which may result in smoother operation.
- Light Does Not Ignite (Ref. 33719 only):
- Check terminal connections.
- If the light still does not work, contact an electrician.