Do you have a question about the Fastfri FF18 and is the answer not in the manual?
Overview and initial guidance for the FastFri 400mm Gas Fryer.
General overview of the FastFri FF18 400mm Gas Fryer features.
Information on gas supply connection point and flexible hose requirements.
Specifications for gas types, pressures, and connections for different regions.
Mandatory requirements for safe and correct installation of the appliance.
Steps to unpack the fryer and check for contents and damage.
Guidelines for placing the fryer and necessary safety clearances.
Instructions for ensuring the fryer is correctly assembled and stable.
Detailed steps for connecting the gas supply by a qualified person.
Final checks before handover to ensure correct operation and user understanding.
Overview of safe and efficient operation of the FastFri fryer.
Identification and function of the fryer's control components.
Essential checks to perform before operating the fryer.
Instructions for filling the fryer tank with oil or shortening.
Step-by-step guide to safely lighting the pilot burner.
Procedure for igniting the main burner after the pilot is lit.
How to adjust the thermostat to the desired frying temperature.
Instructions for switching the fryer to standby or off states.
Best practices for using and maintaining frying oils and fats for optimal results.
General guidelines and warnings for cleaning the appliance.
Steps for draining and cleaning the fryer tank and components.
Procedures for daily cleaning after use.
Recommended procedure for weekly deep cleaning of the fryer.
Schedule and guidelines for professional periodic servicing and maintenance.
Step-by-step guide for converting the fryer to different gas types.
Detailed specifications for gas types, injectors, and pressures for conversions.
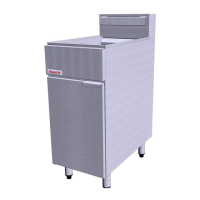
The FastFri FF18 is a 400mm gas fryer designed for professional use in commercial kitchens. This appliance is built to provide years of satisfactory service, emphasizing ease of operation, safety, and efficient performance. It features a single tank with an 18-liter oil capacity, making it suitable for various frying needs.
The FastFri FF18 operates as a commercial gas-fired fryer, utilizing a 90 MJ/hr Multi Jet Target 'U' Burner system and a pilot burner. The appliance is controlled by a single gas controller that manages both the pilot and main burners. It is equipped with a manual ignition pilot burner and incorporates flame failure safety controls, ensuring safe operation. A mechanical thermostat allows for temperature control between 90°C and 190°C. For enhanced safety, the fryer includes an Over Temperature Safety Cut Out system, which automatically turns off the fryer if the oil temperature exceeds 220°C due to a thermostat failure. The open tank design simplifies cleaning, contributing to overall ease of maintenance.
The FF18 is designed for simplicity and 100% safety protection. Before initial use, it is crucial to ensure the gas supply is turned on and the tank is free of foreign articles. The drain valve, located behind the access door, must be closed and locked in position during use. The fryer can be filled with either oil or shortening. When using oil, it should be carefully poured into the tank until the 'FILL-LEVEL' mark is reached. For shortening, it is recommended to pre-melt it in a suitable vessel before pouring it into the tank until it reaches the 'FILL LEVEL' mark. It is important to avoid heating pre-melted shortening to high temperatures, as handling hot shortening can be dangerous. If pre-melting is not possible, shortening can be cut into pieces and packed into the tank.
Lighting the pilot burner involves rotating the gas control knob to the pilot position and holding it depressed while manually lighting the pilot burner through the Pilot Burner Viewing Opening. The knob should be held for 10-15 seconds after ignition to ensure the pilot burner remains alight. Once the pilot burner is lit, the main burner can be ignited by rotating the thermostat control knob to the desired temperature and then rotating the gas control knob to the 'Main Burner' position. The main burner will automatically ignite off the pilot burner. A delay of approximately 30 seconds may occur if the main burner is turned on immediately after the pilot burner is lit, as the thermopile needs time to heat up and open the main valve. The main burner will not light if the frying medium temperature is already above the thermostat set temperature.
For pre-heating with shortening, the main burner can be manually cycled 'On' for 5 seconds and 'Off' for 10 seconds to allow the shortening to liquefy gradually without scorching. Continuous operation of the burner during melting should be avoided to prevent overheating and premature oil breakdown. If shortening starts smoking, the 'Off' intervals of the main burner should be increased.
The operating temperature can be set between 90°C and 190°C by turning the thermostat control knob. The main burner will automatically maintain this set temperature. If the fryer is not in use for short periods, the main burner can be set to a 'Stand-by' temperature (approximately 120°C) to allow it to cycle 'On' and 'Off' and maintain the oil temperature just below operating temperature. To turn the fryer to 'Pilot' position, the thermostat control knob should be rotated to 'Off', which will extinguish the main burner while keeping the pilot burner alight. To turn the fryer completely 'Off', with the thermostat control knob already in 'Off', the gas control knob should be rotated to the 'O' position, extinguishing the pilot burner.
Proper care of frying oils and fats is essential for product quality and oil longevity. Food should be prepared uniformly, brought to room temperature, and free from excessive moisture or crumbing. The frying medium should be preheated to the recommended temperature for the specific food and not higher. Holding the frying medium at frying temperatures for long periods when no food is being cooked will cause it to break down. Food should be lowered gradually into the hot frying medium using a wire basket, ensuring all pieces are submerged. Overloading the basket (more than 900g per basket or 1800g per load) should be avoided, as it causes a significant temperature drop, leading to longer frying times and greasy, unattractive food. Cooking should continue until the food is brown, crisp, and cooked through. After frying, food should be removed and allowed to drain in the basket over the fryer. Fried foods are best served immediately to maintain their hot, crisp, and flavorful quality.
Regular and thorough cleaning is crucial for optimal performance, efficiency, and longevity of the FastFri FF18. All controls and mechanical parts should be checked and adjusted periodically by a qualified service person. It is recommended that the appliance be serviced every 6 months.
For daily cleaning, at the end of each day or shift, the frying medium should be drained and strained into a receptacle. The drain valve, located behind the access door, must be closed and locked in position during use. A drain extension pipe can be screwed on, and a suitable container and filter (such as a muslin bag) placed under the drain to catch crumbs while allowing the frying medium to strain through. Once the tank is empty, a small vessel can be used to ladle hot frying medium from the receptacle and pour it vigorously around the sides and bottom of the tank to wash out crumbs and particles. Any lodged particles or crumb residue in the drain valve should be cleaned out with a stiff nylon brush or a wooden probe; metal rods or wire brushes should not be used as they can damage the valve seating. The control panel should be cleaned with a damp cloth lightly moistened with a mild detergent and water, then wiped dry. After daily cleaning, the valve should be closed, and the strained frying medium poured back into the tank.
For weekly cleaning, especially if the fryer usage is high, the tank should be drained and filtered as described for daily cleaning, but not refilled with frying medium immediately. Instead, the fryer should be filled with cold water to the normal fill level, and a high-quality commercial cleaner specifically formulated for fryers should be added. All-purpose cleaners are not recommended, and caustic or lye solutions should never be used as they can leave a fat-destroying film. The water should be heated to approximately 80-90°C. The fryer baskets can be cleaned by immersing them in the cleaning solution for 5-10 minutes or as directed by the cleaner instructions. After soaking, the baskets and fryer tank should be scrubbed lightly but vigorously with a stiff nylon bristle brush to remove deposits. Wire brushes should not be used as they can scratch the surfaces. After scrubbing, the fryer should be emptied and rinsed thoroughly with water. A solution of 1 part vinegar to 15 parts water (or weaker, up to 1 part to 25 parts water if needed) can be used to rinse the tank and neutralize any cleaner residue. The tank should then be thoroughly rinsed with water, drained, and dried before refilling with new filtered frying medium.
The exterior stainless steel surfaces can be cleaned with hot water, a mild detergent solution, and a soft cloth after the tank has been drained, cleaned, and dried. The thermostat control knob can be removed to facilitate cleaning of the thermostat panel. All components should be dried thoroughly with a dry cloth and polished with a soft dry cloth. Any discoloration on stainless steel can be removed using an approved stainless steel cleaner or stainless steel wool, always rubbing in the direction of the grain.
During any maintenance or cleaning, the gas supply at the mains must always be turned 'Off'. The appliance is not waterproof, and water jet sprays should not be used to clean the interior or exterior. Flammable solvents and cleaning aids should not be used near the fryer while it is still hot. The fryer should never be moved when it is full of oil; all oil must be drained before attempting to move the unit.
| Power | 9kW |
|---|---|
| Material | Stainless Steel |
| Oil Capacity | 18 liters |
| Capacity | 18 liters |
| Frequency | 50 Hz |
| Safety Features | Over Temperature Protection |
| Temperature Control | Adjustable thermostat |