FASTORA NAST8 Quick Installation Guide
©Copyright 2003 AXIOMTEK Co., Ltd.
Version A1 March 2003
Printed in Taiwan
9410000800
2
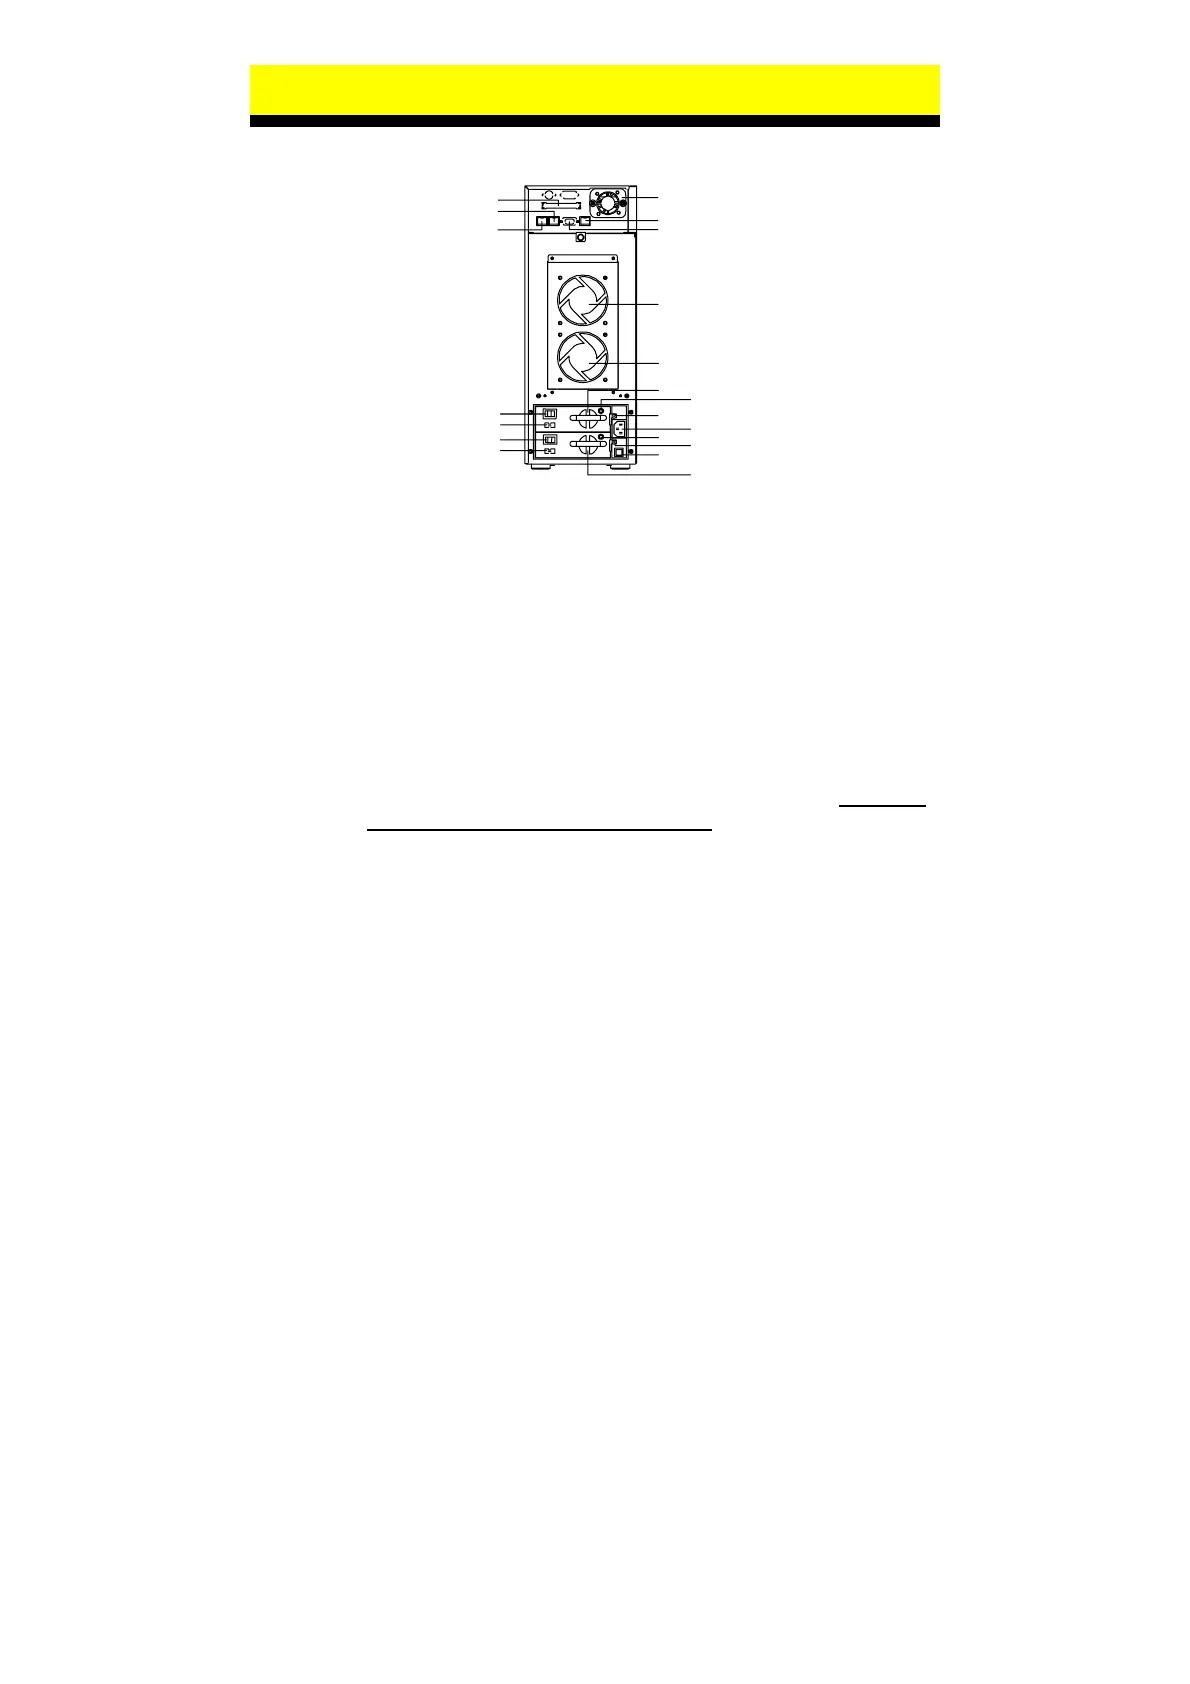
III. Rear Panel Outlets
1
2
3
4
5
6
7
8
9
10
11
12
13
14
15
16
17
18
19
20
1
External SCSI port (Optional)
2
10/100 Ethernet port (I)
3
Gigabit Ethernet port
4
Chassis FAN 3
5
10/100 Ethernet port (II)
6
COM Port #1
7
Chassis FAN 1
8
Chassis FAN 2
9
A/C Switch of Power Supply # 1
10
115V/230V S/W of Power Supply # 1
11
A/C Switch of Power Supply # 2
12
115V/230V S/W of Power Supply # 2
13
FAN of Power Supply # 1
14
D/C LED of Power Supply # 1
15
Thumbscrew of Power Supply # 1
16
A/C Inlet of Power Supply
17
D/C LED of Power Supply # 2
18
Thumbscrew of Power Supply # 2
19
Power Fail Buzzer Reset Button
20
FAN of Power Supply # 2
IV. Installation Steps
Step 1: Install HDD Via hot-swap drive tray to the drive bay. Note that
All HDD must be set to master mode
Step 2: Connect the cable of Ethernet. The appliance is switched on
after one or both AC power cord is connected and the switch
is/are on the on position. Make sure the green IDE LED is
continuously.
Step 3: The red system LED is continuously at diagnostics status
about 2 seconds, then the green system LED flash rapidly (one
flash per 0.5 second) at the appliance is booting.
Step 4: The green LED is continuously means the appliance is ready.
Step 5: Starts to manage the appliance with the File Assistant Utility in
the CD.
Step 6: Finish the setting of the appliance.
 Loading...