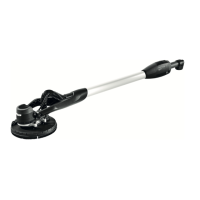
backing pad. The backing pad brake is almost
wear-free thanks to the pins used.
In the case of a decreasing braking effect, first
check the backing pad for wear and replace it if
necessary, see Section 8.4.
If the backing pad brake is damaged, it must be
replaced by an authorised service workshop.
11 Accessories
Use only original Festool accessories and
Festool consumable material intended for this
machine. These components are designed spe
cifically for this machine. Using accessories
and consumable material from other suppliers
will most likely affect the quality of your results
and limit warranty claims. Machine wear or
your own personal workload may increase de
pending on the application. Protect yourself and
your machine, and preserve your warranty
claims by always using original Festool acces
sories and Festool consumable material!
The order numbers of the accessories and tools
can be found in the Festool catalogue or on the
Internet under "www.festoolusa.com".
11.1 SYSTAINER
Systainer
Many Festool products are shipped in a unique
system container, called "Systainer". This pro
vides protection and storage for the tool and ac
cessories. The Systainers are stackable and
can be interlocked together. They also can be
interlocked atop Festool CT dust extractors.
To open the Systainer
Turn the T-loc [SYS-b-1] to this posi
tion.
To lock the Systainer
Turn the T-loc [SYS-b-1] to this posi
tion.
To connect two Systainers
Place one Systainer on the top of the other
(Fig.
[SYS-a]).
Turn the T-loc [SYS-b-1] to one of
this positions (Fig. [SYS-b]).
The Systainers are connected and locked.
A Systainer Classic Line can be connected
to a Systainer T-Loc or to a Systainer
3
from below via its four locking devices.
A Systainer T-Loc can be connected to a
Systainer
3
both from below and from
above.
SYS-b-1
SYS-b
o
p
e
n
l
o
ck
connect
connect
T-loc
12 Environment
There is a Li-ion button cell behind the
Bluetooth
®
button [1-2] on the handle [1-1].
Before disposal
Qualified specialist only: Remove the Li-ion but
ton cell from the tool. To do so, unscrew the
housing components and remove the Li-ion
button cell.
English
19

 Loading...