Step 4: Apply new gasket sealer (vacuum grease) to the O-Rings. Place the o-rings in the grooves and press into place
to seat.
Step 5: Turn each flange over, with the o-ring down, and place on a clean flat surface.
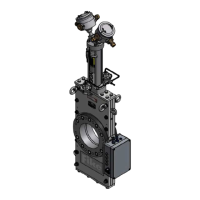
Step 1: Using shop air move the gate to the open (up) position.
Step 2: Place the original Shims on each Flange.
Step 3: Assemble the Flanges to the FAV. Do not fully tighten the cap screws.
Step 4: Align the bore of each flange with the bore of the gate and torque the cap screws in one-third increments in a
crisscross fashion.
Step 5: Using shop air, actuate the gate in both directions ten (10) times, to insure free movement. Pressure required
will vary with valve size and flange bolts/nuts, in a star pattern compression.
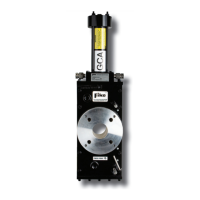
Step 1: Remove the outlet from the body of the muffler assemblies located on the lower end cap of the actuating
cylinder.
Step 2: Remove the ring and the seals from the body of the mufflers.
Step 3: Remove debris from the inside of the muffler bodies using a clean wiper.
Step 4: Insert new seals into the bodies.
Step 5: Insert the metal rings into the bodies. The curved surface of the ring should be placed on the seal surface.
Step 6: Assemble the outlets to the bodies and torque to 13.5 Nm. Excessive torque will damage the seals and allow
moisture to enter the assembly.
Refer to Fike document X.2.66.01-x FAV Reload Parts for contents of Refurbish Kits.
Contact your local Fike representative for information on availability, prices and delivery times.
 Loading...