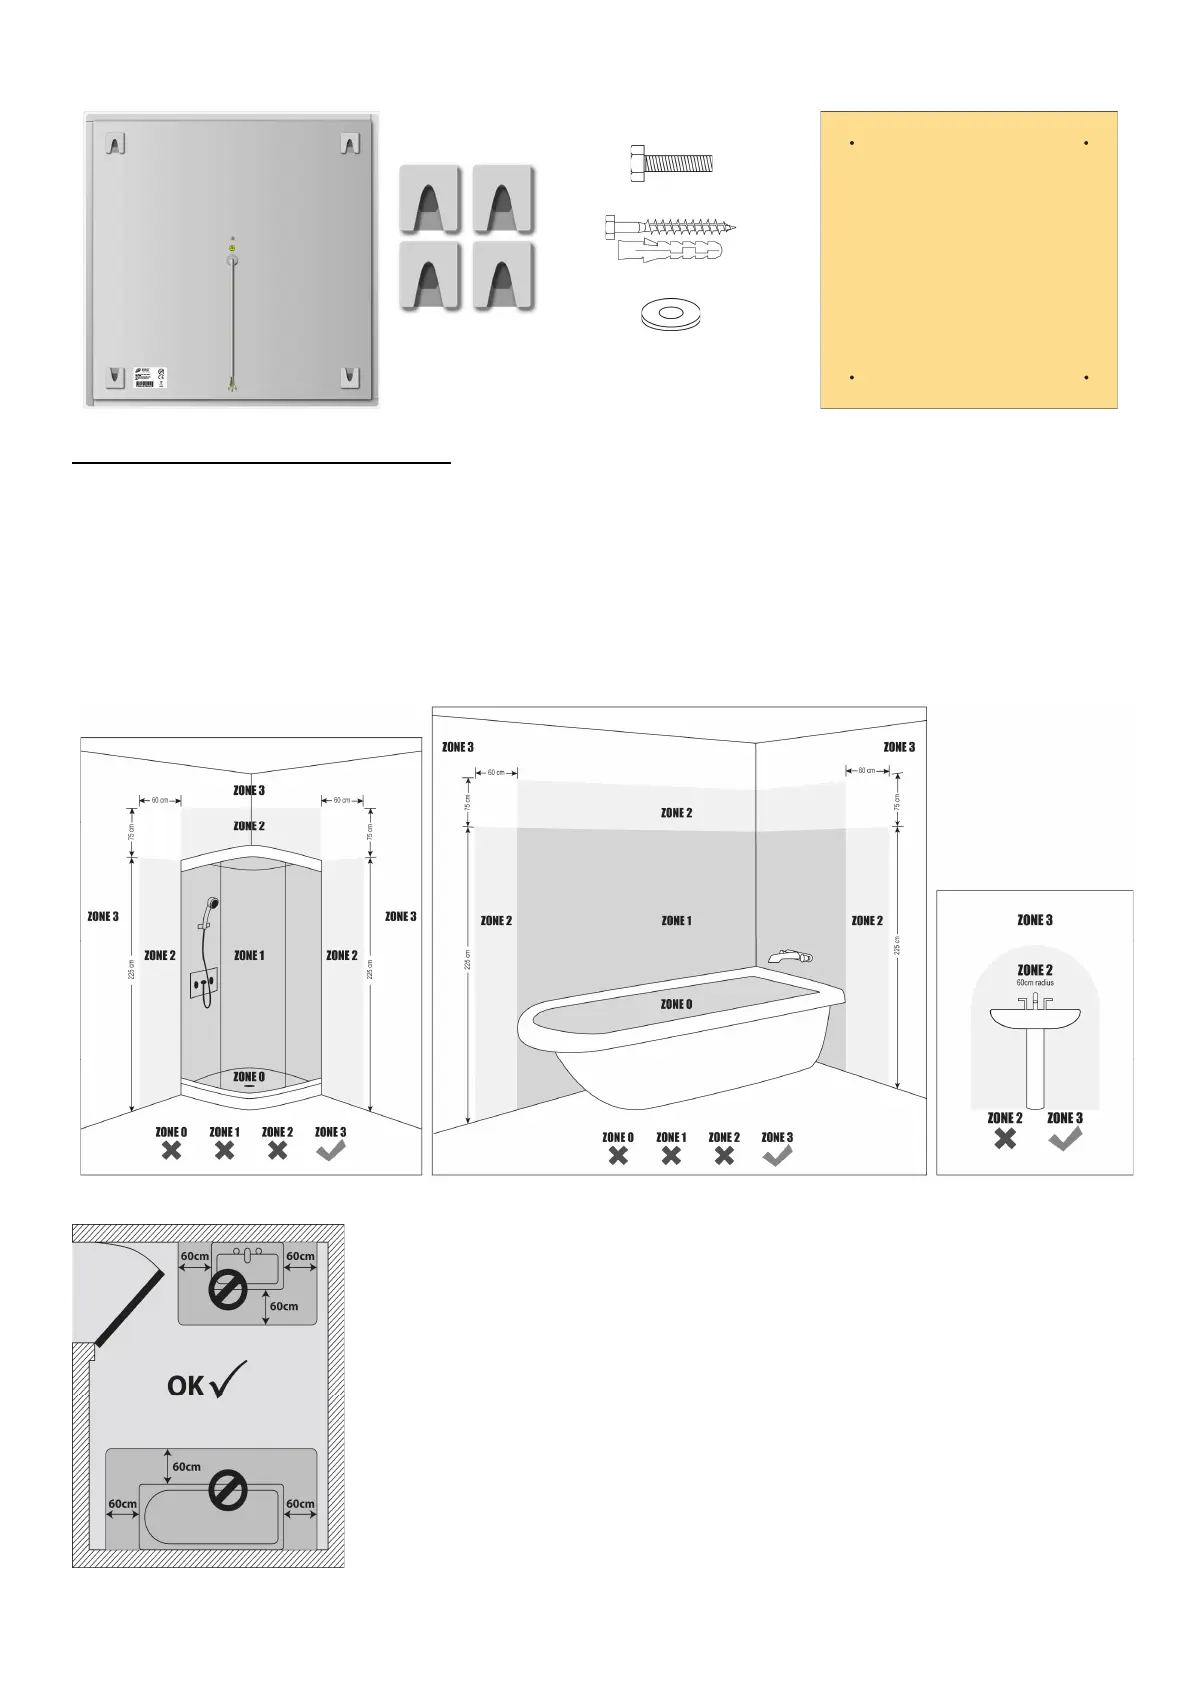
PACKAGE CONTENTS - BASIC ELEGANT:
Brackets (x4)
Bracket bolts (x4)
Installation bolts (x4)
Washers (x4)
HEATING PANEL INSTALLATION:
For effective control of heating output and room temperature, it is necessary that this panel is supplemented with a thermostat or
other device that allows control of the output of radiators.
The heating panel can also be used in bathrooms in ZONE 3 (see picture below). In any case, make sure that the socket to which
you connect the panel is equipped with a circuit breaker.
The panel heats with infrared waves, so it is not recommended to install it behind furniture or other obstacles, as this could reduce
its performance and also endanger safety. The heating panel should be placed so that it is approximately the same distance from
all persons in the room, so the heating will be pleasant for everyone.
Once you have selected the ideal location for the panel, follow these steps:
Step 1: Fix the template to the ceiling with adhesive tape. Make sure the template is
positioned correctly and mark the positions of the holes for the ceiling screws. Make sure that
there are no electrical cables in the ceiling and around the holes you are going to drill!
Step 2: Drill the holes with a drill bit suitable for the ceiling. For concrete or brick ceilings, use
a drill with a diameter of 8 mm.
Step 3: Insert the anchors into the holes and screw in the installation bolts so that they
protrude approx. 1 cm from the ceiling. Anchors and bolts for concrete and brick are included
in the package. If in doubt, seek professional advice.
Step 4: Hang the panel with the brackets and secure them.
Step 5: Connect the panel to mains power.
 Loading...