Do you have a question about the Fischer Connectors MINIMAX SERIES and is the answer not in the manual?
Standard tools like a hand press required for cable assembly.
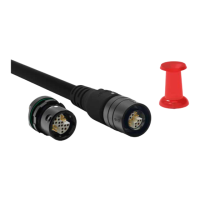
Specialized tools such as the MiniMax support tool for precise assembly.
Kit contents for Size 06 and Size 08, including specific tools for MP11 and MR50.
Detailed list and illustration of connector parts like contact block, insulator tube, and housing.
Description of bend relief parts, including clip and boot.
Specifications for cable cutting diameters for Size 06 and 08 at different levels.
Steps for cutting bend relief, stripping cable jacket, managing braid, and trimming conductors.
Soldering all conductors to the contact block for connection.
Sliding the insulator tube onto the contact block and securing the braid.
Gluing the insulator tube to the contact block for improved retention.
Potting the insulator tube and installing O-rings on the contact block and housing.
Using a press to insert the insulator tube into the housing with correct orientation.
Pulling up and cutting the braided shield to the correct length.
Press-fitting the backnut onto the assembly using the appropriate tool.
Filling the space between the back nut clip and nut with potting material.
Sliding the boot bend relief over the back nut until it hooks securely.
| Series | MiniMax |
|---|---|
| Category | Cables and Connectors |
| Connector Type | Circular |
| Operating Temperature | -40°C to +85°C |
| IP Rating | IP68 |
| Durability | >5, 000 mating cycles |
| Mating Cycles | >5000 |