Instruction Manual
D200108X012
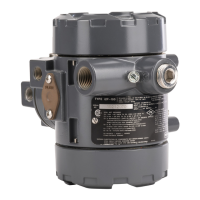
546 Transducer
March 2015
14
CAUTION
Never disassemble the torque motor assembly because the magnetism in the torque motor magnets will decrease
permanently. Shaded key numbers indicate parts that should not be disassembled from the torque motor (see figure 9). If
troubleshooting or alignment attempts indicate either a faulty torque motor or the necessity of disassembling the torque
motor consult your Emerson Process Management sales office.
Relay Removal and Replacement
Use the following procedure when removing and replacing a relay assembly. Refer to figure 10 for key number
locations, unless otherwise directed.
1. Loosen the two mounting screws (key 68), and remove the relay assembly from the transducer case (key 1,
figure 8).
2. To install the replacement relay assembly, install the two relay mounting screws (key 68) into the relay assembly.
Apply lubricant (key 96) to the O‐rings, and make sure the O‐rings (keys 72, 73, and 74) are in place on the relay
assembly.
3. Install the relay assembly on the transducer case. Tighten the mounting screws.
4. With the torque motor installed, apply supply pressure to the transducer case, and check the relay assembly for
leaks with a soap solution.
Replacing the Feedback Bellows Assembly
Refer to figure 9 for key number locations.
1. Loosen the hex nut (key 31).
2. Remove the bellows screw (key 56) and O‐ring (key 36) under the head of the bellows screw.
3. Pull the bellows assembly (key 57) out. The armature is slotted to allow removal of the bellows assembly.
4. Inspect and, if necessary, replace the two O‐rings (key 36). Make sure the O‐rings under the bellows assembly are in
place.
5. Choose the correct bellows assembly as outlined in table 6. Install the new bellows assembly. Make sure that the
O‐ring (key 36) is in place.
6. Install the bellows screw and O‐ring, and tighten the screw. Be sure the bellows assembly is not distorted in any
direction. Tighten the hex nut (key 31).
7. Refer to the adjusting zero and span procedures in the Adjustments section.
Troubleshooting
This section contains some checks for operational difficulties that may be encountered. If correcting the difficulties is
not possible, contact your Emerson Process Management sales office or service center.
Electrical
1. Check the output of the control device. Make sure that it is reaching the transducer.
2. Check the DC input signal. It should be the same as the range stamped on the transducer nameplate.
3. Check the resistance of the transducer circuit to see that it coincides with the value listed on the circuit
identification tag located on the torque motor.
 Loading...