Instruction Manual
D200108X012
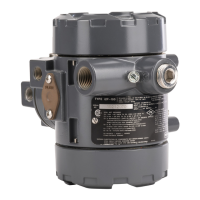
546 Transducer
March 2015
15
4. Check the terminal lugs for proper connections. If reverse action of the transducer is observed, simply reverse the
input leads as indicated in the Reversing the Action procedures in the Operating Information section.
Pneumatic
CAUTION
Do not attempt to remove the nozzle (key 19, figure 9) for any reason. Nozzle removal requires disassembling the torque
motor. Disassembling the torque motor will permanently reduce the strength of the magnets, causing improper operation.
Also, do not adjust the baffle (key 18, figure 9). The spacing between the baffle and nozzle is preset and locked at the
factory to obtain optimum performance of the transducer.
1. Connect supply pressure and a pressure gauge to monitor the output. Check the operation of the transducer as
follows:
a. Force the baffle (key 18, figure 9) against the nozzle. The output pressure should build up to approximately the
supply pressure. If it does not, check for a leak in the pneumatic system or a burr on the nozzle.
b. Force the baffle away from the nozzle. The output pressure should drop to less than 0.07 bar (1 psig). If it does
not, check the flame arrestors in the transducer case (see figure 8). If the flame arrestors require cleaning, first
remove the torque motor assembly from the case by removing four machine screws (key 9, figure 8). Then, clean
the flame arrestors by blowing them out with air pressure.
2. Check zero and span adjustment for proper setting. Refer to the adjustments procedure.
3. Check the supply pressure. It should be at least 0.3 bar (5 psig) above the upper limit of the output pressure range.
4. Check the filter regulator for moisture in the dripwell. Drain off any moisture, and clean the filter element if
necessary.
5. If the transducer cycles, be sure there are no sharp bends in the copper capillary feedback tubing (key 56, figure 9)
and that the tubing is not plugged.
6. Check the nozzle. If it is clogged, remove the entire torque motor assembly from the case by removing four
machine screws (key 9, figure 8). Run a wire through the nozzle from the underside of the assembly.
7. Erratic operation may be caused by metal chips in the air gap between the armature and the pole pieces. Blow any
chips out of the torque motor assembly with low pressure air.
8. If a problem persists, check the relay as described in the Relay Maintenance procedures in this section.
Alignment
The following alignment procedures can be used in conjunction with troubleshooting procedures to correct the
operation of a faulty transducer.
Span Adjustment
Refer to figure 9 for key number locations, unless otherwise directed.
If setting the required span is not possible, additional span adjustment can be obtained by shifting the entire span
adjustment assembly (key 55) at the flexure pivot end. The alignment procedure is as follows:
1. Shut off the DC input signal and supply pressure to the transducer.
2. Disconnect the external lead wires from the terminal mounting bracket assembly (key 53).
 Loading...