- 10 -
according to Column 5 in the Burner Set-up Chart.
B) The proper number on the manual AIR ADJUSTMENT PLATE (1) should
line up with the SETTING INDICATOR (4) on the fan housing cover. Once set,
the air adjustment plate should be secured in place by tightening SCREWS 2
and 3.
C) The final position of the air adjustment plate will vary on each installation.
Use instruments to establish the proper settings for maximum CO
2
and a smoke
reading of zero.
NOTE: Variations in flue gas, smoke, CO
2
and temperature readings may be
experienced when the burner cover is put in place. Therefore, the burner cover
must be in place when making the final combustion instrument readings, to
ensure proper test results.
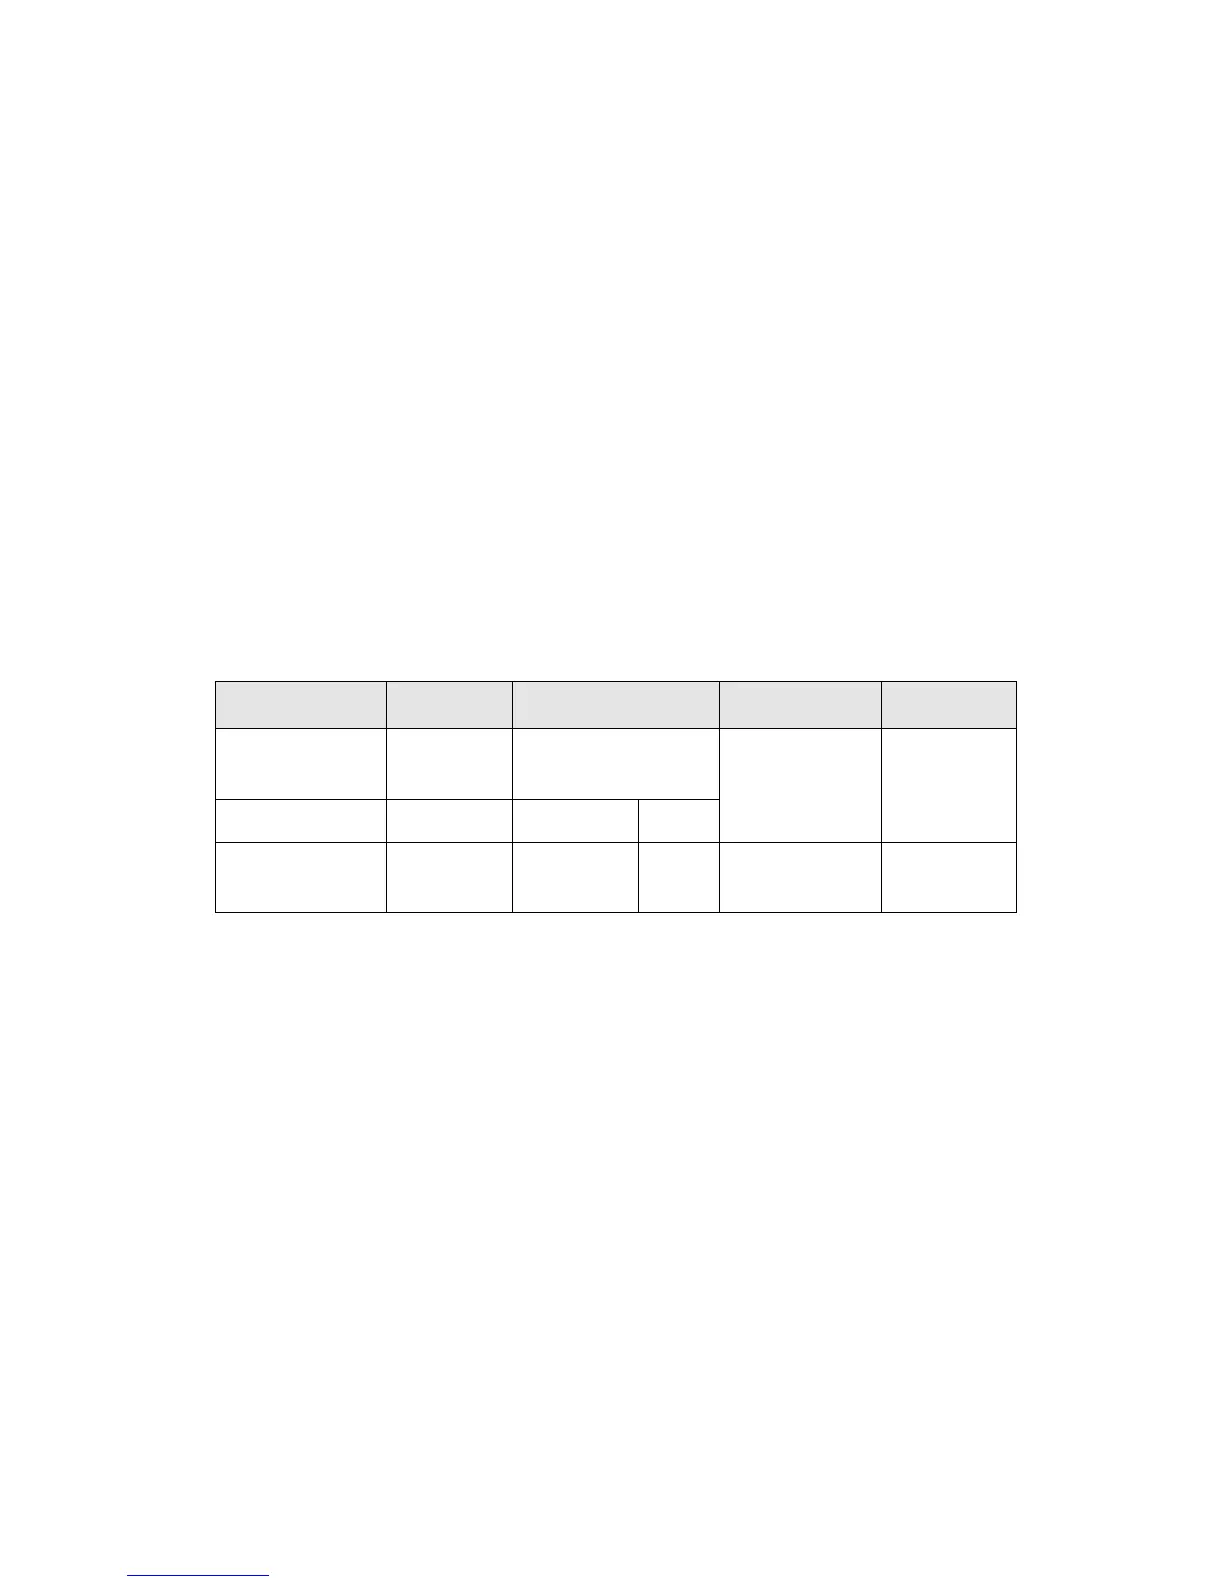
BURNER SET-UP CHART
1 2 3 4 5
ACTUAL
FIRING RATE
± 5%
NOZZLE
SIZE
PUMP PRESSURE
TURBULATOR
SETTING
AIR
DAMPER
SETTING
GPH GPH PSI BAR
2.75
2.25 x 45°
2.00 x 60°
1.75 x 60°
170
170
170
10
10
10
5
5
5
4 - 6
4.5
4.5
* Note – Air damper setting is typically set at 4 for operation in colder
temperatures. A combustion analyzer should always be used when setting the
burner.
TEMPERATURE FEELER GAUGE ADJUSTMENT
(ATTACHED TO FAN SWITCH)
The temperature feeler gauge is required to be always touching the heater
exchanger.
The temperature feeler gauge controls the air flow over the fan switch, which
eliminates any unnecessary fan cycling. The temperature feeler gauge can be
adjusted for different outside temperatures, by rotating the location of the
temperature feeler gauge holes. This will provide maximum performance of the
unit in different applications.
If supply air is warm (-5º C, indoor application):