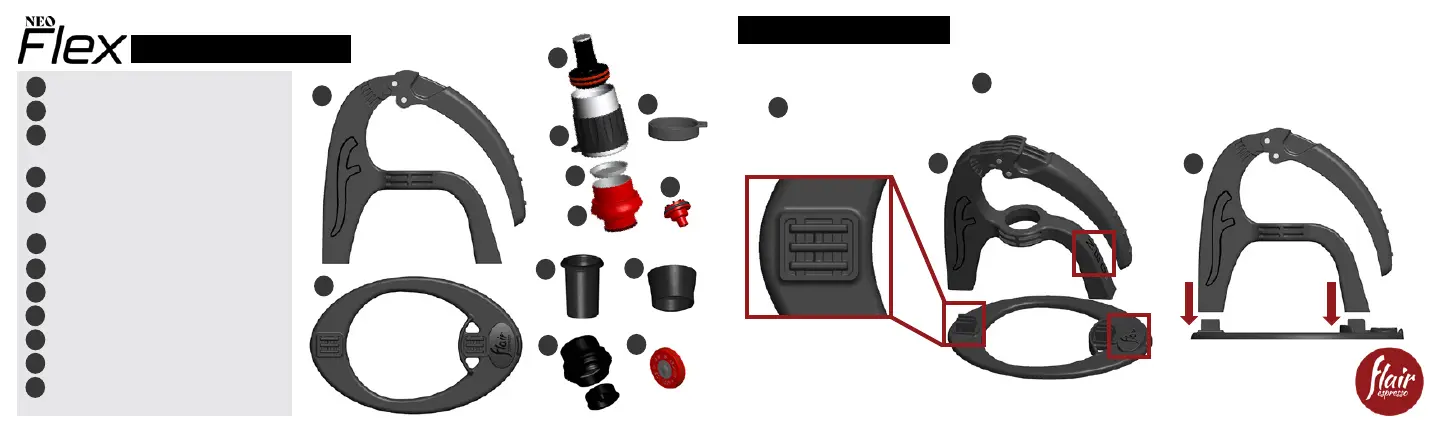
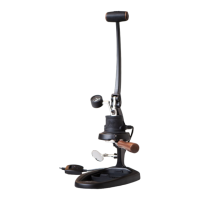
What’s Included in the Box
Assembling Your NEO Flex
Before brewing with your NEO Flex, you’ll need to attach the lever to the base. This is a press t,
so no equipment is needed. Simply line up the ns on the base and post, as show below,
and press down to seat. To dissasemble your NEO Flex, simply pull the pieces apart.
1
2
3
4
5
Main Post & Lever
Base
Piston with Pressure Release Valve
(found inside brew cylinder)
Brew Cylinder
Stainless Steel Screen
(found inside brew cylinder)
Flow Control Portalter (red)
Silicone Preheat Cap
Extra Flow-Control Spout
Dosing Cup/Tamper
Funnel
Bottomless 2-in-1 Portalter (black)
Pressure Release Valve Replacement
6
7
8
1
2
3
4
5
6
9
10
9
10
11
12
Align the ns on the front and
back of the base with the
openings in the bottom of the
post. Push down to seat.
1
2
1
2
The Flair logo on the base
and the NEO logo on the post
must be on the same side.
8
12
7
11