Assembly And Installation Instructions
NOTE: Before mounting the brackets, install the switch in the
mounting bracket as follows:
1. Place the T-handle onto the switch stem and turn to the ON
position, then remove the T-handle.
2. Remove the large hex nut and wave washer and the ON/OFF
plate from the installation kit package.
3. Insert the neck of the switch into the mounting bracket hole
just enough to install the ON/OFF plate, wave washer and start
the hex nut.
4. Tighten the brass hex nut until the wave washer is completely
flat. (7-10 ft.-lbs.) Do Not Over Tighten! Make sure to align the
alignment tab on the switch with the alignment hole on the
mounting bracket.
5. Install the T-handle onto the switch stem and turn to the off
position. Making sure to align the lock-out hole in the handle
with the lock-out hole in the mounting bracket.
6. Remove the spring steel pin from the installation package and
tap it in approx 1/4 inch. Ensure that the hole in the handle is
aligned with the hole in the switch stem and then finish
installing the pin.
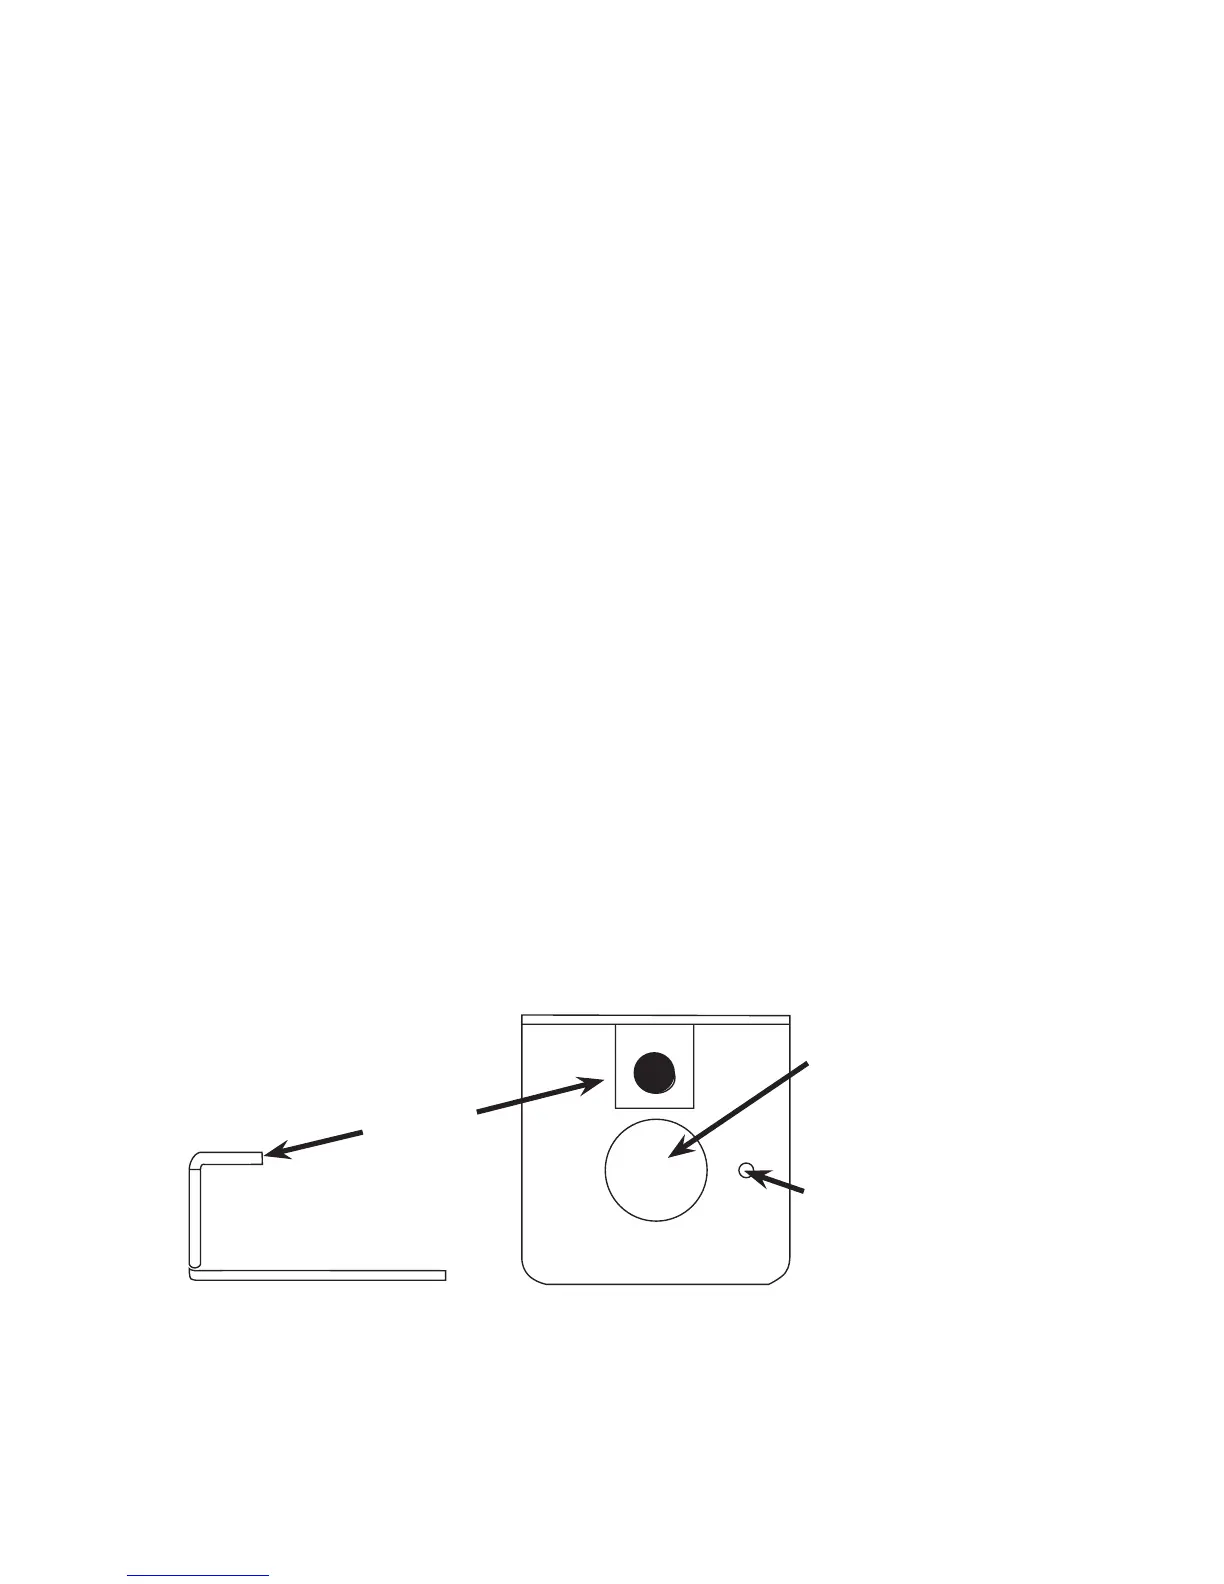
Figure 1
Lockout
Bracket
Switch
Mounting Hole
Locating Tab Hole
Top View