3 EN-US English
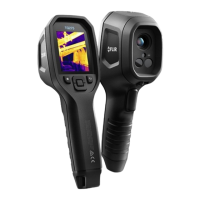
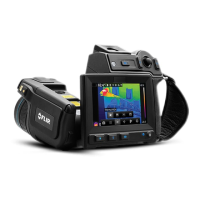
3.7 View from the right
See Figure 2.1 View from the right, page 2
1. Knob to change the dioptric correction for the viewfinder.
Note This item is dependent on the camera model.
2. Hand strap.
3. Digital zoom button.
4. Autofocus button (push half-way down)/Save button (push fully down).
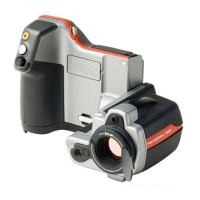
3.8 View from the left
See Figure 2.2 View from the left, page 3
1. Camera lamp.
2. Laser pointer.
Note The laser pointer may not be enabled in all markets.
3. Camera lamp.
4. Infrared lens.
5. Digital camera.
6. Focusing ring.
7. Button to operate the laser pointer.
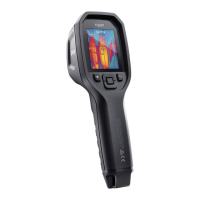
3.9 View from the rear
See Figure 2.3 View from the rear, page 3
1. Sensor that adjusts the touch-screen LCD intensity automatically.
2. Button to switch between touch-screen LCD mode and viewfinder mode.
Note This item is dependent on the camera model.
3. Viewfinder.
Note This item is dependent on the camera model.
4. Programmable button.
5. Joystick with push-button functionality.
6. Back button.
7. Camera lamp button.
8. Button to switch between automatic and manual image adjustment mode.
9. Image archive button.
10. Touch-screen LCD.
11. Power indicator.
#T810139; r. AA/33071/33072; mul 7
 Loading...