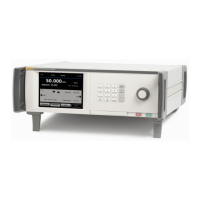
6270A
Operators Manual
48
Switch Test
To test a pressure switch:
1. Go into the SETUP menu.
2. Connect the unit under test (UUT) to the switch test terminals on the rear of
the Product with the pressure switch terminals to the pressure switch
contacts (de-energized dry contacts). The polarity of the terminals does not
matter. Connect the test port of the Product to the input of the pressure
switch.
3. Select Tasks>Switch Test. The Switch Test menu is shown. Use the
touchscreen and keypad to enter the switch test values.
4. Configure the test:
Start – Minimum Setpoint pressure
End – Maximum Setpoint pressure for the test
Rate – This is the slew rate to determine how quickly the pressure will
increase or decrease. For sensitive switches, Fluke Calibration recommends
a slower rate.
Direction – Select whether to increase then decrease pressure (up and
down), or a one time upward test (single).
5. Touch Run to start the test. The task bar shows the progress of the test and
also the state of the switch (Open or Closed). The test is fully automated and
progress can be viewed at any time.
The Product changes the pressure over the specified range at the required
rate. When the switch changes state, the Product records the pressure. The
results of the switch test are shown on the display when the test completes.
Exercise
The Exercise function repeatedly pressurizes a UUT to reduce the effects of
hysteresis. The Exercise menu specifies a maximum and minimum Setpoint
pressure and how many times to repeat the routine (cycles).
To Exercise, set a few parameters so the Product can do the task. These
parameters are:
Maximum – Max Setpoint
Minimum – Minimum Setpoint
Cycle – How many times to repeat
Delay – How long to stay at setpoint when reached
Control at Target – If ON, the Product uses the dynamic control mode to keep
pressure at the Setpoint. If OFF, the Product uses static pressure control at the
Setpoint.
 Loading...


