1. Plug in the smART Pixelator™ AC Adapter (included) or insert 4 C batteries (not included).
2. Flip the switch on the back to turn on.
3. Insert the pre-loaded activity card into the back of the smART Pixelator ™ with the flat side facing up.
4. Place smART Pixel Beads tray (included) or Sequins or Pegs tray (sold separately) on the Pixelator surface.
5. After 15 minutes of no activity, the smART Pixelator™ lights will turn o. Reactivate using the buttons in the app or on
the Pixelator.
USER MANUALUSER MANUAL
For additional products or information on using
multiple trays, smART Pixel Pegs or Sequins, or
creating 3D designs, go to:
www.smartpixelator.com
Requires Android 5.0+
Requires Apple iOS 8.0+
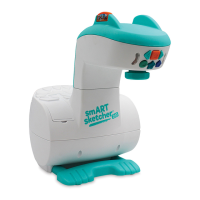
SIMPLE SET UPSIMPLE SET UP
On/O Switch
(back)
AC Adapter
connection (back)
* 2 Battery
Compartments
(bottom)
SD Activity
Card Slot
SD Activity Card
Control Buttons
Tray holding pins
Activities Display Screen
CONTROL BUTTONS
Go to Home
Go Back a Step
Go Forward a Step
Next Drawing
Previous Drawing
Repeat Last Step/AutoPlay
LED Indicators
CAUTION-
ELECTRIC TOY:
N
ot recommended for children
under
3
years of ages.
A
s with
all electric products, precautions
should be observed during handling
and use to prevent electric shock.
AC
adapter:
INPUT:100-240VAC, 0.3A MAX 50/60H
z;
OUTPUT: 5.9V 1.0A
WARNING:
CHOKING HAZARD
Small parts
Not for children under 3 years
™