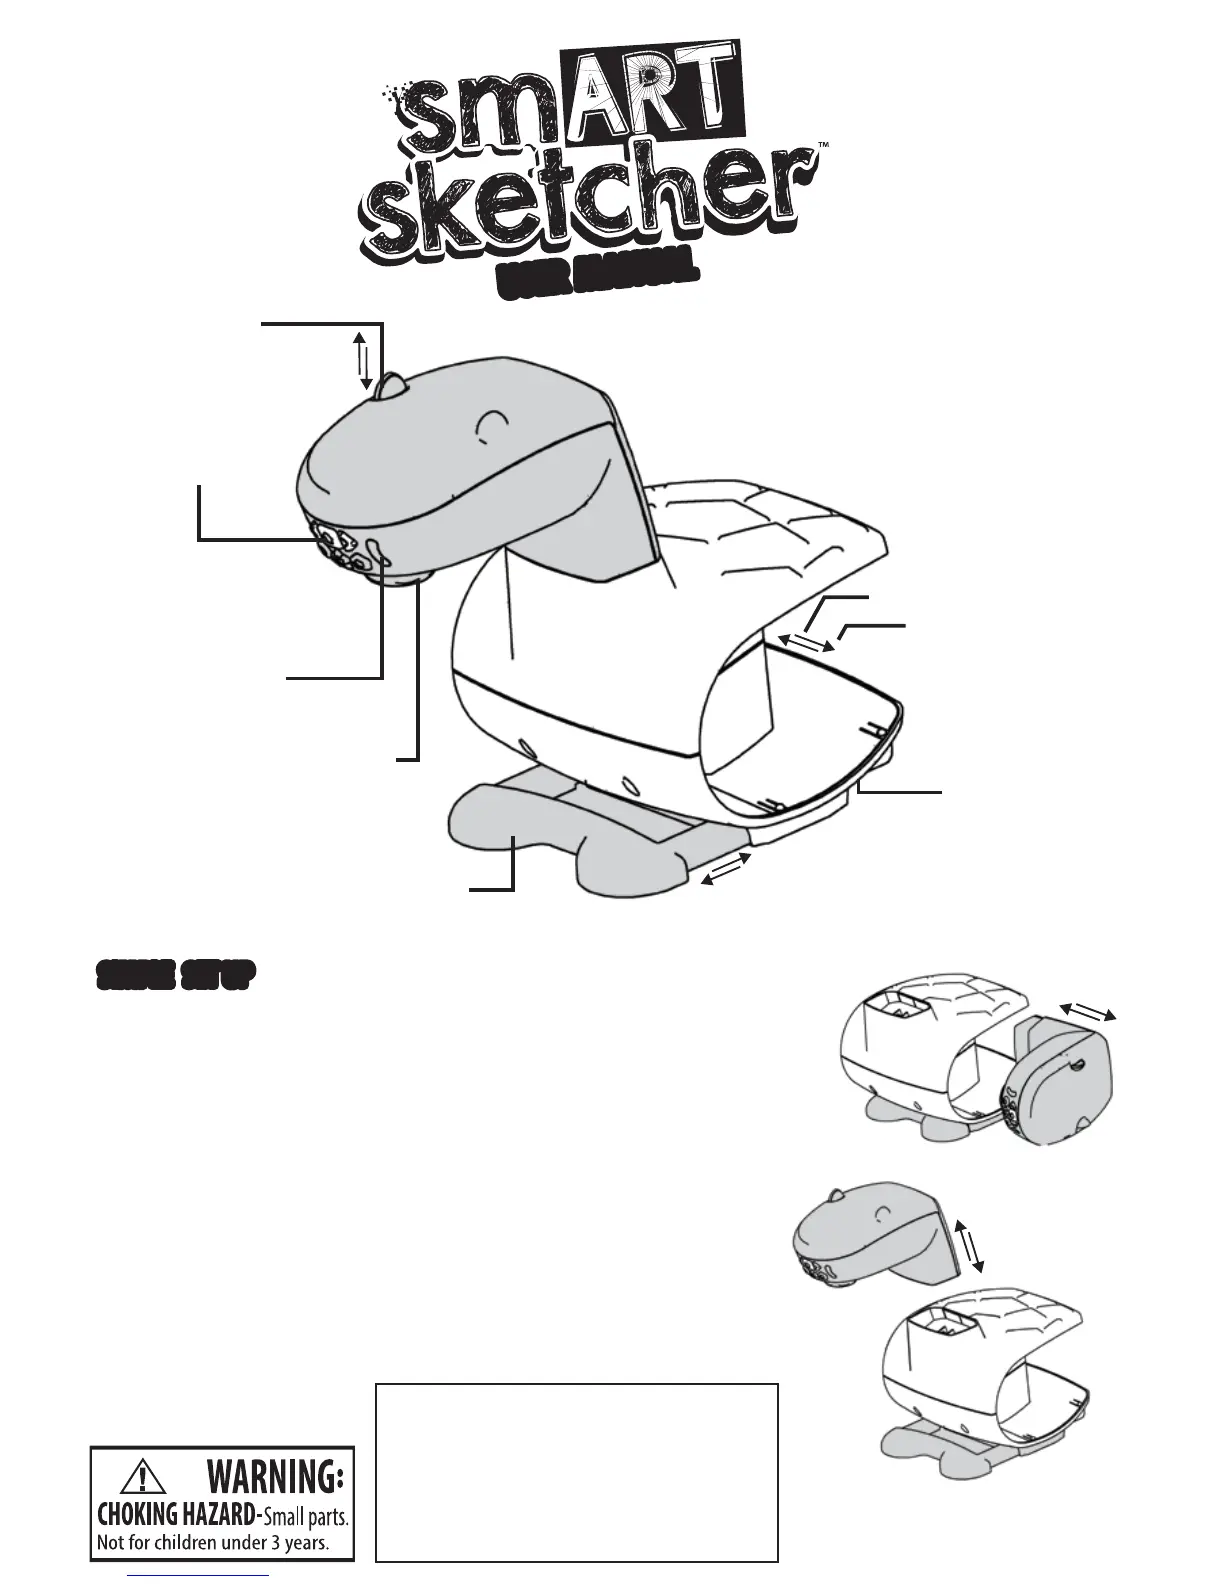
Control Buttons
Paper Holder
On/Off Switch (back)
Power Jack (back)
*Battery Compartment (bottom)
Adjustable
Focus
Stability Legs
LED Indicators
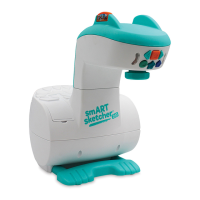
1. Separate the blue projector head from the white base unit.
2. Insert blue unit into top of white base until you hear a click.
3. Insert 4 D batteries (not included) or plug-in the smART sketcher™
AC Adapter (sold separately).
4. Pull out the blue legs to stabilize the projector and create
a paper holder.
5. Flip the switch on the back to turn on the projector.
6. Insert the pre-loaded activity pack into the top of the projector.
7. After 10 minutes with no activity the projector light will
automatically turn off. Reactivate the light by using the buttons
in the app or on the projector.
For more fun, additional Creativity and Learn-A- Language
Alphabet Packs are available at: www.smartsketcher.com.
Content
Card Slot
SIMPLE SET UPSIMPLE SET UP
USER MANUALUSER MANUAL
Not recommended for children under
3 years of ages. As with all electric
products, precautions should be
observed during handling and use to
prevent electric shock.
AC adapter output: 6V, 2A
CAUTION
–
ELECTRIC TOY:
60 Hz