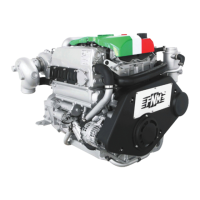
38 – FNM® Series HPE – Installation Manual
For proper calibration of the sensor follow the instructions in
chapter 6.9 – Calibration of trim and fuel level signals on the
CANBUS instrument .
6.9 Calibration of trim and fuel level signals on
the CANBUS instrument
To obtain the correct functioning of the trim and fuel level
sensor, it is necessary to follow these configuration guidelines
for each instrument panel connected. To navigate the panel
settings follow the information on the user manual of the
instrument.
Press the up and down arrows to move through the
screens, press MENU quickly to cancel and hold
MENU long to confirm.
1. Turn on the panel
2. Access the MODIF MENU, then select ORIGIN. DATA,
TANKS, T1:FUEL.
3. Select the type of sensor: US 240-33 or EU 10-180.
4. Select the analogue signal input on pin 3 of the connector
1: AI#3 P1-8
5. Exit the menu
6. Access the MODIF MENU, then select ORIGIN. DATI,
TRIM, SENSOR.
7. Select ANALOG.
8. Turn off the panel.
At this point the two instruments are working properly.
The selection of the fuel sensor settings is required
for the proper operation of the trim even if no fuel
sensor is connected.
Before setting the sensors with this procedure, and if some
instrument configurations hinder the proper operation it is
possible to make a MASTER RESET from the SYSTEM menu
to return the instrument to the factory settings. In this case, at
the engine selection request it is necessary to indicate
GENERIC.
The calibration procedure that follows is mandatory
for fly-bridge installations. During the procedure
make sure that systems are connected as in Figure
46 sopra and that on both panels the instruments are
turned on.
For installations with double panel (fly-bridge) and junctions on
the two extension cables, or if at the end of the procedure,
even after a MASTER RESET, the sensors do not work, it is
possible to make a detailed calibration of the trim and diesel
sensors. Follow this procedure for the TRIM sensor:
9. Enter the ORIGIN menu. DATA, and then select TRIM
and CAL SENDER.
10. Move your foot in the lowest position (ALL DOWN ), then
press MODE for more than 1 second.
11. Move your foot in the highest position (ALL UP), then
press MODE for more than 1 second.
12. The system confirms with SETTINGS SAVED and a
BEEP.
Follow this procedure for the fuel sensor:
13. Enter the SETUP FUEL menu , then select CAL
SENDER.
14. Choose the calibration mode: 2, 3 or 5 points.
15. For each point on the mode selected (in 3 points every
half tank is calibrated, in 5 points in every quarter), move
the sensor to the desired position, then press MODE for
more than one second.
16. The system confirms with SETTINGS SAVED and a
BEEP.
17. For fly-bridge installations repeat the procedure on the
second panel .
6.10 Transmission oil level alarm (if present)
Connect the transmission oil level alarm switch as follows:
1. Signal: connect the additional yellow-blue wire labelled
"GEAR OIL" on the extension cable, near the ECU.
2. Ground: lead to a ground point of the electrical system,
possibly near the battery.
The transmission oil level alarm is connected to the
panel at a red signal LED and is powered at 12V.
Test the alarm before proceeding with the
installation. The alarm failure may cause malfunction
of the transmission.
 Loading...