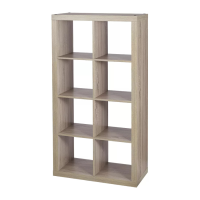
Do you have a question about the for Living 424230 and is the answer not in the manual?
Key safety warnings and cautions to prevent injury during use and assembly.
Information on contacting customer service and preparing for assembly.
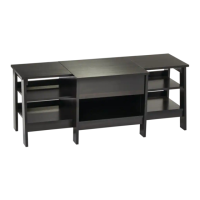
Install cam screws into various unit components as per diagram.
Insert large and small hidden cams into designated holes on unit parts.
Fasten moldings to shelves and bottoms using flat head screws.
Attach long and short skirts to the center bottom and other bottoms.
Connect the left upright to the center bottom and back panel.
Connect the right upright to the center bottom and back panel.
Attach the center legs to the long skirt and center bottom.
Attach the right shelf and right bottom to the right upright.
Fasten right brace to legs and legs to right shelf/bottom.
Attach the left shelf and left bottom to the left upright.
Fasten left brace to legs and legs to left shelf/bottom.
Attach the right and left cabinets to the unit's frame.
Connect top panels to legs, uprights, and braces.
Assemble drawer sides, back, bottom, and front.
Attach drawer right and left sides to the drawer box.
Attach top moldings, apply warning labels and appliques.
Guidelines for checking screws, placement, moving, and cleaning the unit.
| Brand | for Living |
|---|---|
| Model | 424230 |
| Category | Indoor Furnishing |
| Language | English |