EasyManua.ls Logo

Ford Explorer Sport Trac 2005 - User Manual

Ford Explorer Sport Trac 2005
12 pages
Print Icon
To Next Page IconTo Next Page
Loading...
May 2004
First Printing
Quick Reference Guide
Explorer Sport Trac
Litho in U.S.A.
*F5L2J19G217BA*
This Quick Reference Guide is not intended to replace your
Owner’s Guide, which contains more detailed information
concerning the features of your vehicle and important
safety warnings to help reduce the risk of injury to you and
your occupants. Always carefully read your entire Owner’s
Guide when first learning about your vehicle and consult the
appropriate chapter when questions arise.
All information contained in the Quick Reference Guide
was accurate at the time of duplication. We reserve the right
to change features, operation and/or functionality of any
vehicle specification at any time. Your Ford dealer is the best
source for the most current information.
For detailed operating and safety information, please consult
your Owner’s Guide.
Ford Motor Company
Customer Relationship Center
P.O. Box 6248 Dearborn, Michigan 48121
1-800-392-3673 (FORD)
(TDD for the hearing impaired: 1-800-232-5952)
5L2J-19G217-BA
Question and Answer IconNeed help?

Do you have a question about the Ford Explorer Sport Trac 2005 and is the answer not in the manual?

Summary

Premium Dual Media Radio

Volume;Power Control

Controls system on/off and adjusts volume.

AM;FM Select

Selects AM or FM frequency bands or switches to radio play.

Seek Function

Finds next station or track; moves through tape selections.

Scan Function

Samples listenable stations or brief audio selections.

Tune Adjust

Moves to the next frequency up or down the band.

Tape;CD Select

Starts tape or CD play, toggles between single/changer modes.

Autoset Memory Preset

Automatically sets strong radio stations without losing manual presets.

Setting the Clock

Sets the hour and minute for the clock display.

Select Audio Output

Adjusts sound output and distribution (BASS, TREB, etc.).

Setting Memory Preset Stations

Saves preferred radio stations to numbered controls.

Audiophile Satellite-Ready In-Dash Six-CD Radio

Scan Function

Samples listenable stations or brief CD selections.

CD;AUX Mode Selection

Selects CD or AUX modes, displays loaded disc number.

Loading CD

Loads a CD into a slot or activates autoload.

Volume;Power Control

Controls system on/off and adjusts volume.

AM;FM Select and Autostore

Selects AM/FM bands and activates Autostore feature.

Satellite Feature

Enables satellite reception with an available kit.

Disc;Tune CAT

Tunes radio or selects CD disc; CAT for satellite radio.

Digital Signal Processing

Selects desired signal mode for audio output.

Seek Function

Tunes to next station or selects next track on disc.

Setting the Clock

Sets the hour and minute for the clock display.

Setting Memory Preset Stations

Saves preferred radio stations to numbered controls.

Climate Control System

Temperature Control

Adjusts the temperature of the airflow inside the vehicle.

Fan Speed Control

Adjusts the volume of air circulated in the vehicle.

A;C Operation

Uses outside air to cool the vehicle via instrument panel vents.

Max A;C Operation

Uses recirculated air for faster cooling via panel vents.

Panel Vent Distribution

Distributes outside air through instrument panel vents.

Panel and Floor Distribution

Distributes air through panel and floor vents.

Floor Vent Distribution

Distributes outside air through the floor vents.

Floor and Defrost Distribution

Distributes air through windshield defroster and floor vents.

Defrost Vent Distribution

Distributes air through windshield defroster vents.

Essential Information

Tire Pressure

Details tire pressure specifications and checks.

Fuel Tank Capacity

Specifies fuel tank size and fuel type recommendations.

Fuses

Explains fuse function and locations for electrical components.

Fuel Pump Shut-Off Switch

Describes the location and reset procedure for the fuel pump switch.

Changing the Tires

Provides guidance on safely changing a flat tire.

Location of Spare Tire and Tools

Details where the spare tire, jack, and wrench are stored.

Roadside Emergencies

Outlines Ford's complimentary roadside assistance program details.

Vehicle Controls and Features

Headlamp;Panel Dimmer Control

Controls headlamp operation and panel lighting intensity.

Check Engine Lamp

Indicates potential engine malfunctions detected by the OBD-II system.

ABS Warning Lamp

Illuminates momentarily during ignition; indicates ABS system status.

Hazard Flasher Control

Activates all hazard flashers simultaneously for emergencies or warnings.

Gearshift;Overdrive Control

Manages transmission drive positions and overdrive settings.

Four-Wheel Drive (4 X4) Control

Selects between 2WD, 4X4 HIGH, and 4X4 LOW drive modes.

Premium Dual Media Radio

Details operation of the premium dual media radio system.

In Dash Six-CD Radio

Explains operation of the in-dash six-CD radio system.

Power Down Back Window Control

Controls the lowering and raising of the vehicle's back window.

Climate Control System

Details operation of the climate control system.

Speed Control (if equipped)

Operates and sets the vehicle's cruise control speed.

Hood Release

Locates and explains how to release the vehicle's hood.

Turn Signal and Wiper;Washer Control

Controls turn signals, wipers, and washer fluid operation.

Additional Features

Remote Entry System

Operates door locks, panic alarm, and interior lighting remotely.

Keyless Entry System

Allows locking/unlocking doors without a key, and autolock feature.

SecuriLock Passive Anti-Theft System

Immobilizes the engine, requiring a programmed coded key.

Door Controls

Manages power door locks, one-touch down windows, and window lock.

Overview

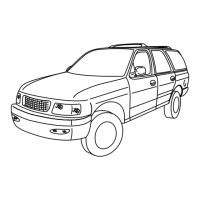
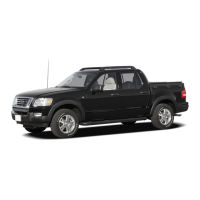
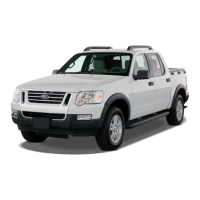
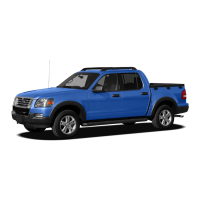
This document is a Quick Reference Guide for the 2005 Ford Explorer Sport Trac, providing essential information about its features, operation, and maintenance. It is designed to be used in conjunction with the Interactive Owner Experience CD-Rom for a more comprehensive understanding.

General Information and Safety:

The guide emphasizes that it is not a replacement for the Owner's Guide, which contains more detailed information, safety warnings, and instructions. Users are urged to read the entire Owner's Guide and the Driving Your SUV or Truck Supplement for safe driving precautions. The vehicle handles differently from an ordinary passenger car, especially in off-road conditions, and drivers are advised to drive with care and always wear a safety belt. All information in the guide was accurate at the time of duplication, but Ford reserves the right to change features, operation, and functionality at any time. The Ford dealer is the best source for the most current information.

Contact Information:

For detailed operating and safety information, users should consult their Owner's Guide. The Ford Motor Company Customer Relationship Center can be reached at P.O. Box 6248, Dearborn, Michigan 48121, or by phone at 1-800-392-3673 (FORD). A TDD number for the hearing impaired is also provided: 1-800-232-5952.

Audio Systems:

Premium Dual Media Radio (if equipped):

  • Volume/Power Control (A): Press to turn the audio system on or off. Rotate to raise or lower the volume.
  • AM/FM Select (B): In radio mode, press to select AM or FM frequency bands. In tape and CD modes, it stops play and begins radio play.
  • Seek Function (C): In radio mode, finds the next listenable station up or down the band. In tape mode, moves to the next/previous selection. In CD mode, selects the next/previous track.
  • Scan Function (D): In radio mode, plays a sampling of all listenable stations. In tape and CD modes, plays a brief sampling of all selections.
  • Tune Adjust (E): In radio mode, moves to the next frequency up or down.
  • Tape/CD Select (F): Press TAPE to start tape play; pressing during fast forward or rewind stops the tape. Press CD to start CD play; pressing repeatedly toggles between single CD and CD changer play (if equipped).
  • Autoset Memory Preset (G): Select AM, FM1, or FM2 bands, then press AUTO to activate autoset memory preset, which sets strong radio stations without losing manually preset stations. Press again to deactivate.
  • Setting the Clock (H): Press and hold CLK, then press SEEK to set the hour. Press and hold CLK, then press TUNE to set the minute.
  • Select (I): Adjusts sound output and distribution after selecting BASS, TREB, BAL, or FADE.
  • Setting Memory Preset Stations (J): Select AM, FM1, or FM2 bands, then select a station. Press and hold a numbered control until the sound returns.

Audiophile Satellite-Ready In-Dash Six-CD Radio (if equipped):

  • Caution: Do not use CDs with adhesive labels or irregularly shaped CDs, as they may get stuck. Homemade CDs should be identified with permanent felt tip markers.
  • Scan Function (A): In radio mode, samples listenable stations. In CD mode, samples selections on the current CD.
  • CD/AUX (B): Selects CD/AUX modes. Displays the number of loaded CDs (1-6). In radio mode, plays a loaded CD.
  • Loading CD (C): Press LOAD, then a preset number to select a slot. Press and hold LOAD to activate autoload.
  • Volume/Power Control (D): Turns the audio system on or off. Raises or lowers volume.
  • AM/FM Select (E): Selects AM/FM frequency band. Autostore feature sets the six strongest local radio stations without losing original presets. Press and momentarily hold AM/FM to activate AUTOSTORE.
  • Satellite (F): Equipped with satellite-ready capability. A dealer-installed kit is required for satellite reception, available only in the continental United States.
  • Disc/Tune CAT (G): In radio mode, moves to the next frequency up or down. In CD mode, selects a disc. CAT is available only with satellite radio.
  • Digital Signal Processing (H): Press DSP, then SEL to choose the desired signal mode.
  • Seek Function (I): In radio mode, finds the next listenable station. In CD mode, selects the next/previous track.
  • Setting the Clock (J): Press MENU until SELECT HOUR or SELECT MINUTE is displayed. Press SEL to set the time. Press MENU again to disengage.
  • Setting Memory Preset Stations (K): Select AM, FM1, or FM2 band, then select a station. Press and hold a numbered control until the sound returns.

Climate Control System:

  • Temperature Control (A): Rotates to adjust the airflow temperature inside the vehicle.
  • Fan Speed Control (B): Rotates to adjust the volume of air circulated.
  • A/C (C): Uses outside air to cool the vehicle. Airflow is from instrument panel vents only. Functions only if outside temperature is 43°F (6°C) or higher.
  • Max A/C (D): Uses recirculated air for quick cooling. Airflow is from instrument panel vents only. Noisier than A/C but more economical and efficient. Can prevent undesirable odors. Functions only if outside temperature is 43°F (6°C) or higher.
  • Panel (E): Distributes outside air through instrument panel vents.
  • Panel and Floor (F): Distributes outside air through instrument panel and floor vents.
  • Floor (G): Distributes outside air through floor vents.
  • Floor and Defrost (H): Distributes outside air through windshield defroster and floor vents.
  • Defrost (I): Distributes outside air through windshield defroster vents. Used to clear ice or fog.
  • Operating Tips: Do not leave airflow selector in MAX A/C or OFF when parked to allow the vehicle to "breathe" via outside air inlet vents. Do not place objects under front seats that interfere with airflow to the back seats.

Essential Information:

  • Tire Pressure: Set at the dealership according to the Tire Pressure Label on the driver's door jamb. Check regularly.
  • Fuel Tank Capacity: 22.5 gallons. Uses "Flex" fuel and "Regular" unleaded gasoline with an (R+M)/2 octane rating of 87 for optimum performance. Lower octane ratings may degrade performance.
  • Fuses: If electrical components are not working, a fuse may have blown. Consult Owner's Guide for changing fuses.
  • Fuel Pump Shut-Off Switch: After a collision, if the engine cranks but doesn't start, the switch (located in the passenger's footwell, by the kick panel) may need to be reset. Consult Owner's Guide.
  • Changing the Tires: If a flat tire occurs, gradually decrease speed, hold the steering wheel firmly, and move to a safe place. The vehicle is equipped with a spare tire that can be used as a regular tire. Consult Owner's Guide.

Location of Spare Tire and Tools:

  • Spare Tire: Under the vehicle, just in front of the rear bumper.
  • Jack, Wheel Nut Wrench, Jack Handle, Jack Handle Extension: In the passenger-side rear cab compartment, behind the access door in the trim panel.

Roadside Emergencies:

Ford offers a complimentary roadside assistance program, separate from the New Vehicle Limited Warranty. Available 24/7 for the New Vehicle Limited Warranty period (U.S.) or Basic Warranty period (Canada) of three years or 36,000 miles (60,000 km). Services include:

  • Changing a flat tire
  • Lock-out assistance
  • Jump-starts
  • Towing your vehicle
  • Limited fuel delivery For complete details, consult the Roadside Emergencies or Customer Assistance chapter in the Owner's Guide.

Roadside Assistance Centers:

  • United States: (800) 241-3673
  • Canada: (800) 665-2006

Headlamp/Panel Dimmer Control (2):

  • Operation: Rotate clockwise to the first position for parking lamps, instrument panel lamps, license plate lamps, and tail lamps. Rotate to the second position for headlamps.
  • Dimmer: Adjusts intensity of panel lighting. Rotate up to brighten, down to dim. Full up position (past detent) turns on interior lamps; full down position (past detent) turns them off.
  • Autolamp Delay System (if equipped): Headlamps can automatically turn on at night and off during the day. Delay can be set to keep headlamps on for up to three minutes after the key is OFF. Consult Owner's Guide.

Check Engine Lamp (3):

  • Function: Illuminates when ignition is ON to check the bulb. Solid illumination after engine start indicates an On Board Diagnostics System (OBD-II) malfunction.
  • Fuel Cap Lamp: Illuminates when the fuel cap is not correctly installed. Continuous driving with this light on may cause the check engine warning light to come on. Secure fuel cap by turning clockwise 1/8 of a turn until it stops. Consult Owner's Guide for OBD-II information.

ABS Warning Lamp (4):

  • Function: Illuminates momentarily when ignition is ON. In an emergency, apply continuous force on the brake to prevent wheel lock on slippery surfaces; do not pump brakes. Pulsation or noise is normal.

Hazard Flasher Control (5):

  • Location: On the steering column, behind the steering wheel.
  • Operation: Press to activate all hazard flashers simultaneously in an emergency or to warn traffic. Press again to turn off. Can be operated when ignition is off.

Gearshift/Overdrive Control (6):

  • Overdrive: Normal drive position for best fuel economy.
  • Deactivation: Deactivate Overdrive (O/D OFF) only when driving with a heavy load, towing a trailer up or down steep hills, or when additional engine braking is desired. Press the transmission control switch on the end of the gearshift lever to deactivate.

Four-Wheel Drive (4X4) Control (7) (if equipped):

  • 2WD: Powers rear wheels only, used for street and highway driving.
  • 4X4 HIGH: Used for extra traction (snow, icy roads, off-road). Should not be operated on dry pavement.
  • 4X4 LOW: Uses extra gearing for maximum power to all four wheels.
  • Shifting 2WD to 4X4 HIGH: Turn the control between positions at any forward speed, as long as rear wheels are not slipping.
  • Shifting to/from 4X4 LOW: Bring vehicle to a complete stop. Press the brake. Place gearshift in N (Neutral), then turn the control to the desired position.

Power Down Back Window Control (10):

  • Operation: Turn counterclockwise and release to lower window to full-open. Turn clockwise and release to raise window to full-closed. Press once to move window to vent position. If already in vent position, pressing the control will not cause movement.
  • Requirement: Ignition switch must be in ON or ACC position.
  • Safety: All rear-seat occupants and/or cargo must be properly restrained and clear of the back window opening before operation.

Speed Control (12) (if equipped):

  • Operation: Must be ON, vehicle speed at or above 30 mph (48 km/h).
  • Set Speed: Press SET ACC. Press SET ACC again to set a higher speed. Press COAST to set a lower speed. Press RSM to return to a previously set speed.
  • Turn Off: Press OFF button or turn off vehicle's ignition. Press brake pedal to disengage.

Hood Release (13):

  • Internal Release: Pull handle under bottom of instrument panel near steering column.
  • Auxiliary Latch: Release located in the center between the hood and the grille.
  • Support: Lift hood and secure with prop rod.

Turn Signal and Wiper/Washer Control (14):

  • Wiper Speed: Rotate end of control to increase or decrease wiper speed.
  • Speed-Sensitive Wipers: Wiper speed automatically adjusts with vehicle speed when control is on.
  • Single Wipe: Push control end briefly (no wash).
  • Three Wipes with Wash: Push and hold for three wipes with wash.
  • Long Wash Cycle: Long push and hold activates a longer wash cycle (up to ten seconds).
  • Rear Window Wiper/Washer (Explorer Sport Trac): Control located to the right of the audio system. Turn clockwise for desired interval speed. Press to activate washer fluid.
  • Maintenance: Occasional cleaning of wiper blades is required for extended quality.

Remote Entry System (if equipped):

  • Unlock Driver's Door: Press control once.
  • Unlock All Doors: Press control twice. Interior lamps illuminate.
  • Lock All Doors: Press control once. Pressing a second time within three seconds chirps horn and flashes lights to confirm doors are closed and locked.
  • Panic Alarm: Press control to activate. Press again or turn ignition to ON to deactivate. Alarm operates only when ignition is in OFF or ACCESSORY position.
  • Interior Lights: Turn on when remote unlocks doors or sounds panic alarm. Turn off when ignition switch is ON or after 25 seconds of illumination. Dome lamp control must not be set to OFF.

Keyless Entry System (if equipped):

  • Location: Outside portion of the driver's door.
  • Function: Locks/unlocks doors without a key, or activates/deactivates autolock. Consult Owner's Guide for more information.

SecuriLock™ Passive Anti-Theft System:

  • Function: Engine immobilization system. Prevents engine from starting unless a coded key programmed to the vehicle is used.
  • Security: Coded keys cannot be copied. Spare coded keys can be purchased from the dealership.

Door Controls:

  • Power Door Locks (A): Left portion unlocks all doors, right portion locks all doors. Located on driver and front passenger door panels.
  • One-Touch Down (B): Fully opens driver's window when AUTO is pressed completely down and released quickly. Press again to stop window.
  • Power Windows (C): Top portion of rocker switch closes window, bottom portion opens.
  • Window Lock (D): Allows only the driver to operate power windows. Left side locks out all other window controls; right side restores them.

Ford Explorer Sport Trac 2005 Specifications

General IconGeneral
BrandFord
ModelExplorer Sport Trac 2005
CategoryAutomobile
LanguageEnglish

Related product manuals