CHAIR OPERATION (CONTINUED)
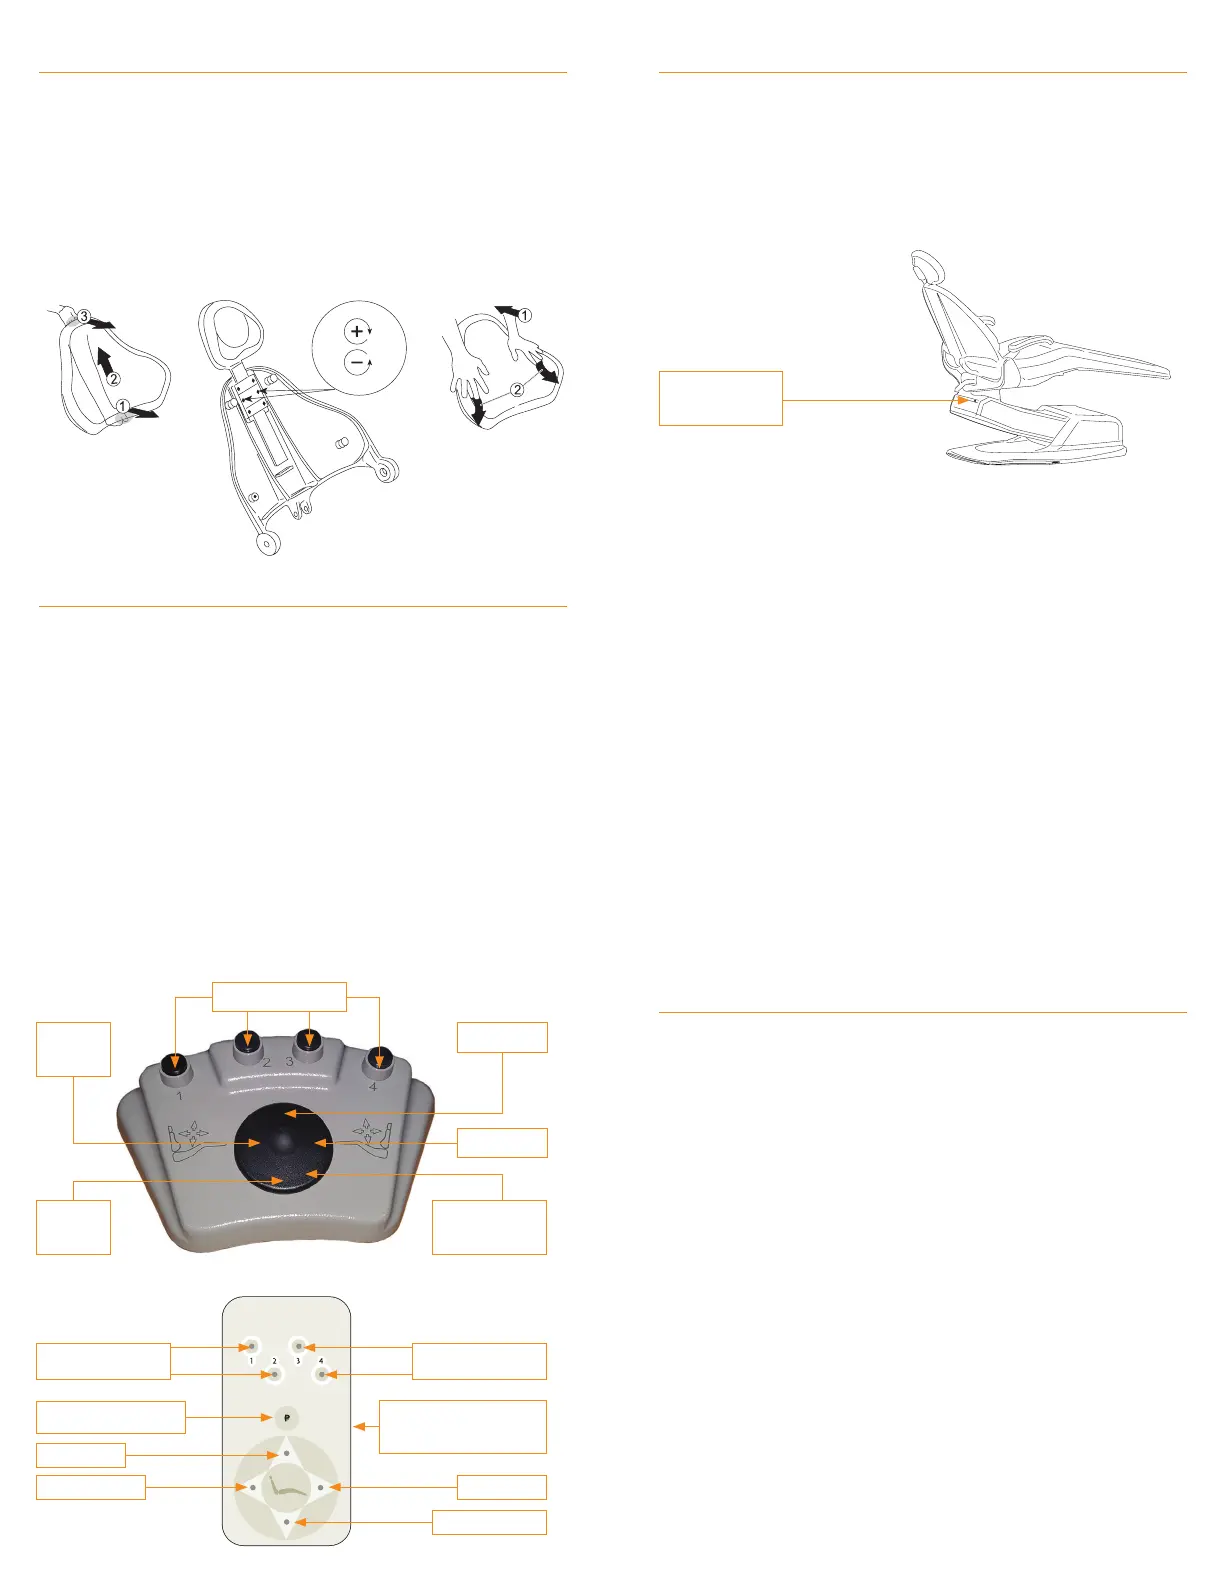
STEP 1: Remove backrest cushion (FIG. 6).
STEP 2: Adjust screws (FIG. 7).
STEP 3: Replace backrest cushion (FIG.8).
TOOLS NEEDED: Phillips screwdriver
Headrest Tension Slide Adjustment
FIG. 6: BACKREST FIG. 7: SCREWS FIG. 8: CUSHION
FIG. 9: FOOT SWITCH CONTROL
FIG. 10:
TOUCHPAD CONTROL
Proper positioning of the articulating headrest to support the head
in its natural relationship to the spine reduces tension in the neck
and jaw muscles decreasing the request for “open wider please”.
NOTE: Common presets: 1, 2 and 3 for operating
positions and 4 for patient exit.
NOTE: Holding the directional button makes the chair
run until the button is released.
STEP 1: Select the direction of travel (Base up; Base down;
Back up; Back down.
STEP 2: Press and release the corresponding button to move
the chair to factory-set travel limit.
Manual Positioning
FOOT SWITCH & TOUCHPAD CONTROL (FIG. 9 & 10)
AUTO BUTTONS
AUTO BUTTONS
PROGRAM BUTTON
BASE UP
BACK DOWN BACK UP
BASE DOWN
AUTO BUTTONS
BACK
DOWN
BASE UP
BACK UP
BASE
DOWN
MANUAL DISC
CONTROLS
MANUAL TOUCHPAD
CONTROLS
FIG. 11: PROGRAM BUTTON
NOTE: Reprogramming a new auto position erases the old position.
STEP 1: Using the manual touchpad controls, maneuver the
chair to the desired position.
STEP 2: Press the program button momentarily (FIG. 11),
the chair will beep twice indicating it is ready to assign
this position to an auto button.
STEP 3: Press an auto button to assign it to this position. The
chair will beep 3 times to indicate the program is complete.
STEP 4: Program failure is indicated by more than 3 beeps.
STEP 5: Repeat steps 1-3 to program the remaining auto buttons.
Programming and Reprogramming Auto Positions
FOOT SWITCH & TOUCHPAD CONTROL (CONT)
PROGRAM
BUTTON
Guidelines for Infection Control in Dental Health Care
Settings can be found at: www.cdc.gov.
The American Dental Association’s recommendations
can be found at: www.ada.org.
The Organization for Safety and Asepsis Procedures
recommendations can be found at: www.osap.org.
Proper maintenance and regular cleaning will prevent excessive
dirt from accumulating. To help keep your quality fabrics looking
their best, follow these guidelines to extend the life of the
Naugahyde® fabric.
NOTE: Pressing any button on a chair control while the chair
is moving to a programmed position will immediately stop the
movement of the chair, and three short beeps will sound. To
continue and complete the automatic positioning of the chair,
simply press the desired position button a second time.
STEP 1: Press the #1, 2, 3, or 4 auto button once on the foot
switch control or touchpad control.
STEP 2: A beep will sound.
STEP 3: The chair will automatically stop in the programmed
position selected.
STEP 1: Wipe up spills as soon as they occur using soap
and water or alcohol based cleaners.
STEP 2: Sanitize using disinfectants such as
(1:5) bleach/water solution.
STEP 3: For stubborn stains, wipe off with isopropyl alcohol
as soon as possible.
STEP 4: Thoroughly rinse all solution residue with clean
water and air dry.
Activating Auto Positions
UPHOLSTERY CARE
 Loading...