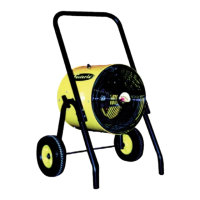
ll Fostoria FES models come fully assembled with
the handle attached in a lowered shipping position.
Tools Required: (2) 7/16” sockets or box wrenches
To position the handle at operating height:
Step 1: Remove and keep the hardware securing the
handle to the legs.
Step 2: Raise handle until holes align with the uppe
holes in the legs.
Step 3: Re-insert hardware as shown.
“FES” ASSEMBLY
Bolts
Washers
Washers
Nuts
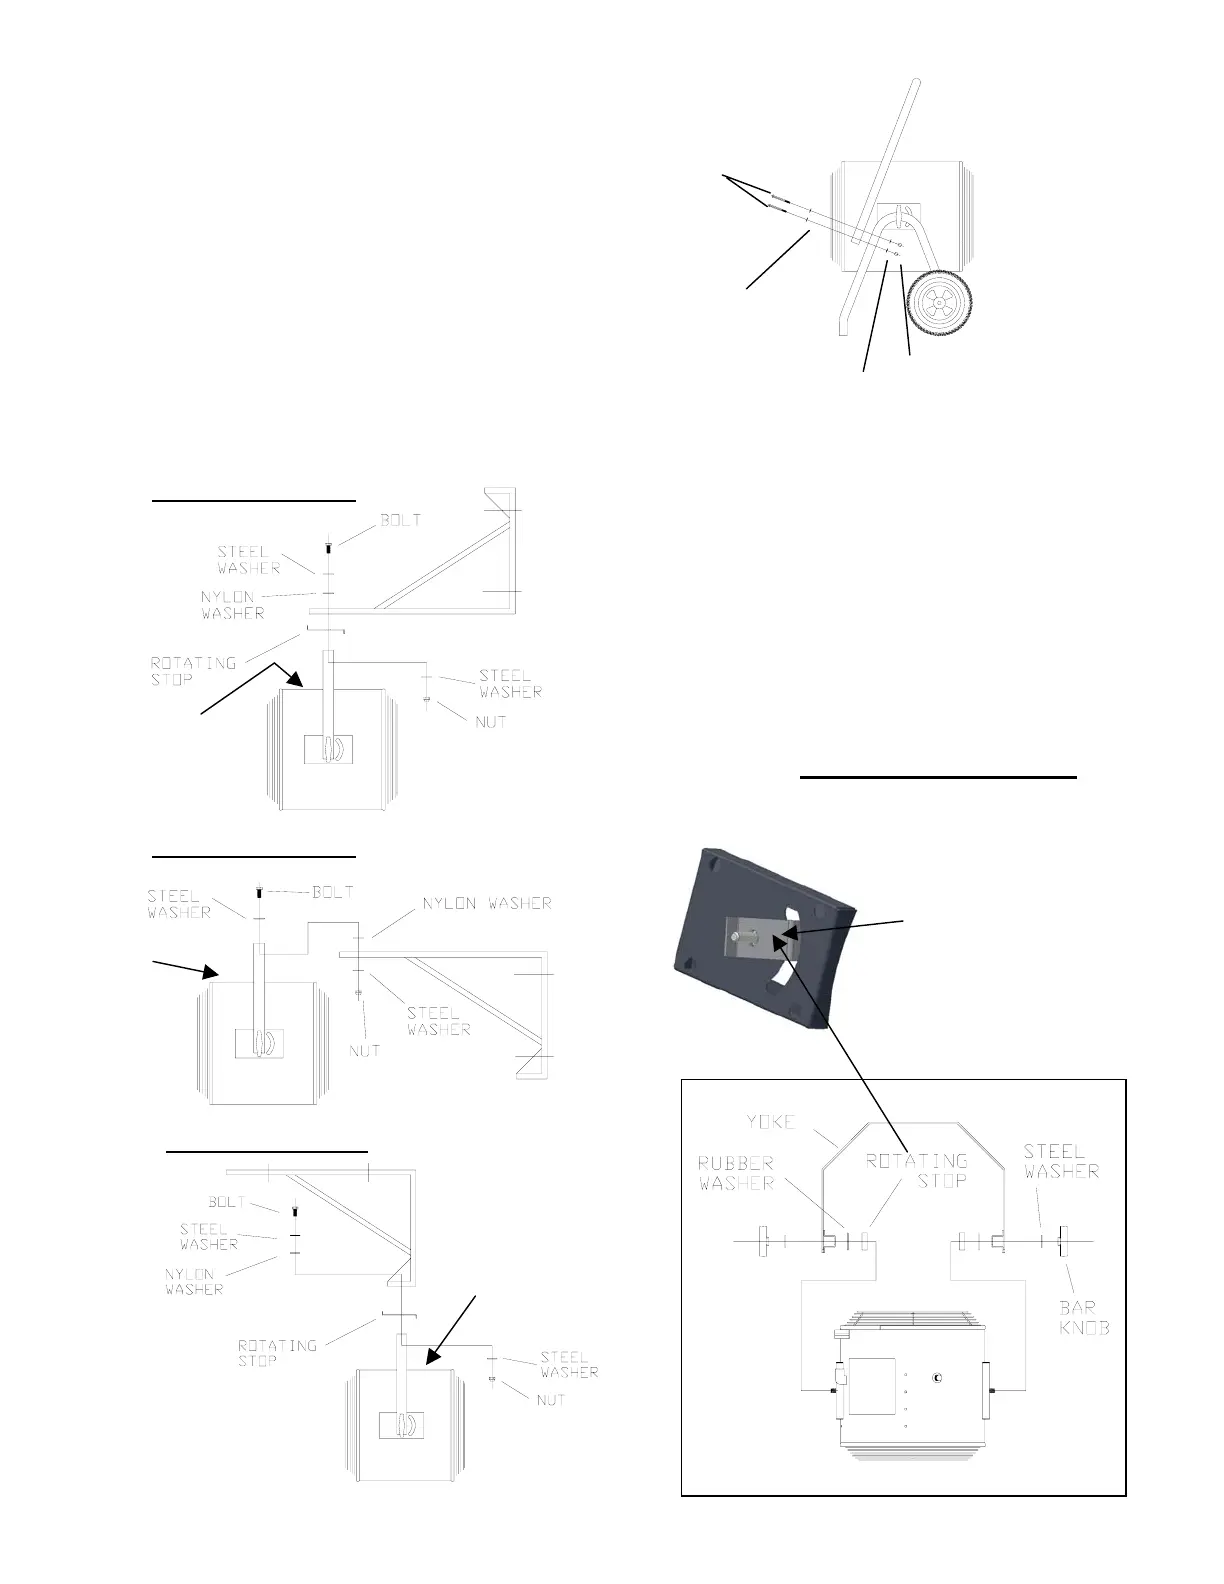
“YES” ASSEMBLY & MOUNTING INSTRUCTIONS
Wall Mount Option #1
Wall Mount Option #2
Ceiling Mount Option
ll Fostoria YES models require some assembly. Tools
Required: (2) 3/4” sockets or box wrenches
Step 1: Assemble Yoke to heater p er “Yoke/Heater Assembly”
detail. No tools are required.
Step 2: Secure wall/ceiling mounting bracket to appropriate
surface that will support a min. weight of 10 0lbs.
NOTE: all mounting hardware is customer s pecified and
supplied.
Step 3: Assemble Unit to mounting bracket following instructions
of chosen mounting option.
NOTE: Heater cannot be mounted upside down, refer to product
ID label for “TOP” of Heater.
TOP
of
Heater
TOP of
Heater
TOP
of
Heater
YOKE / HEATER ASSEMBLY
TYPICAL FOR ALL MOUNTING OPTIONS
Install (1) Rotating
Stop on each side of
heater as shown in
detail.
Issue Date: 4-19-02 Rev. Date: 12-12-03 Rev. Level: 07 OIPM P/N 3420458 Page 3 of 7
 Loading...