EasyManua.ls Logo

Franke Titan TTD 611-97 User Manual

Franke Titan TTD 611-97
8 pages
To Next Page IconTo Next Page
Page #1 background imageLoading...
Page #1 background image
Titan TTD
TTD 611-97 TTD 621-116 TTD 651-97
EN Installation and user manual Sinks, Tectonite
DE Installations- und Gebrauchsanweisung Spüle, Tectonite
FR Manuel d‘installation et mode d‘emploi Eviers, Tectonite
NL Installatie- en gebruikershandleiding Spoeltafels, Tectonit
IT Manuale per l‘installazione e l‘uso Lavelli, Tectonite
ES Manual de instalación y servicio Fregaderos, Tectonite
PT Manual de instalação e de assistência Lava-louças, Tectonite
EL
Εγκατάσταση και εγχειρίδιο συντήρησης Νεροχύτες, Tectonite
DA Installations- og servicevejledning Vaske, Tectonit
NO Installasjons- og servicemanual Vasker, Tectonitt
SV Installations- och servicehandbok Tvättställ, Tectonite
CS Montážní a servisní návod ezy, Tectonite
PL Instrukcja montażu i obsługi Zlewozmywaki, Tektonit
SK Návod na italáciu a obsluhu Drezy, Tectonit
RO Manual de instalare și service Chiuvete, Tectonite
BG
Ръководство за монтаж и обслужване Мивки, Tectonite
UK
Посібник зі встановлення та обслуговування Мийки з Тектоніту
RU
Руководство по установке и обслуживанию Мойки из Тектонайта
TR Kurulum ve kullanım kılavuzu Evyeler, Tectonit
ZH
安装维修手册 ,构
AR
   Tectonite

Question and Answer IconNeed help?

Do you have a question about the Franke Titan TTD 611-97 and is the answer not in the manual?

Franke Titan TTD 611-97 Specifications

General IconGeneral
TypeKitchen Sink
MaterialStainless Steel
ColorSilver
Installation TypeUndermount
Mounting TypeUndermount
WarrantyLimited Lifetime
Number of Bowls2
InstallationUndermount
Bowl ConfigurationDouble

Summary

Sink Installation Overview

Inset Installation

Guides through the steps for installing the sink in an inset configuration.

Installation Steps

Step 1: Sealing

Applies sealant around the countertop cutout for the sink.

Step 2: Placement

Positions the sink into the countertop opening.

Step 3: Securing

Secures the sink from underneath using mounting clips.

Fastening and Finalization

Step 4: Tightening Clips

Tightens the mounting clips to secure the sink firmly.

Step 5: Final Placement

Ensures the sink is correctly seated and flush with the countertop.

Post-Installation and Care

Step 6: Curing Time

Allows the sealant to cure for 24 hours before use.

Cleaning Recommendations

Provides guidance on suitable cleaning products and methods.

Technical Specifications

Model Dimensions

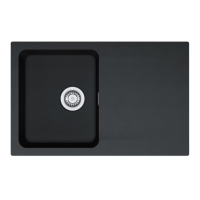
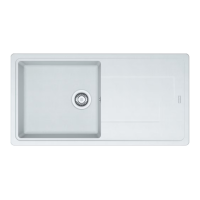
Details the dimensions (A, B, r1) and minimum cabinet size for each model.

Related product manuals