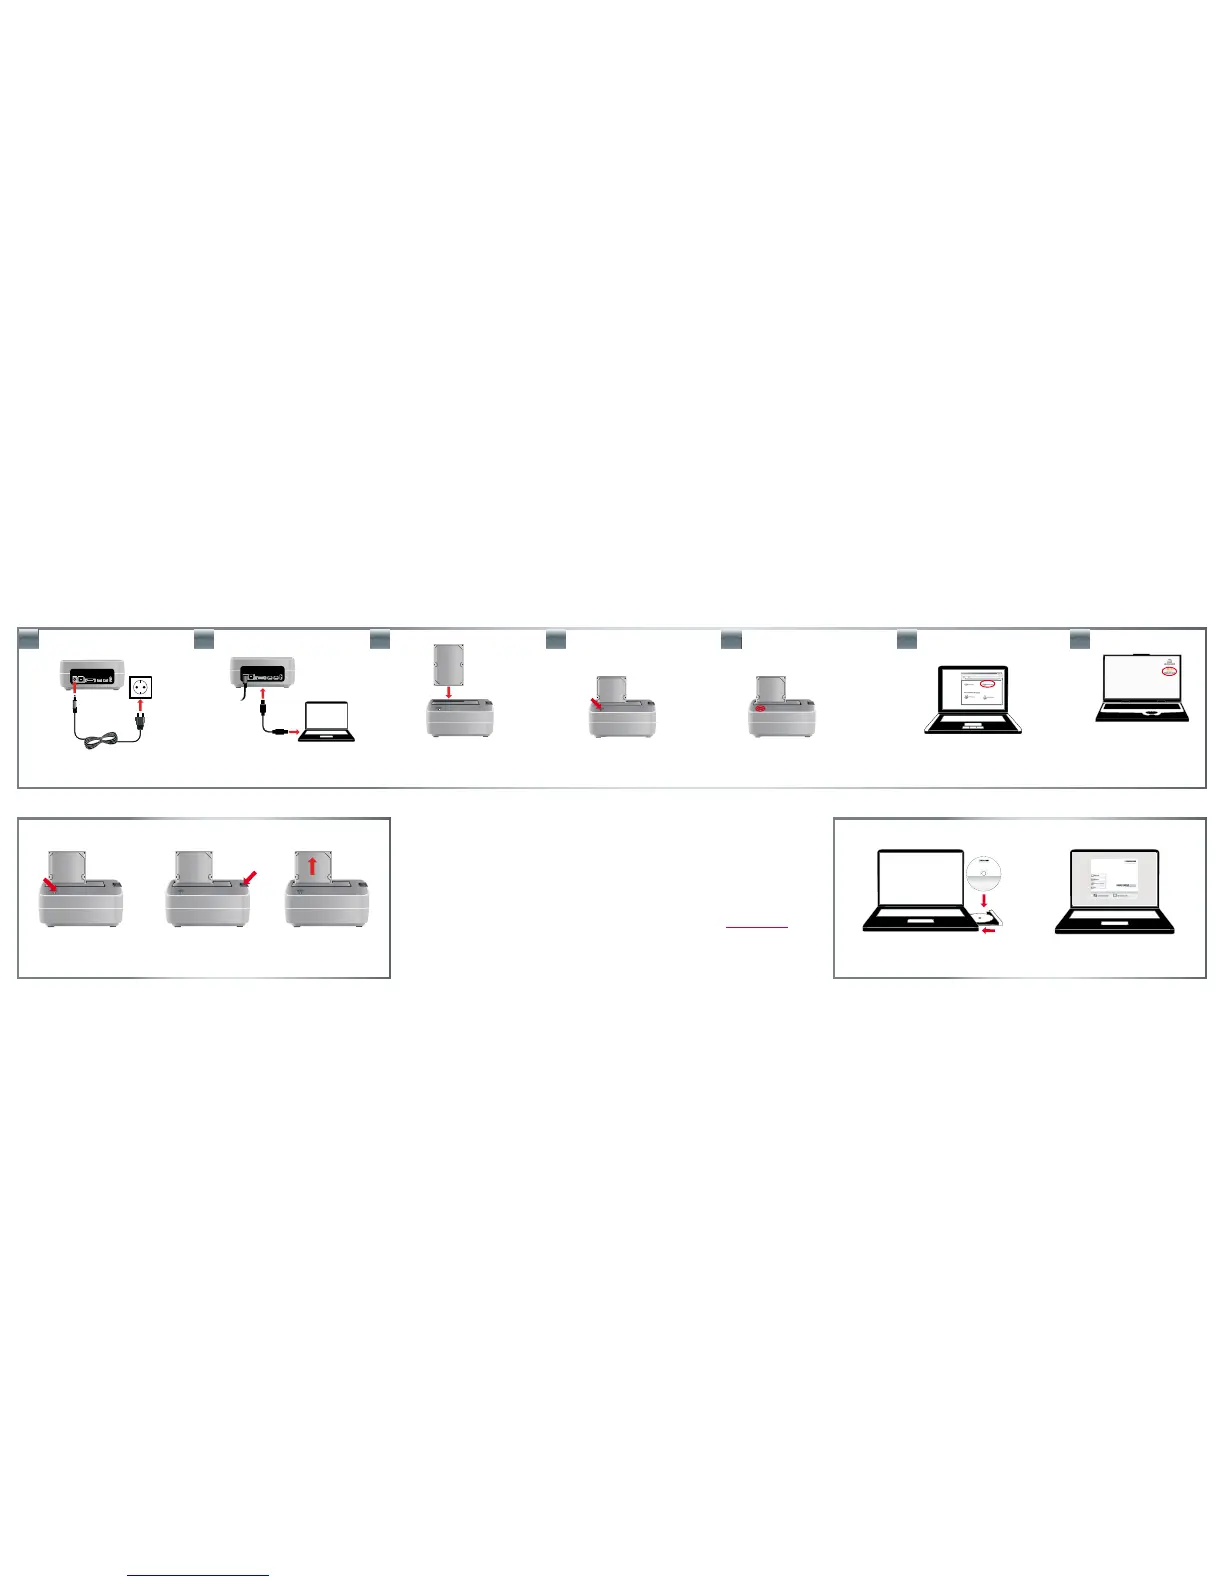
Connect the power supply.
Switch on the HD Dock.
Connect the cable (USB, FireWire, eSATA)
to the port of your HD Dock and your
computer (USB, FireWire, eSATA).
Insert the hard drive vertically into the
drive slot, make sure the hard drive ts
rmly in the connector inside the dock.
HDD installation (depending on model)
LED on:
HD Dock switched on
LED ashes: Data transfer
PC:
Your hard drive appears in "My
Computer" and can be used now.
Mac:
Your hard drive appears on the
desktop and can be used now.
Partition and format your hard drive (if required).
Manuals, Support, Freecom ProductsInsert the Manual CD.
Gently remove the
hard drive o in vertical
direction.
Press the button
down.
Switch o the power.
1.
ATTENTION:
Hard drives may get hot during operation! Keep this in mind when touching the hard drive.
Note (HD Duplicator only): If you are connecting the Hard Drive Duplicator via eSATA, the main board of
your computer must support the “Port Multiplier” mode for SATA, so that both hard disks will be recognised
simultaneously by your computer. If this is not the case, only one hard disk will be recognised by the computer. In
this case, use the USB connection, so that both hard disks are displayed.
Need assistance? Have questions?
In case you have a question about the use of this product, need information about other Freecom products or
need technical assistance, please contact the Freecom Service Center for your country. See www.freecom.com
for details.
Freecom oers free unlimited helpdesk support.
Ejecting the HDD from the Dock
Optional: Support, Manuals, Freecom Products
2. 3. 6b.6a.5.4.
 Loading...
