Do you have a question about the FreeWave ZumLink Z9-PE and is the answer not in the manual?
The ZumLink Z9-PE is a wireless device designed for robust data communication, offering a reliable solution for various applications. This Quick Start Guide provides a comprehensive overview of its setup, configuration, and maintenance, ensuring users can quickly integrate it into their systems. The device is sold as a fully enclosed unit, assembled at the FreeWave factory, and any attempt to open it will void the warranty, emphasizing its sealed and tamper-proof design.
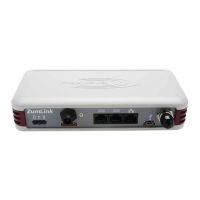
The ZumLink Z9-PE serves as a wireless data communication device, enabling the transmission of data packets over a radio link. It is designed to be configured and managed through a Command Line Interface (CLI), accessible via a terminal program like Tera Term. This allows for detailed control over its network settings, including IP address and node ID, which are crucial for establishing and maintaining communication within a network. The device supports standard Ethernet connections for data packets and a micro-USB port for configuration, providing flexibility in how it integrates with existing infrastructure. Power is supplied via a dedicated power cable with flying leads, accommodating a wide input voltage range, making it adaptable to various power environments. The ZumLink Z9-PE is also designed to work with FCC-approved antennas, ensuring compliance with regulatory standards for wireless operation.
Setting up the ZumLink Z9-PE involves a straightforward process that begins with connecting the device to a computer. This includes connecting the power cable, an Ethernet cable for data, and a micro-USB cable for configuration. Upon connection, the computer automatically detects the device and initiates the installation of necessary drivers, simplifying the initial setup. The AutoPlay feature guides the user through the driver installation, with on-screen messages confirming successful installation.
Once the drivers are installed, the next step is to establish a CLI connection using a terminal program. The guide specifically recommends Tera Term, detailing the steps to open a new connection, select the correct COM port, and configure serial port settings such as baud rate, data bits, parity, and stop bits. The default settings for the ZumLink Z9-PE are 115200 baud, 8 data bits, no parity, and 1 stop bit, which are automatically presented in the Tera Term serial port setup dialog.
After establishing the serial connection, users can log into the ZumLink CLI using predefined credentials (admin for both username and password). Once logged in, the CLI allows for critical network configurations, such as setting the IP address and node ID. These parameters are essential for identifying the device within a network and ensuring proper data routing. The CLI commands are simple and direct, requiring users to type ip_address=192.168.1.nnn and nodeld=nnn, followed by save to apply the changes. The nnn placeholder represents a unique three-digit number, highlighting the importance of assigning distinct identifiers to each device in a network.
The ZumLink Z9-PE is approved to operate within a broad input voltage range, offering flexibility in power supply options. However, it is strongly recommended to use a dedicated power supply line that can provide sufficient current to meet the device's operational demands. This ensures stable performance and prevents potential issues related to insufficient power.
The ZumLink Z9-PE is designed for minimal maintenance, primarily due to its fully enclosed and factory-assembled nature. The device is intended to be a robust, set-and-forget component in a system. However, certain considerations are important for its longevity and reliable operation.
One critical aspect of maintenance involves protecting the device from electrostatic discharge (ESD) and power fluctuations. The guide explicitly warns users to employ ESD protectors to shield the radio from electric shock and to provide filtered, conditioned power with over-voltage protection. This proactive measure helps prevent damage to the internal components, which could otherwise lead to device failure and costly replacements. Ensuring a stable and clean power supply is paramount for the ZumLink Z9-PE's long-term health.
The device's sealed design means that internal components are not user-serviceable. Any attempt to open the device voids the warranty, reinforcing the manufacturer's intent for it to be a self-contained unit. This design philosophy simplifies maintenance by eliminating the need for routine internal inspections or component replacements by the end-user. Instead, maintenance focuses on external factors such as power quality and environmental protection.
For troubleshooting or advanced support, users are directed to the FreeWave support website and provided with contact information for local resellers and FreeWave Technologies directly. This ensures that expert assistance is available if issues arise that cannot be resolved through basic configuration or external checks. The comprehensive support resources underscore the commitment to ensuring the device's continued operation and user satisfaction.
The ZumLink Z9-PE's compliance with FCC Part 15 rules, which govern radio frequency devices, is also a key aspect of its maintenance. Users are reminded that the device must be professionally installed and is only approved for use when installed in devices produced by FreeWave or third-party OEMs with express written approval. This ensures that the device operates within regulatory guidelines, preventing interference with other electronic equipment and maintaining its operational integrity. Any unauthorized changes or modifications to the device are explicitly discouraged, as they could impact its compliance and performance.
| Frequency Range | 902-928 MHz |
|---|---|
| Data Rate | Up to 4 Mbps |
| Operating Temperature | -40°C to +75°C |
| Interface | Ethernet, Serial |
| Range | Up to 60 miles with line of sight |
| Power Output | Up to 30 dBm |
| Input Voltage | 9-30 VDC |
| Security | AES-128 encryption |
| Modulation | FHSS (Frequency Hopping Spread Spectrum) |