P/N 450368 Rev I 13
SECTION 7: DISSOLUTION CYCLE
1. Before initiation of Dissolution Cycle, ensure the tank is empty and the 1 micron filter is installed in the
Filter Housing (Diagram 2, pg 8) by ensuring that there is a filter present. Ensure you have the
appropriate personal protective equipment donned. If the filter is not present in the filter housing, refer
to Section 8.4.1, Filter Removal and Replacement.
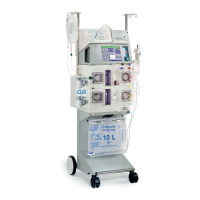
2. Ensure the power switch is ON and water supply valve is in the OPEN position, then place GranuFlo
Dissolution Unit II in Dissolution FILL Operation by pressing the Dissolution START button (Figure 5).
3. Gather six dry acid cases and process documentation accordingly. Succeeding testing of each
hemodialysis concentrate batch should be completed in accordance with the Form: GranuFlo® Batch
Production Record, pg 31. Identification should be attached to the GranuFlo Dissolution Unit II .
4. Verify the tank is actually filling. The GranuFlo Dissolution Unit II will do a short Recirculation Operation
with only the Fill Indicator Light illuminated and once complete the GranuFlo Dissolution Unit II shall fill
to the Mid-Level Sensor.
Figure 5 Figure 6
5. When the Mid Level Sensor is reached (Figure 6), the Fill Valve will CLOSE
and the Add Granules Light will begin to flash.
This flashing light indicates that the GranuFlo Dissolution Unit II is in a hold state waiting for the
operator to add the dry acid product in accordance with the GranuFlo® Batch Production Record Form
pg 31.
6. Before adding Dry Acid Granules make sure to check the following:
Ensure water is not leaking from underneath or any external connections to and from GranuFlo
Dissolution Unit II. In addition, ensure there is no leak at the end of the drain hose.
Remove the large access lid and ensure water has stopped at the Mid-Level Sensor (See Figure 6, pg.
13). Then place large access lid back on the tank loosely.
Ensure you have the appropriate personal protective equipment donned.
 Loading...