M A I N T E N A N C E Continued
P/N 450368 Rev I 23
SECTION 8: MAINTENANCE
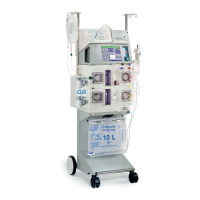
The GranuFlo Dissolution Unit II has been designed for ease of use and trouble free operation. However, a
minimal amount of preventive maintenance is required to maintain the GranuFlo Dissolution Unit II in good
working condition and minimize the possibility of a system malfunction.
The recommended program for proper care of the GranuFlo Dissolution Unit II consists of four basic steps.
They are: (8.1) Visual inspection, (8.2) Cleaning, (8.3) Sodium Hypochlorite (Bleach) Disinfection and (8.4)
Filter Maintenance.
8.1 VISUAL INSPECTION
Visually inspect the GranuFlo Dissolution Unit II prior to mixing a batch. Look for any defects which may
inhibit the safe or proper operation of the Unit. Items such as damaged hydraulic hoses or fittings,
damaged electrical cables or connections, loose, missing or damaged hardware or process
contamination should be corrected prior to the use of the GranuFlo Dissolution Unit II.
Should the power cord or plug become cracked, frayed or otherwise damaged, it should be replaced
immediately. Tag unit “OUT of SERVICE” until the repair is made. Always remove the power cord from
the power source before attempting to service this device. Never unplug the unit by pulling on the
power cord.
8.2 CLEANING
Clean the exterior surface of the GranuFlo Dissolution Unit II thoroughly after each batch of concentrate
is mixed. If necessary, a mild detergent solution may be used to clean the exterior surface. Care should
be taken not to contaminate the system interior. All spills should be wiped off IMMEDIATELY. AVOID
SPILLAGE AT THE CONTROL PANEL TO MINIMIZE THE POSSIBILITY OF ELECTRICAL MALFUNCTION.
8.2.1 PREVENTIVE MAINTENANCE (SEE TABLE 1 ON PAGE 30)
8.3 SODIUM HYPOCHLORITE (REGULAR BLEACH) DISINFECTION
1. To start the disinfection process, power OFF the GranuFlo Dissolution Unit II, remove the Filter
Housing and discard the Filter Element. Place the residual fluid from the Filter housing in the
Residual Solution Bucket. Reinstall Filter Housing, but do not insert a Filter at this time. Connect
the Transfer Nozzle to the end of the Dissolution Unit’s Transfer Hose and make sure the valve on
the Transfer Nozzle is in the CLOSED position. In addition, loosen the top Access Lid, but leave it in
place. Ensure you have the appropriate personal protective equipment donned.
2. Turn the power switch ON and ensure that the water supply valve is OPEN, then press the Rinse
START button. The Fill Indicator Light will illuminate indicating the RINSE CYCLE has started and
the GranuFlo Dissolution Unit II is in FILL Operation (Figure 16).
WARNING! TO PREVENT ACCIDENTAL SHOCK HAZARD, THIS DEVICE MUST BE PLUGGED INTO A PROPERLY
GROUNDED GFI PROTECTED THREE WIRE RECEPTACLE AC CIRCUIT. DO NOT EMPLOY EXTENSION CORDS OF ANY
KIND. WHEN THE POWER CORD IS NOT LONG ENOUGH TO BE SERVICEABLE, A LICENSED ELECTRICIAN MUST INSTALL A
NEW THREE WIRE GROUNDED RECEPTACLE IN ACCORDANCE WITH THE NATIONAL ELECTRICAL CODE. DO NOT USE A
THREE TO TWO PRONG PLUG ADAPTER WITH THIS DEVICE.
 Loading...