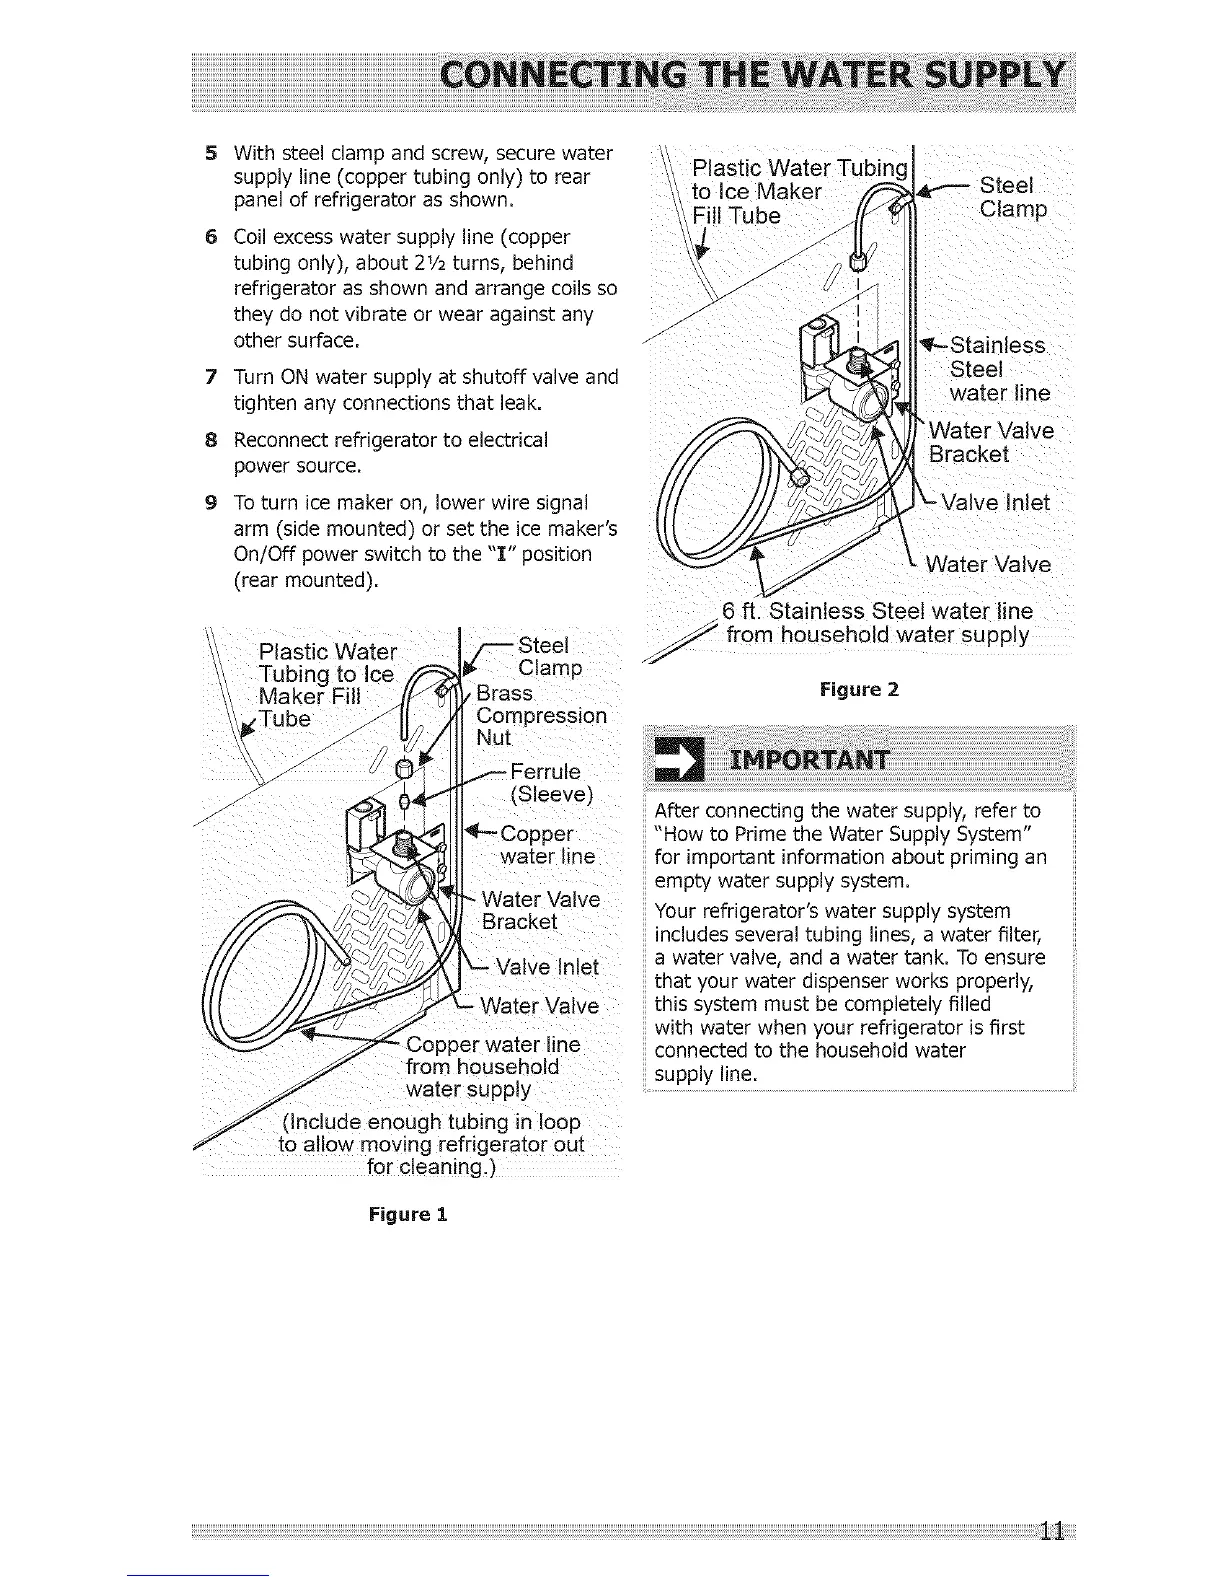
Withsteelclampandscrew,securewater
supplyline(coppertubingonly]torear
panelofrefrigeratorasshown.
Coilexcesswatersupplyline(copper
tubingonly),about21/2turns,behind
refrigeratorasshownandarrangecoilsso
theydonotvibrateorwearagainstany
othersurface.
7 TurnONwatersupplyatshutoffvalveand
tightenanyconnectionsthatleak.
8 Reconnectrefrigeratortoelectrical
powersource.
9 Toturnicemakeron,lowerwiresignal
arm(sidemounted)orsettheicemaker's
on/off power switch to the 'T' position
(rear mounted).
Plastic Water
Tubing to Ice P
Maker Fill , Brass
Compression
Nut
JJ _ -Copper
water line
!,b// Vater Va w
/-_ _ -t_,Yc'_X Bracket
///
/// -VaIveInIet
l(l__ _ Water Valve
• Copper water line
from household
_ water supply
J (oln_llUdemenough tubing in loop
to allow moving refrigerator out
for cleaning.)
Figure 1
Plasti(
to Ice Maker
11Tube
Clamp
3S
Steel
water line
"Water Valve
Bracket
\ Water Valve
6 ft. Stainless Steel water line
:f from household water supply
Figure 2
IMPORTANT
After connecting the water supply, refer to
"How to Prime the Water Supply System"
for important information about priming an
empty water supply system
Your refrigerator's water supply system
includes several tubing lines, a water filter,
a water valve, and a water tank. To ensure
that your water dispenser works properly,
this system must be completely filled
with water when your refrigerator is first
connected to the household water
supply line.
 Loading...