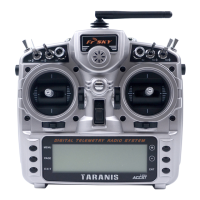
Step 4: Registration
In ACCESS, select the Module [Reg] into Registration status. Then Press the F/S button and power on
your receiver, and select the “RX Name XX” and [ENTER] to complete the Registration process then
power down the receiver.
Step 5: Automatic binding (Smart Match )
Move the cursor to Receiver1[Bnd],and select it , power your receiver, select the RX, and complete the
process, the system will confirm “Bind successful”. (You do not need to press the “F/S” button in
ACCESS to Bind. Refer to the receivers manual for details)
Step 6: Set Failsafe mode
There are 4 failsafe modes: No pulse, Hold, Custom and receiver.
No Pulse: on loss of signal the receiver produces no pulses on any channel. To use this type, select it
in the menu and wait 9 seconds for the failsafe to take effect.
Hold: the receiver continues to output the last positions before signal was lost. To use this type, select
it in the menu and wait 9 seconds for the failsafe to take effect.
Custom: pre-set to required positions on lost signal. Move the cursor to “Set” and press the Encoder
Button, and you can see FAILSAFE SETTING screen below.
Move the cursor to the channel you want to set failsafe on, and press the Encoder Button.
When moving the corresponding sticks or switches, you will see the channel bar moving. Move the
channel bar to the place you want for failsafe and long press the Encoder Button to finish the setting.
Wait 9 seconds before failsafe takes effect.
Receiver: set the failsafe on the receiver (see receiver instructions) in ACCESS, select it in the menu
and wait 9 seconds for the failsafe to take effect.
Step 7: Range
Range refers to Taranis Q X7/X7S ACCESS range check mode. A pre-flight range check should be done
before each flying session. Move the cursor to [Rng] and press the Encoder Button. In range check
mode, the effective distance will be decreased to 1/30. Press the Encoder Button or EXIT to exit.
 Loading...