4-9
Section 4 Installation and Wiring
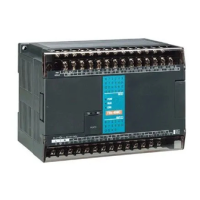
(3) Mounting an expansion unit
Expansion units connected to the main unit can be mounted without gaps.
X20X22
X21X23
X0 X2 X4 X6 X8 X10X12 X14X16 X18
X1 X3 X5 X7 X9 X11 X13X15 X17 X19
m
a
x
.
400mA
24V OUT
S/S
PORT0
IN AC100~240V
Y1 Y2 Y4 Y5 Y6 Y8 Y10
C0 Y0 C2 Y3 C4 C6 Y7 C8 Y9 Y11
L N
N
A
0
P
A
4
0
T
-
3
1
C
Y14Y12
C12Y13 Y15
NA0E16T-0
Y1
Y2
C2 C4C0
Y0
Y5 Y7
Y3 Y4 Y6
Y10Y8 Y11 Y12 Y14
Y9C8 C10 C12 Y13 Y15
O0+O1+
AG O0-
NA0AW06-MR
O1-
24V IN
I0+I1+ I2+I3+
I0-I1- I2-I3-
O0+O1+
AG O0-
NA0AW06-MR
O1-
24V IN
I0+I1+ I2+I3+
I0-I1- I2-I3-
PWR/
BAT
RUN/
MEM
ALM
IN (X)
OUT (Y)
NA0LA-RS5
TX
RX
TX
RX
PORT4 (RS485)
G
PORT3 (RS485)
T
+
T
N
N
+
G
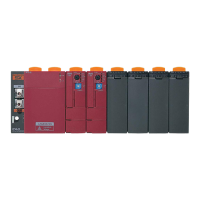
<How to connect an expansion right side unit>
1) Remove the connector cover of the expansion connector (right side) of the main unit or that of the expansion connector (OUT)
of the expansion unit that is mounted on the left of the expansion right side unit to be connected.
2) Connect the expansion cable connector equipped with the expansion right side unit to be connected to the expansion
connector described in the step 1).
3) After the connector is connected, store the remaining cable inside the connector housing of the unit on the left side.
4) Attach the connector cover removed in the step 1).
<How to connect a healthy unit>
1) Remove the connector cover of the expansion connector (OUT) of the rightmost expansion right side unit.
2) Mount a healthy unit to the expansion connector described in the step 1).
(The connector cover removed in the step 1) is not used.)
O0+ O1+
AG O0-
O1-
24V IN
I0+ I1+ I2+ I3+
I0- I1- I2- I3-
max.
400mA
+24V OUT-
S/S
X0
X1 X3
X5 X9 X11X7 X12
X6 X8 X10 X12
Y7 Y9C4 C4
Y4 Y5 Y6 Y8
0
4
8
2
I
6
5
9
3
7
I2 I3
0
8
4
2
I
I0
9
65
3
II
7
PWR/
BAT
RUN/
MEM
ALM
IN (X)
OUT (Y)
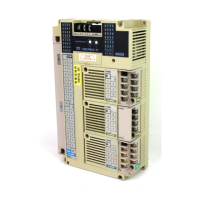
Expansion
connector
Expansion cable
connector
Expansion right side unit
Store the remaining
expansion cable here.
 Loading...