En-6
5. INSTALLING DRAIN PIPES
CAUTION
Install the drain hose in accordance with the instructions in this Installation Manual and
keep the area warm enough to prevent condensation. Problems with the piping may
lead to water leaks.
Use general hard polyvinyl chloride pipe and connect it with adhesive (polyvinyl chloride)
so that there is no leakage.
Always heat insulate the indoor side of the drain hose.
Use a drain pipe that matches the size of the drain hose.
• Do not perform a rise, trap and air bleeding.
• Provide a downward gradient (1/100 or more).
• Provide supporters when long pipes are installed.
• Use an insulation material as needed, to prevent the pipes from freezing.
• Install the pipes in a way that allows for the removal of the control box.
O.D.
Drain pipe Φ 3/4 in (19 mm) [I.D.],
Φ 1-1/16 in (27 mm) [O.D.]
When using the drain port on the
left side of the unit, remove the
drain cap and install it to the right
side drain port.
(Only when suspended from the
ceiling)
Drain cap
Unit
Install the drain hose
Working procedure
(1) Install the attached drain hose to the drain port of the body. Install the hose band
from the top of the hose within the graphic display area. Secure firmly with the hose
band.
(2) Use vinyl adhesive agent to glue the drain piping (PVC pipe) / [Φ 3/4 in (19 mm) I.D.,
Φ 1-1/16 in (27 mm) O.D.] which is prepared on site or piping socket. (Apply color
adhesive agent evenly until the gauge line and seal)
(3) Check the drainage.
(4) Install the heat insulation.
(5) Use the attached heat insulation to insulate the drain port and band parts of the body.
Top view
3/8 to 9/16 in
(10 to 15 mm)
Drain hose
(accessories)
Hose band
(accessories)
Soft PVC side
Ensure there is no space
Drain pan
Side view
Applying
area of
adhesive
Hard PVC side
Joint pipe
(locally purchased)
Drain pipe (locally purchased)
Φ 3/4 in (19 mm) [I.D.], Φ 1-1/16 in (27 mm) [O.D.]
3/16 in (4 mm) or less
Wrap the drain hose insulation around the drain hose connection.
Top view
Drain pan
Drain hose
3-15/16 in
(100 mm)
Drain hose insulation
(accessories)
Hose opening view
Wind the attached heat insulation
around the hose band. Make sure the
alignment is on top.
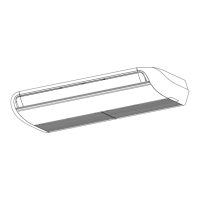
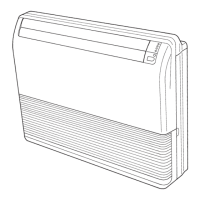
A. Floor console type
Be sure to arrange the drain hose so that it is leveled lower than the drain hose connect-
ing port of the indoor unit.
Drain hose
GOOD
PROHIBITED
Arrange the drain
hose lower than this
portion.
CAUTION
Do not install the unit so that the drain hose side is too high. Height A should be less
than 3/16 in (5 mm).
AA
Drain hose
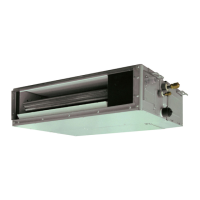
B. Under ceiling type
Be sure to arrange the drain hose so that it is leveled lower than the drain hose connect-
ing port of the indoor unit.
Drain hose
Arrange the drain hose
lower than this portion.
GOOD
PROHIBITED
When drain hose is arranged backward.
Secure the drain hose with the VT wire.
Drain hose
VT wire
hole
VT wire
(accessories)
Pass the drain hose
through here.
Cut the grille
Intake grille
Base (bottom)
9367701162-02_IM.indb Sec1:69367701162-02_IM.indb Sec1:6 27/09/2019 09:32:5727/09/2019 09:32:57
 Loading...