Top Latch
Bottom
Latch
Display Side
LAN Jack
Optional
Modem
Jack
DC Power Jack
AC Adapter
Rotating
Display
Lid
Power/Suspend/
Resume Switch
WLAN/Bluetooth/
WWAN Switch
“Click Me!”
(For
Additional
Utilities)
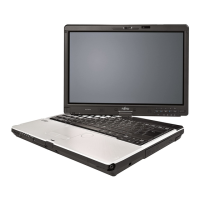
1. Open the Display Panel
• Ensure that your LifeBook is on a hard level surface and that the
air vents are not blocked.
• Lift the display, being careful not to touch the screen.
• Adjust the display until it is at a comfortable viewing angle.
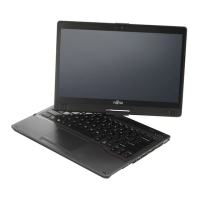
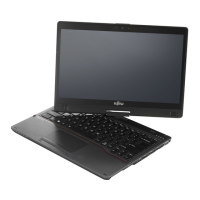
2. Convert from Notebook to Tablet
• Open your notebook and lift the display so it is perpendicular
to the keyboard.
• Rotate the display 180 degrees (either direction).
• Carefully fold the display down onto the keyboard.
• Push the latch down toward the display.
• Reverse this procedure to return to the notebook configuration.
Be sure to rotate the display in the opposite direction.
3. Connect AC Power
• Plug the power cord into the AC adapter.
• Plug the AC adapter into your notebook.
• Connect the power cord to an electrical outlet.
4. Connect to Internet or Network
• Move the wireless switch to “On” to turn on the notebook.
• Connect the phone cord (not supplied) to the modem jack (available on
some models) or an Ethernet cable (not supplied) to the LAN jack
on your notebook and to a wall jack or to Ethernet router.
5. Turn on Power
• Press the Suspend/Resume switch.
• The notebook is now on and the battery is being charged.
•
The notebook will begin a power-on self test. Once successfully completed,
the operating system will begin the initialization process.
6. Register
Starting Windows
®
for the first time:
• Accept the Microsoft
®
Windows
®
Licensing Agreement and the Fujitsu
End User License Agreement to proceed. Select your User ID and
Password during the “Welcome Screen.” Keep a record of your
User ID and password stored in a secure place. THE SCREEN WILL
GO DARK FOR SEVERAL MINUTES. Do not attempt to turn power
on or off during this stage.
• Register your LifeBook with Fujitsu Service and Support via
our website (us.fujitsu.com/computers). This helps us to
better serve you.
7. Activate Additional Utilities & Drivers
• Check to be sure the WLAN switch is on, or that your notebook is
otherwise connected to the Internet.
The first time you boot up your system, you will see an icon
called Click Me! in the Start menu.
When you click the Click Me! icon, your system will automatically
create the related icons in the system tray in the bottom right of
the screen. These icons provide links to utilities that you will
frequently access.
When you install the ClickMe! utility, several applications and utilities
are installed; this takes time.
While ClickMe! is installing, the system may go into Suspend mode.
If this occurs, slide the Power/Suspend/Resume button momentarily
to wake the system up. You can also slide your finger across the
touchpad every few minutes to keep the system awake while
ClickMe! is installing.
Initial Start Up
The Lithium ion battery is not charged upon purchase.
Initially you will need to connect either the AC adapter
or the Auto/Airline adapter to use your notebook.
Caution
To avoid possible damage to your computer, be sure
the display panel is perpendicular to the keyboard
before rotating it.
Caution
It is very important that you run the ClickMe! utility the
first time you boot up in order to ensure that the necessary
applications, utilities. and drivers are installed.
3
 Loading...