10. Place a test stock piece against the xed fence and slide
the end to be cut against the router table fence.
11. Move the adjustable fence so that it ts at against the
other side of the stock and secure the 1” knob on the ad-
justable fence.
12. Adjust the toggle foot assembly so that it rmly holds your
stock in place. Once the toggle is adjusted, engage the
toggle so that it is holding the stock down.
13. Make a test cut.
14. If necessary, repeat the router bit height setup process un-
til the stile and rail mate perfectly as shown below.
Please note that your Rail piece(s) should already be cut.
Rail
Rail
Style
Style
15. Once you are satised with your t, attach the Sacricial
Wood Backer Block as detailed in the following steps.
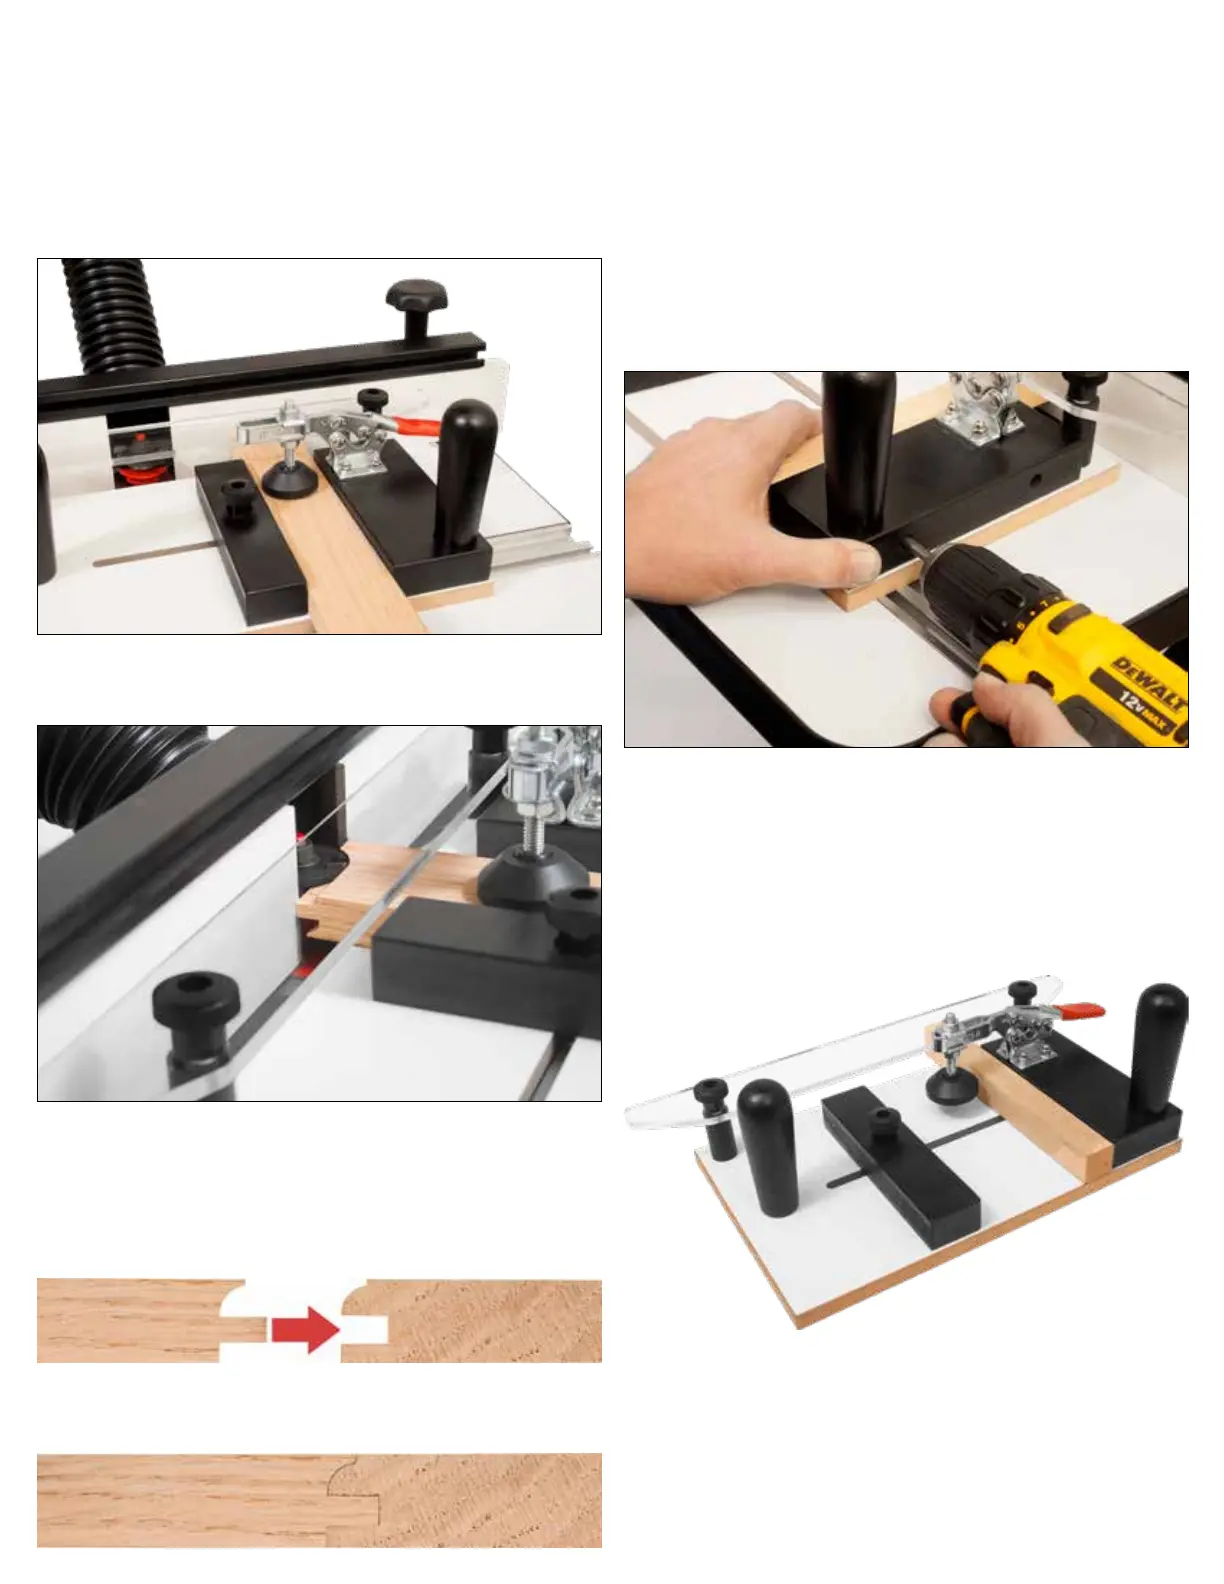
16. Place the Coping Sled back on to the router table with the
Clear Acrylic Fence Guide against the router table fence.
Set the Sacricial Wood Backer Block against the Fixed
Fence. Slide the end against the router table fence and se-
cure the Sacricial Wood Backer Block using the two sup-
plied wood screws that came with the coping sled.
Please note: When securing the Sacricial Wood Backer Block
against the Fixed fence, make sure it aligns with the
Clear Acrylic Fence.
17. Use a combination or engineer’s square to verify that the
Sacricial Wood Backer Block remained square to the rout-
er table fence.
18. Your Rail Guide Coping Sled Pro is now setup for your
rst cope cut. Secure your project project piece into the
sled and make your cuts!
Shop Tip
To accomodate dierent router bit proles, you will need to
make your own replacement Sacricial Wood Backer Block.
Do not throw away the old block, this can be used again for
future projects.
 Loading...