COAXIAL
DIGITAL
AUDIO OUT
COMPONENT
VIDEO OUT
VIDEO
OUT
AUDIO
OUT
C
R
/P
R
C
B
/P
B
Y
L
R
COAXIAL
DIGITAL
AUDIO OUT
COMPONENT
VIDEO OUT
VIDEO
OUT
AUDIO
OUT
C
R
/P
R
C
B
/P
B
Y
L
R
AC plug
AC plug
COMPONENT VIDEO IN
Y
PB/CB
PR/CR
LANGUAGE
AUDIO
SUBTITLE
DISC MENU
PLAYER MENU
LANGUAGE_AUDIO
AUDIO
SUBTITLE
DISC MENU
PLAYER MENU
ORIGINAL
ENGLISH
FRENCH
SPANISH
GERMAN
ITALIAN
SWEDISH
OTHERS
LANGUAGE_AUDIO
AUDIO
SUBTITLE
DISC MENU
PLAYER MENU
ORIGINAL
ENGLISH
FRENCH
SPANISH
GERMAN
ITALIAN
SWEDISH
OTHERS
If you have any questions or issues with our product, please refer to the
“TROUBLESHOOTING” section of this “SETUP MANUAL”, or visit our website for the
. If additional support is required please
contact our Customer Service line at 1-877-393-8624.
© 2013 Funai Electric Co., Ltd.
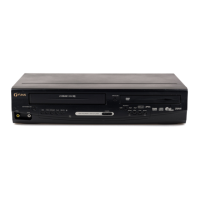
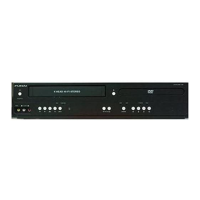
Connection to the TV
See the Online Owner’s Manual for details:
www.funaiamerica.com
Step 1 Position your camera to read the QR code below and let
it scan or visit by web www.funaiamerica.com
(You need a QR-code app and a smartphone or tablet
equipped with a camera.)
Step 2 Select Download.
Step 3 Type in the Model # “DP100FX4”, and click “Search”.
Step 4 Select the Manual, and click on “Download”.
Problem Tip
Check if the AC power cord is properly connected.
Unplug the AC power cord from the AC outlet, wait for
5-10 seconds and then plug it in again.
Check if the TV is switched On.
Check the TV Input or Source video signal.
Check the Audio / Video cable connections to the TV.
Sometimes a small amount of picture distortion may
appear. This is not a malfunction.
Connect the unit directly to the TV.
Set “PROGRESSIVE” correctly in “DISPLAY” menu. Turn it On
only if your TV has progressive scan and you are using the
component video connection between the unit and the TV.
Disable progressive scan for all other connections.
on the front panel for 5 seconds
to change back to default output (not progressive scan).
Connect this unit directly to the TV.
Make sure the disc is compatible with the unit.
Check that the speakers are connected correctly.
Check the digital connections.
Check if the audio format of the selected audio
language matches your receiver capabilities.
This unit does not support DTS audio. This is not a malfunction.
Picture freezes momentarily
Check the disc for fingerprints / dirty and clean with a
soft cloth wiping from center to edge.
Ensure the disc is inserted in correct direction.
Check if the disc is defective by trying another disc.
Cancel the parental lock or change the control level.
Insert a correct disc that plays back on this unit.
If unit moved from cold to warm temp then possible
moisture inside unit can cause no playback. Let unit set
in warm area for 1-2 hours and tr y again.
Reset the unit by switching Off the unit, then On again. If
still not working perform a hard reset by unplugging the
AC power cord and then plug it back in after 1 minute.
Aim the remote control directly at the front panel
sensor or reduce the distance to the front panel.
In the Remote re-insert the batteries with their polarities
(+ / – signs) as indicated or replace the Remote batteries.
Press and hold any button on Remote control toward
a digital or telephone camera. The Remote control is
working if you confirm a blinking infrared light through
the unit stops responding.
To completely reset the unit, unplug the AC cord from
the AC outlet for 5-10 seconds.
Use a commonly available cleaning CD / DVD to clean
the lens before sending the unit for repair.
The angle cannot be switched for a DVD which does
not contain multiple angles. In some cases multiple
angles are only recorded for specific scenes.
when the title is selected.
Check the “PARENTAL” setting.
level has been forgotten.
Enter the default password “4737”, then your forgotten
password will be cleared.
Compruebe si el cable de alimentación está conectado
Desconecte el cable de energía CA del enchufe CA, espere
5-10 segundos y después vuelva a conectarlo.
frontal durante 5 segundos para regresar a la salida
predeterminada (sin exploración progresiva).
Asegúrese que el disco esté insertado en la dirección correcta.
Apunte el control remoto directamente al sensor del
tablero frontal o reduzca la distancia al tablero frontal.
En el Control remoto, vuelva a insertar las baterías con su
polaridad (signos + / –) como se indica o reemplace las
baterías del Control remoto.
Presione y sostenga cualquier botón en el Control remoto
hacia una cámara digital o de teléfono. El Control remoto está
funcionando si confirma la luz infrarroja a través de la cámara.
STANDBY-ON
AUDIO
SUBTITLE
ANGLE
REPEAT
CLEAR
A
-
B
PAUSE
SETUP
TOP MENU
MENU
ENTER
MODE
ZOOM RETURN
SLOW
SKIP
OPEN/CLOSE
DISPLAY
SEARCH
MODE
12
3
45
6
78
9
0
+10
PLAY
REV FWD
STOP
19
1
4
9
7
2
11
15
16
5
22
24
17
18
11
21
14
13
3
12
10
6
8
20
23
Install 2 AA (1.5V) batteries
See the Online Owner’s Manual for details: www.funaiamerica.com
ENGLISH ESPANÕL
1.
Pulse esta tecla para encender la unidad o
para dejarla en el modo de espera. (Para
apagar completamente la unidad, debe
desconectar el cable de alimentacion de
Para mostrar el modo de disco actual.
Para seleccionar lenguaje de audio. (DVD)
Para seleccionar modo de sonido. (CD)
Para seleccionar el idioma de subtítulos
Para seleccionar los ángulos de la cámara
Para reproducir repetidamente.
Para eliminar el Nº de estado en la
Para borrar los números mal entrados.
Para borrar el punto para la repetición A-B.
Para repetir entre su punto A y B
Para hacer una pausa en la reproducción.
Para avanzar la reproducción un cuadro cada
Para iniciar o reanudar la reproducción.
Search Forward / Backward
Para buscar en avance / retroceso por un
Para comenzar la reproducción de avance
lento en el modo de pausa. (DVD)
Para parar la reproducción.
Para llamar el menú inicial en un disco.
Para recuperar el menú de configuración.
To arrange the playing order or play
Para disponer el orden de reproducción
o la reproducción aleatoria.
Para activar/desactivar el nivel del negro.
Para agrandar la parte de una imagen.
Para abrir o cerrar la bandeja del disco.
chapter, title, tracks or
Para buscar un capítulo, título, pistas, o
values in the input field.
Para especificar valores en el campo de
Para seleccionar capítulo, título y pista
chapters, titles and tracks.
Para saltar capítulos, títulos y pistas .
Para mover el cursor y determinar la
Para llamar el menú en un disco. (DVD)
Para seleccionar opciones o valores de
Para volver al menú o pantalla
anteriormente visualizado.
Please refer to relevant topics on “Troubleshooting Guide
Owner’s Manual before returning the product.
If this unit becomes inoperative, do not try to correct the problem by
yourself. There are no user-serviceable parts inside. Eject the disc (if
possible), place the unit into the standby mode, unplug the power plug, and
1-877-393-8624 or visit : www.funaiamerica.com/support
FUNAI is a registered trademark of Funai Electric Co., Ltd.
and may not be used in any way without the express written
*2VMN00041*
03141406E6N0AUHDP100FX4SUv1.indd1 2013/03/2619:45:17