Do you have a question about the G-Technology G-SPEED eS and is the answer not in the manual?
Guidance on reading all safety and operating instructions before unit operation.
Adherence to all warnings on the unit and within operating instructions.
Step-by-step guide for installing the G-Tech RAID controller into a workstation's PCIe slot.
Procedure for opening a web browser and accessing the G-Tech RAID controller's web interface.
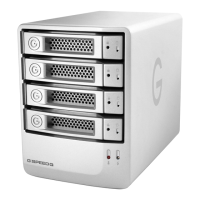
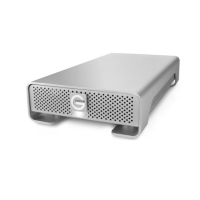
The G-SPEED eS is a high-speed storage system designed for professional content creation applications, featuring a 3Gbit/sec eSATA interface. When used with the optional G-Tech PCIe RAID controller, it offers RAID 0, 1, 5, 10, and JBOD functionality, with support for capacities greater than 2TB in Windows 32-bit environments. Up to four G-SPEED eS units can be attached to the G-Tech RAID controller, providing storage capacities up to 16TB and data rates exceeding 600 MB/sec. This system is optimized for multi-stream video editing workflows.
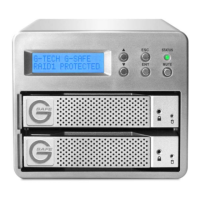
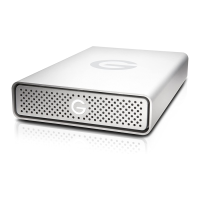
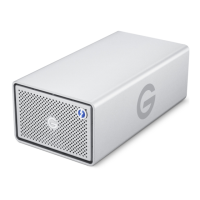
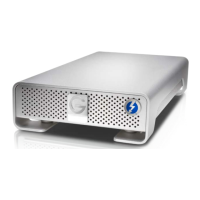
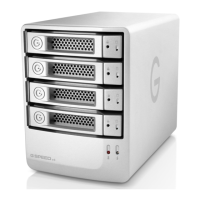
The G-SPEED eS enclosure includes four removable SATA drive modules, each with a power/activity LED and a disk module lock hole. The unit also features a power supply LED and a temperature/fan RPM warning LED on the front bezel. The rear of the unit includes a removable fan, a 3 GB/sec eSATA port, an ON/OFF switch, an AC input, and a cable lock hole. The optional G-Tech PCIe RAID controller connects to a PCIe-equipped workstation and provides four high-speed 3 Gb/s eSATA ports, supporting up to four G-SPEED eS systems. The RAID controller has a PCIe x4 interface and a RAID engine. The G-SPEED eS is also compatible with third-party Windows port multiplier aware eSATA host adapters.
The G-SPEED eS enclosure is equipped with an audible alarm that sounds if the internal temperature reaches 60° centigrade or if the main fan fails or slows down, preventing adequate cooling. In such cases, the temperature/fan warning LED on the front bezel will illuminate. If an alarm sounds and the RED warning LED is on, users should immediately stop using the G-SPEED eS, check if the fan is spinning, and move the unit to a cooler location. If the problem persists, G-Tech Support should be contacted. The G-Tech RAID controller also has an audible alarm that sounds if a disk drive fails or if the G-SPEED eS is removed from the RAID controller without first selecting "Unplug" in the Array Maintenance menu in the web GUI.
System requirements include a PCIe-equipped workstation and Microsoft Windows 2000/XP/2003/Vista. Users will also need either a G-Tech PCIe RAID Controller or a third-party port multiplier aware eSATA host adapter. The product package includes the G-SPEED eS storage system, four removable SATA drive modules (pre-installed), two disk module keys, a 1-meter eSATA cable, an AC power cable, and a configuration utility & installation CD. The optional G-Tech PCIe RAID controller is also available. It is crucial to retain the shipping container and packing materials, as the warranty will be void if the product is returned damaged due to improper packaging.
Installation of the G-Tech PCIe RAID Controller involves inserting it into an available PCIe slot in the workstation and securing it. The G-SPEED eS unit is then connected to the RAID controller via the eSATA cable, with the cable attached to Port 1 (closest to the motherboard) on the controller. The power cord is connected to the G-SPEED eS and then to AC power, and the unit is powered on.
Software installation for the G-Tech PCIe RAID Controller involves three steps: installing the Windows driver, updating the controller firmware, and installing the web GUI. The Windows driver installation is guided by the "Found New Hardware Wizard" after inserting the G-Tech Product CD. Users must select "Install from a list or specific location," then "Don't Search, I will choose the driver to install," and finally "Have Disk" to browse to the driver files on the CD-ROM. After selecting the appropriate driver (G-SPEED eS RAID Controller), the installation proceeds, and users must click "Continue Anyway" if a Windows Logo warning appears. Once the driver installation is complete, the workstation should be restarted.
Firmware updates are performed by navigating to the "G-SPEED eS\PC\GSeS Firmware-v2.2c" folder on the Product CD and running "hptflash.exe." The utility allows users to select the controller and the firmware file (rr231.xpm.22c) and then initiate the flash process. After a successful flash, the workstation should be restarted.
The G-SPEED eS Web GUI is used to configure and monitor the system. It is accessed via a web browser by entering "https://localhost:7402." A security alert may appear, which users should accept. The default login credentials are "admin" for the User Name and "0000" for the Password. The main GUI screen displays physical device information, showing each of the four drives. The G-SPEED eS is shipped initialized as a RAID 0 array formatted for Mac OSX, so for Windows workstations, this configuration must be deleted and re-created.
Configuring the RAID level involves launching the web GUI, clicking the "Maintenance" link, and deleting the existing array. This action will erase all data on the array. After deletion, users click "Create Array" to access the configuration page. Here, they select the desired RAID level (e.g., RAID 0, 1, 5, 10, or JBOD), enter an array name, choose an initialization method (Foreground or Background), and select a cache policy (Write-back or Write-through for RAID 5). All disks for the array can be quickly selected using the "Select All" button. For arrays larger than 2TB, the Variable Sector Size (VSS) feature is used to overcome Windows 32-bit limitations, allowing logical disks up to 16TB. The sector size is chosen based on the array capacity (e.g., 1k for 2TB-4TB, 2k for 4TB-8TB, 4k for 8TB-16TB). After configuration, clicking "Create" begins the initialization process. Redundant arrays (RAID 1 or RAID 5) take time to initialize (e.g., approximately 1hr 45m per TB for RAID 5). Once initialization is complete, the GUI will show the array type and a "Normal" status. The G-SPEED eS is then ready to be formatted using Disk Management in Windows XP.
In the event of a disk drive failure, the G-Tech RAID controller will sound an audible alarm, and the web GUI will report the failed drive and its physical position. For protected RAID modes (RAID 1, 5, or 10), data loss does not occur, but the array enters an unprotected "Critical" state. Users should mute the alarm, identify the failed drive via the GUI (which shows an exclamation mark next to the G-SPEED eS icon and highlights the failed drive's location), and then remove the failed drive module by inserting the provided key into the lock hole and gently sliding it out. It is critical to remove the correct drive, especially when multiple G-SPEED eS units are connected, to avoid data loss. The failed drive is then replaced with a new disk module. Once the new drive spins up, the GUI will indicate that the array is "Rebuilding," showing the percentage complete. After the rebuild, the G-SPEED eS returns to "Normal" status.
The web GUI offers several management and maintenance features:
Specific settings include:
RAID levels explained:
Notes:
Technical support is available via telephone, fax, email, and internet. When contacting support, users should have their G-SPEED eS serial number, operating system and version, computer brand and model, eSATA host adapter brand and model, amount of memory installed, and other attached devices readily available.
The product comes with a limited warranty covering defects in material and workmanship under normal use for the designated warranty period. G-Tech will repair or replace defective products at its discretion. Replaced parts or products will be new or reconditioned and become the property of G-Tech. The warranty is void if damage is caused by accident, misuse, abuse, unauthorized service, or parts. Warranty service requires obtaining a Return Material Authorization (RMA) number and delivering the product in its original shipping container to an authorized G-Tech service facility or to G-Tech. The purchaser bears all shipping, packing, insurance, and other costs. In the event of a defect, the purchaser's exclusive remedy is repair or replacement. Incidental or consequential damages, including data loss, are not the responsibility of G-Tech and are excluded to the extent permitted by law.
| Brand | G-Technology |
|---|---|
| Model | G-SPEED eS |
| Category | Storage |
| Language | English |