Do you have a question about the GAF 2788Z and is the answer not in the manual?
Position the projector on a stable surface at a suitable height for viewing.
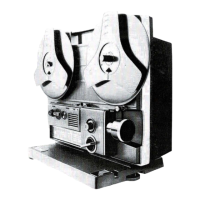
Detach the projector cover by releasing the bottom latch and lifting.
Connect the power cord to a 220/245V, 50Hz AC outlet and set the voltage switch.
Place the take-up reel onto the spindle, ensuring the slotted center aligns with the key.
Position the screen at the correct distance for optimal viewing.
Set the control switch to the FORWARD position to begin operation.
Adjust elevation and focus knob to center and sharpen the projected image.
Switch the projector to the OFF position after initial setup.
Move film selector to STANDARD, remove adapter for standard 8mm reels.
Move film selector to SUPER 8, insert adapter for Super 8 reels.
Load film onto the supply spindle, ensuring correct orientation and feed.
Trim the film end using the projector's trimmer for proper threading.
Guide the trimmed film end from the supply reel under the film guide.
Feed the film end into the threading slot with the projector OFF.
Engage FORWARD and NORM modes; check common issues if threading fails.
Film threads automatically; adjust take-up lever for proper film curl.
Set control to FORWARD for normal movie projection.
Adjust focus knob to achieve a sharp picture image on the screen.
Use the framer adjustment knob to center the picture frame.
If film stalls, manually advance a few frames using the take-up reel.
Turn off projector immediately if film breaks, fails to feed, or projection ends.
Turn knob to STILL for single frame projection; refocus if needed.
Use the speed shift knob to select 6 FPS for slow motion projection.
Use speed shift knob for 6 FPS or 2 FPS step motion.
Set control switch to REVERSE; re-frame if necessary.
Use FAST FORWARD or REWIND for quick scene advance; lamp is off.
Adjust picture size with the zoom lens collar and refocus as needed.
Rewind film onto the supply reel using the REWIND switch.
Projector rewinds automatically; turn OFF manually after rewind.
Attach the film clip to the film end and insert into the supply reel.
Allow lamp to cool, remove reels, unplug, and replace cover.
Cut out damaged film sections and ensure all splices are aligned.
Turn projector OFF, unplug, remove housing, and carefully extract film.
Turn OFF, trim film, rethread, splice, and resume projection.
Rewind film correctly or re-spool to fix backward or upside-down pictures.
Clean aperture and film path with soft brush or swab when projector is OFF.
Disassemble, clean lens with soft brush or tissue, reassemble carefully.
Disconnect power, remove cover, replace with 75W, 12V lamp.
Clean mirror with a soft brush; do not use lens tissue or other cleaners.
The projector is lifetime lubricated; no additional lubrication is needed.