P
P
G
G
-
-
6
6
0
0
0
0
0
0
T
T
h
h
r
r
e
e
a
a
d
d
D
D
i
i
a
a
m
m
e
e
t
t
e
e
r
r
G
G
a
a
g
g
e
e
O
O
p
p
e
e
r
r
a
a
t
t
i
i
o
o
n
n
M
M
a
a
n
n
u
u
a
a
l
l
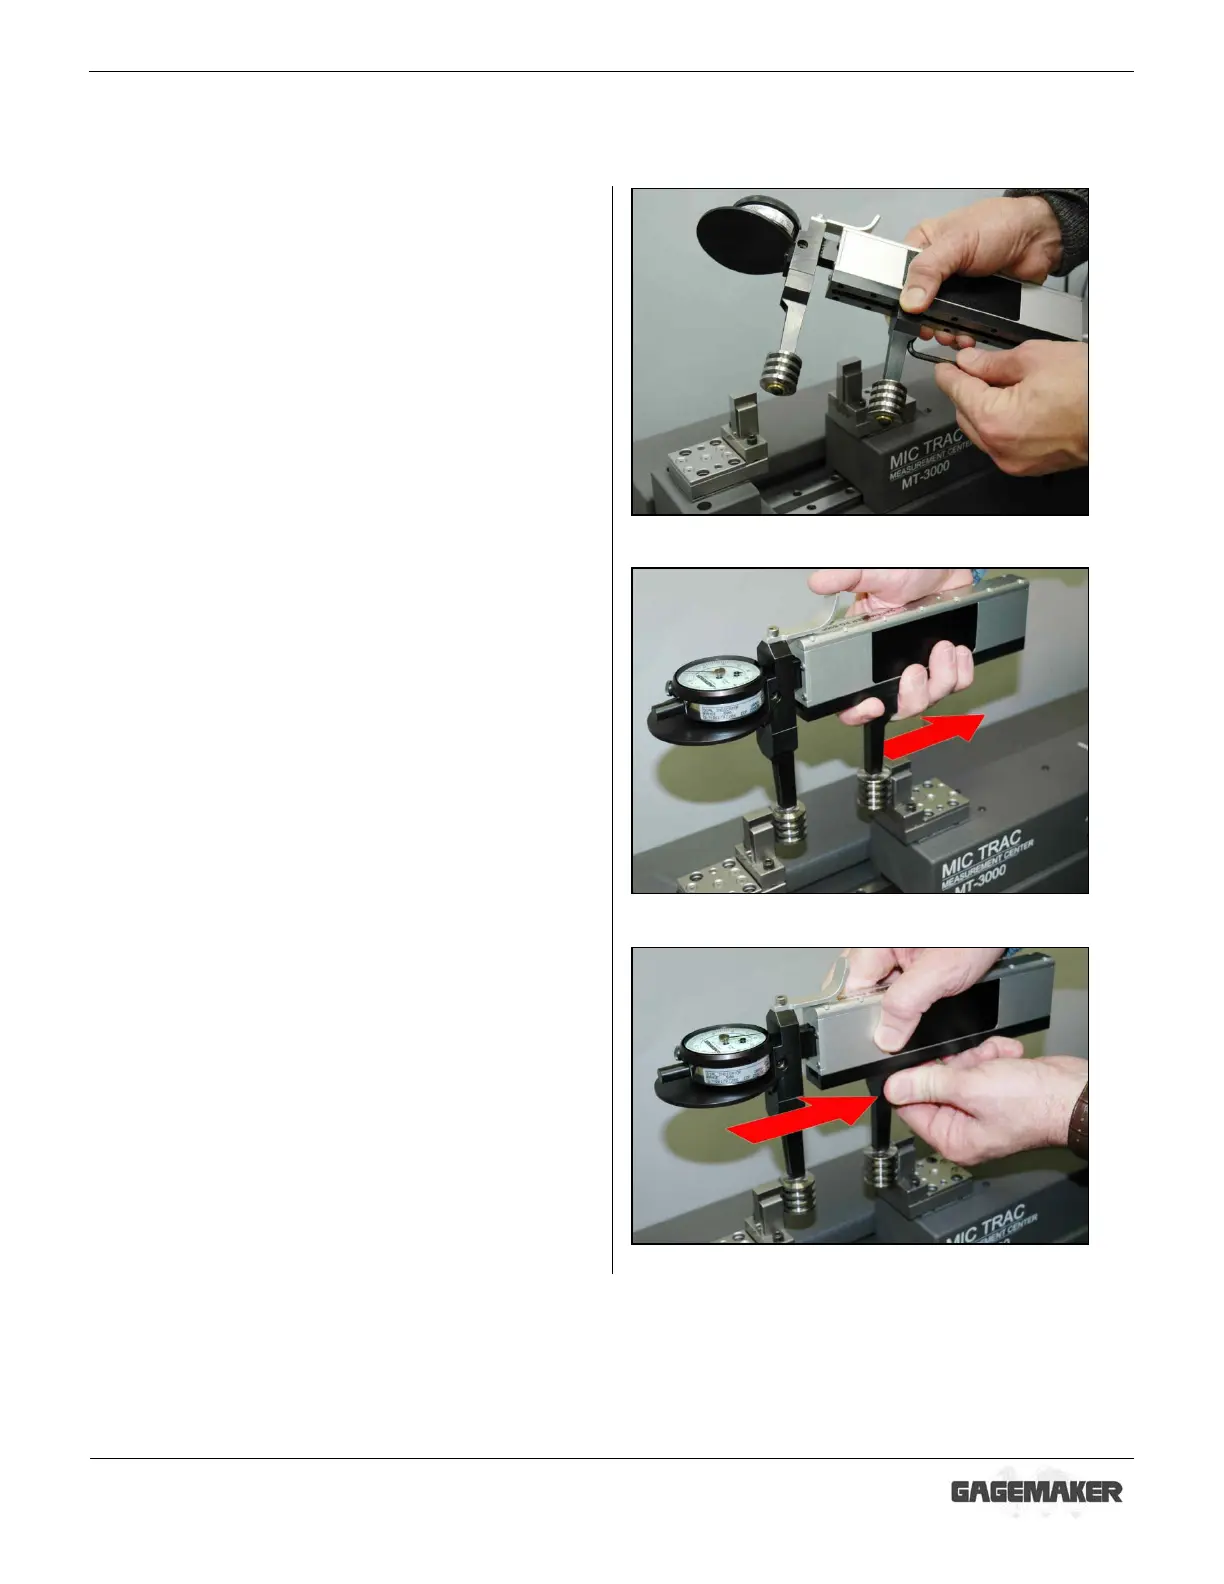
Zeroing the PG-6000 Gage Using the MIC TRAC (continued)
10. Loosen the bent bolt on the PG-6000 gage to
release the adjuster arm.
11. Slide the adjuster arm to position the gage
between the flat face anvils until the thread rolls
contact the flat face anvils.
12. Remove the PG-6000 gage from the MT-3000.
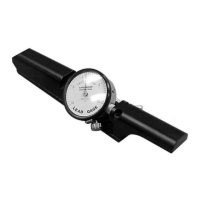
13. Slide the adjuster arm approximately .050”
away from the upper thread roll to give the
gage the proper preload.