P
P
G
G
-
-
6
6
0
0
0
0
0
0
T
T
h
h
r
r
e
e
a
a
d
d
D
D
i
i
a
a
m
m
e
e
t
t
e
e
r
r
G
G
a
a
g
g
e
e
O
O
p
p
e
e
r
r
a
a
t
t
i
i
o
o
n
n
M
M
a
a
n
n
u
u
a
a
l
l
Inspecting Parts (continued)
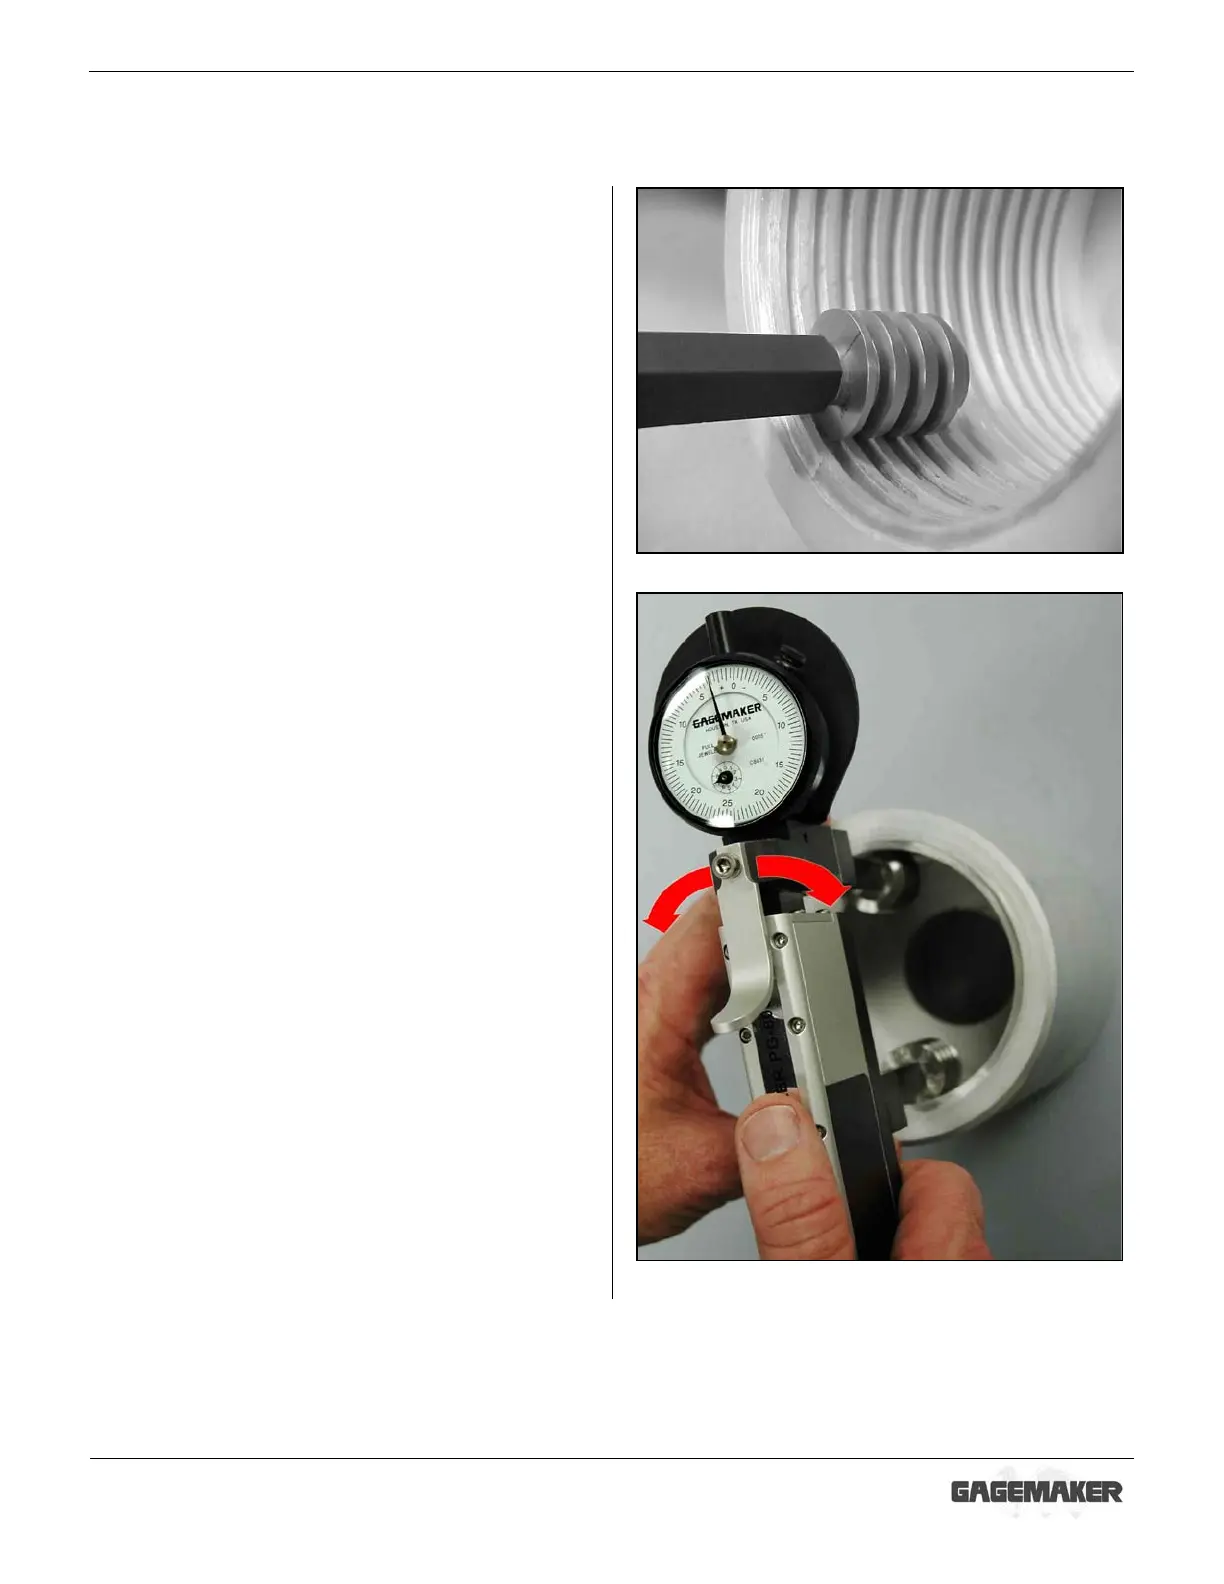
3. Ensure that the thread rolls on the PG-6000
fully engage with the threads in the part.
4. Sweep the PG-6000 gage back and forth to
locate the largest indicator reading on the part.
Use the gauging tolerances previously printed
from the Gagemaker screen in the Thread Disk
for Windows software to determine the
accuracy of the diameter.
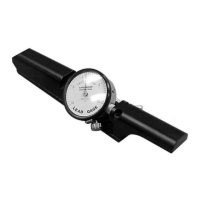
5. Hold the gage steady at the largest reading and
rock the gage frame left and right to seat both
rolls and allow a maximum indicator reading.
Note: Be sure that the small revolution counter on
the indicator is pointing to the same number
as when the gage was zeroed. Refer to the
number previously recorded on the back of
the indicator.