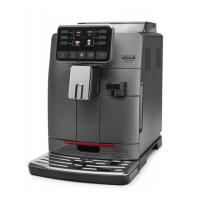
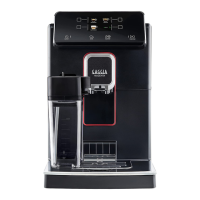
Do you have a question about the Gaggia Milano BRERA and is the answer not in the manual?
Guidelines for using short or long power cords, including electrical ratings and grounding requirements.
General safety precautions for machine operation, covering voltage, earthing, cord handling, and user safety.
Safety advice for machine usage, including supervision, cleaning, placement, and coffee bean types.
Warnings regarding burns and precautions for using and cleaning the milk carafe.
Warnings about burns and instructions for cleaning the classic milk frother.
Warnings about burns and precautions for cleaning the automatic milk frother spout.
Importance of packaging and preliminary steps before setting up the machine.
Instructions for filling the water tank and coffee bean hopper correctly.
Steps for operating the machine for the first time to ensure excellent coffee.
Explanation of the rinse/self-cleaning cycle for maintaining the machine.
Explanation of the self-adjusting system for optimizing coffee extraction with different beans.
Instructions and warnings for adjusting the coffee grinder settings.
How to make slight adjustments to the coffee grinder for different coffee types.
How to program the amount of brewed coffee according to personal taste or cup size.
How to select aroma, coffee type (espresso/long), and brew 1 or 2 cups.
Step-by-step guide on how to brew coffee using whole beans.
Instructions for preparing a cappuccino using cold milk and the steam wand.
Daily cleaning of coffee grounds drawer and machine exterior.
Daily and weekly cleaning instructions for the steam wand and Pannarello.
How to clean the brew group with water and lubricate guides.
Daily cleaning of the drip tray and water tank.
Steps to prepare the machine and remove the filter before starting descaling.
Instructions for pouring the descaling solution and filling the water tank.
How to start the descaling cycle by pressing buttons and setting the selector switch.
How the machine dispenses the descaling solution through the wand and spout.
How the machine indicates the start of the rinse phase after descaling.
Steps for the first rinse cycle, dispensing water directly from the spout.
Steps for the second rinse cycle, dispensing water through the steam/hot water wand.
Explains the meaning of the steady indicators on the control panel when the machine is ready.
Explains the meaning of blinking and steady indicators for warnings and ongoing operations.
Actions to take for various alarm signals like knob position, brew group insertion, and empty hoppers/tanks.
Solutions for the machine not turning on or coffee not being hot enough.
Solutions for no hot water/steam, low water output, or no coffee output.
Solutions for little crema or weak coffee, often related to grind or adjustments.
Solutions for the brew group not coming out or being out of place.
Solutions for slow coffee brewing and coffee leaking from the dispensing head.
| Type | Super Automatic Espresso Machine |
|---|---|
| Coffee Bean Hopper Capacity | 8.8 oz |
| Pump Pressure | 15 bar |
| Grinder | Ceramic |
| Adjustable Coffee Dispenser | Yes |
| Pre-Brewing | Yes |
| Removable Brewing Group | Yes |
| Opti-Dose | Yes |
| Rapid Steam Technology | Yes |
| Programmable Buttons | Yes |
| Adjustable Coffee Strength | Yes |
| Adjustable Grinder Settings | Yes |
| Cup Warming Tray | Yes |
| Milk Frother | Pannarello wand |
| Material | Plastic and Stainless Steel |
