Press the adapter kit contacts firmly against the spring contacts (1D) in the housing. Put the battery
housing back and route the wires from the adapter kit under the ground contact to (1E) outside.
Route the wire between the 3 plastic bars (1F) and behind the plastic clip to the bottom of the electric
fence device. After the complete installation of the system, connect the 2 crocodile clips to a 12 Volt
battery, black on minus (-), red on plus (+).
The system is now turned on.
Warning! The on/off switch of the electric fence device will not work when using the 12 V battery
adapter kit: this is normal. To switch the system off, remove the red crocodile clip from the battery.
2. Connect the green earth cable (included in the electric fence device housing).
Slide the cable shoe from the (green) earth cable onto the earth contact plate (2A).
Route the wire between the 3 plastic bars (2B) and behind the plastic clip to the bottom of the electric
fence device.
3. Installation of the earth cable and earth pin
Choose your desired location on the fence to place the electric fence device,
Place the earth pin (E) at the desired location directly next to the fence in the earth. Let the earth pin
protrude about 5 cm above the ground and place the crocodile clip (3A) of the earth cable on this part.
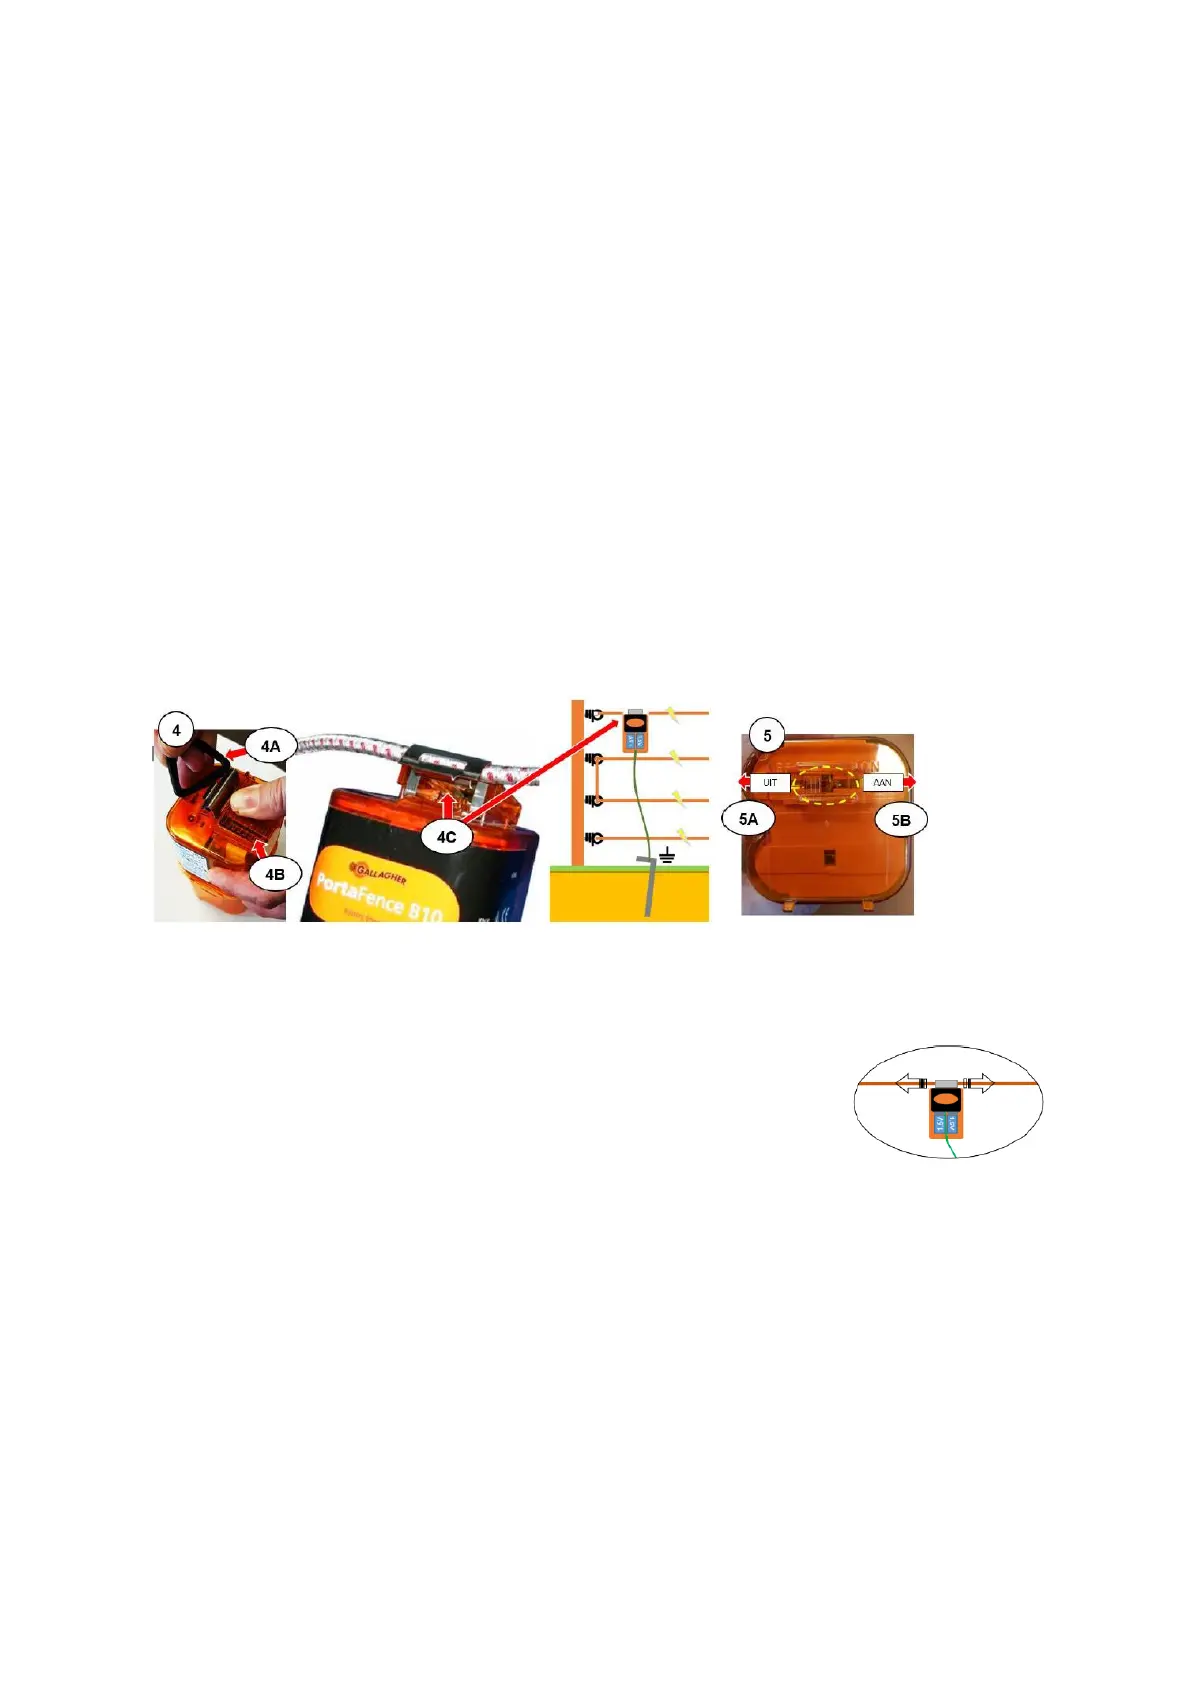
4. Placing the electric fence device
Remove the black plastic (suspension) bracket (4A) on top of the electric fence device by pressing the
button (4B). Hang the electric fence device on the fence by pressing the button on top again, place
the fence wire in the open metal clip (4C) and release the button. The system is now fully connected.
Tip: To achieve good contact between the electric fence device and the
wire, slide the electric fence device a few times in horizontal motion over the
wire when closing the clip.
5. Switching on the electric fence device
To switch the electric fence device ON or OFF, a switch is located on the underside. For the correct
position, see the ON and OFF text above the switch. As soon as the switch is placed in the ON (5B)
position, your fence is powered, a LED will flash on the electric fence device.
Warning! The on/off switch of the electric fence device will not work when using the 12 V battery
adapter kit: this is normal. To switch the system off, remove the red crocodile clip from the battery.
Warning! There is now electricity on the fence.