EasyManua.ls Logo

GAPOSA XQ5 - User Manual

GAPOSA XQ5
3 pages
Print Icon
To Next Page IconTo Next Page
Loading...
1
2
1
2
3
Programming Quick Guide
CONNECT POWER TO THE MOTOR
OPTION 1
OPTION 2
PROGRAMMING A TRANSMITTER
(Sec. 1)
1 Press and hold the SYNC button on the back of the transmitter
or the white button on the head of the motor until the motor
starts moving
2 Check the motor rotation (UP or DoWN) then release the SYNC
button or the white button (the motor now stops)
3 Within 5 seconds, press the corresponding button (UP if the
motor turns upwards or DoWN if the motor turns downwards.)
This will set the direction of the motor. If the incorrect button is
pressed, the controls will be reversed. To fix, see Sec. 3.
Transmitter is now programmed
ADDING A NEW TRANSMITTER (Sec. 2)
When adding new transmitters, begin with the motor position
somewhere inbetween the two limits. This allows the motor to
have room to move, and allows the direction that the motor moves
to be discernible.
1 Press and hold the SYNC button on the back of a transmitter
ALREADY paired until the motor starts moving in one direction
2 Check the motor rotation (UP or DoWN) then release the SYNC
button (the motor now stops)
3 Within 5 seconds, press the corresponding button (UP if the
motor turns upwards or DoWN if the motor turns downwards)
on the NEW transmitter being added. This will set the direction
of the motor.
Additional transmitter is now added
CHECKING / CHANGING DIRECTION (Sec. 3)
To check the direction, press the UP or DoWN button. The motor
will go UP or DoWN accordingly, if the direction needs to be
changed:
1 Press and hold the SYNC button on the back of transmitter until
the motor starts moving
2 Press the STOP button; the motor makes a brief jog. The direction
of the motor has been reversed
IMPORTANT: the change of direction procedure must be
performed before initiating the limit setting procedure,
otherwise limits will need to be reset
The buttons shown on the left are used to program the transmitters and specific channels.
The programing buttons (buttons 4 and 5) locations can be placed differently depending
on the transmitter model. Shown in this guide is the Emitto Slim line transmitter.
UP (1) the rolling shade/awning moves up
SToP (2) the rolling shade/awning stops
DoWN (3) the rolling shade/awning moves down
SYNC (4) program the transmitter
LIMIT (5) set limits
1
3
2
5
4
OFF
ON
Question and Answer IconNeed help?

Do you have a question about the GAPOSA XQ5 and is the answer not in the manual?

Overview

This document outlines the programming and operational procedures for Gaposa motor systems, primarily focusing on transmitters and motor control for rolling shades and awnings.

Function Description:

The Gaposa system allows users to program transmitters to control motors for rolling shades and awnings. Key functions include:

  • Transmitter Programming: Linking a transmitter to a motor, establishing initial control.
  • Direction Setting: Defining the "up" and "down" movement for the motor.
  • Limit Setting: Establishing the upper and lower stopping points for the shade/awning. This can be done automatically for systems with torque sensors or manually for precise control.
  • Preferred Position Setting: Memorizing and recalling an intermediate stopping point.
  • Transmitter Management: Adding new transmitters, deleting individual transmitters or channels, and completely resetting the motor's memory to erase all paired transmitters.

Usage Features:

Transmitter Overview:

The system uses a transmitter with distinct buttons:

  • UP (1): Moves the rolling shade/awning up.
  • STOP (2): Stops the rolling shade/awning.
  • DOWN (3): Moves the rolling shade/awning down.
  • SYNC (4): Used for programming the transmitter.
  • LIMIT (5): Used for setting motor limits. The physical location of the SYNC and LIMIT buttons may vary by transmitter model (e.g., Emitto Slim line shown).

Connecting Power:

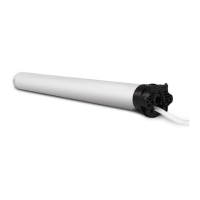
The first step in any programming or operation is to connect power to the motor.

Programming a Transmitter (Sec. 1):

  1. Press and hold the SYNC button on the back of the transmitter (or the white button on the motor head) until the motor begins to move.
  2. Release the SYNC/white button once the motor starts moving (it will then stop).
  3. Within 5 seconds, press the UP button if the motor moved upwards, or the DOWN button if it moved downwards. This sets the motor's direction. Incorrect selection reverses controls, which can be fixed later (Sec. 3). The transmitter is now programmed.

Adding a New Transmitter (Sec. 2):

When adding new transmitters, ensure the motor is at an intermediate position to allow for discernible movement.

  1. Press and hold the SYNC button on the back of an already paired transmitter until the motor starts moving in one direction.
  2. Release the SYNC button once the motor starts moving (it will then stop).
  3. Within 5 seconds, press the UP or DOWN button on the new transmitter being added, corresponding to the motor's direction of movement. The new transmitter is now added.

Checking/Changing Direction (Sec. 3):

To check the current direction, press UP or DOWN. If the direction needs to be reversed:

  1. Press and hold the SYNC button on the back of the transmitter until the motor starts moving.
  2. Press the STOP button. The motor will jog briefly, indicating the direction has been reversed. Important: Direction changes must be performed before setting limits; otherwise, limits will need to be reset.

Setting the Limits (Sec. 4):

It is mandatory to set the "UP" limit first every time.

  1. Run the motor to an intermediate position.
  2. Press and hold the LIMIT button on the back of the transmitter until the motor makes a brief jog.
    • Note: During "limit setting mode," operations are in "deadman control," meaning UP and DOWN buttons must be held down for the motor to move.
  3. Press and hold the UP button to run the motor to the desired UP limit position.
  4. Press the STOP button to set the UP limit. The motor jogs briefly to confirm.
  5. Press and hold the DOWN button to run the motor to the desired DOWN limit position.
  6. Press the STOP button to set the DOWN limit. The motor jogs briefly to confirm.
    • Note: For accurate limit setting, pressing the LIMIT button a second time reduces motor speed, allowing for precise adjustments. Always use the STOP button to finalize the limit.

Setting Limits Individually (Sec. 5):

Limits can be adjusted individually after initial setup. The motor can be in any position to start.

  • To Change the UP Limit:

    1. From any point between existing limits, press and hold both the LIMIT and UP buttons until the motor makes a brief jog.
    2. Press and hold the UP button until the desired new UP limit is reached.
    3. Press the STOP button to set the limit. The motor jogs briefly to confirm.
  • To Change the DOWN Limit:

    1. From any point between existing limits, press and hold both the LIMIT and DOWN buttons until the motor makes a brief jog.
    2. Press and hold the DOWN button until the desired new DOWN limit is reached.
    3. Press the STOP button to set the limit. The motor jogs briefly to confirm.

Automatic Setting of the Limits (Sec. 6):

For systems with torque sensors (e.g., mechanical stop shutters or cassette awnings/shades):

  1. Press and hold the UP button until the bottom bar hits the cassette or shutter box. A brief jog confirms the UP position is memorized.
  2. The same procedure can be followed for the DOWN limit, but only for roller shutters.

Preferred Position (Sec. 7):

  • 1. Setting a Preferred Position:

    1. Operate the motor to the desired intermediate position and stop it.
    2. Press both the UP and DOWN buttons together until the motor makes a brief jog. The intermediate position is now set.
  • 2. Recalling the Preferred Position:

    1. Press and hold the STOP button for 3 seconds. The motor will move to and stop at the intermediate position.
  • 3. Erasing the Preferred Position:

    1. Press both the UP and DOWN buttons until the motor makes a brief jog. The intermediate position is now erased.

Deleting a Transmitter or a Channel (Sec. 8):

  1. Using the transmitter to be deleted, press and hold both the SYNC and STOP buttons until the motor makes a brief jog. Only the transmitter used for this procedure is deleted from motor memory.

Reset Transmitter Memory (Sec. 9):

This procedure deletes all transmitters, channels, and sensors from the motor's memory.

  • Option 1 - Using a programmed transmitter:

    1. Press and hold both the SYNC and STOP buttons for at least 15 seconds. The motor will make a brief jog, then another jog after 5 seconds, confirming completion. This operation is only successful if both jogs occur. Memory is now empty.
  • Option 2 - Using a new transmitter without ID (not paired):

    1. Switch power to the motor OFF, then switch it back ON.
    2. Within 8 seconds, using any Gaposa transmitter, press and hold both the SYNC and STOP buttons until the motor makes a jog. Memory is now empty.
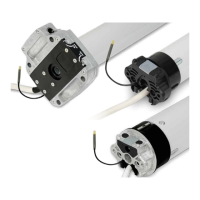
  • Option 3 - White button on the head of the motor:

    1. Press and hold the white button on the head of the motor until the motor starts to move.
    2. Release the white button. All transmitters have been erased.

Maintenance Features:

The document does not explicitly detail maintenance features. However, the ability to reset transmitter memory (Sec. 9) can be considered a maintenance-related function, allowing for a clean slate if programming issues arise or if transmitters are lost/replaced. The individual limit setting (Sec. 5) also allows for fine-tuning and adjustment over time, which can be part of routine maintenance to ensure optimal shade/awning operation.

GAPOSA XQ5 Specifications

General IconGeneral
BrandGAPOSA
ModelXQ5
CategoryWindow Blinds
LanguageEnglish

Related product manuals