11
GB
Fault Possible Cause Rectification
Abnormal Noises Screws / components loose v Tighten screws
Foreign bodies on the blade. v Remove foreign bodies.
Notch in the blade v Remove notches with
grindstone.
Blades are striking each other v Adjust cutting mechanism.
too hard.
Lawn is not cleanly cut Blade adjustment incorrect. v Adjust cutting mechanism.
Blade blunt. v Regrind or replace blade.
Grass too long (e.g. after a v Cut lawn shorter with a
relatively long absence). sickle.
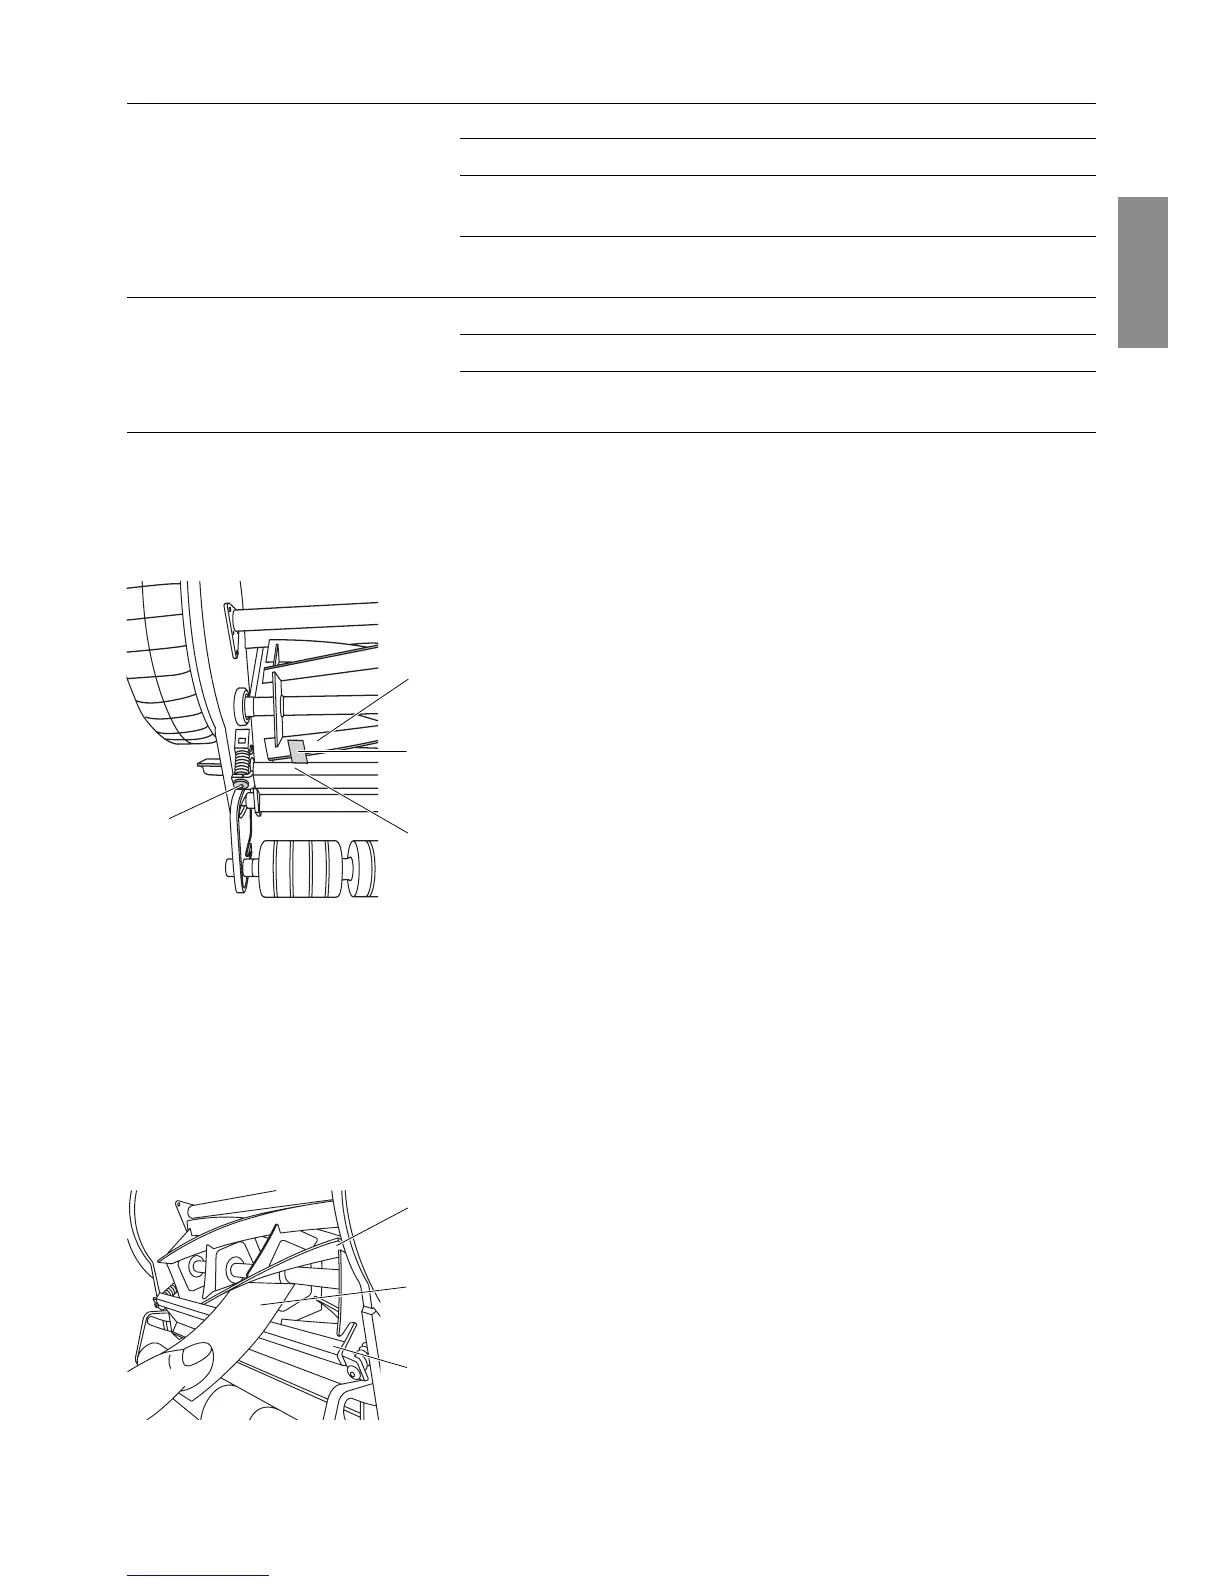
The cutting gear of your lawn mower was optimally adjusted be-
fore leaving our company. If, after longer use, a clean cut of the
grass is no longer possible or the blade roller contacts the lower
blade, then the lower blade should be adjusted as follows:
1. Unhook upright and clean cylinder mower.
2. Check cylinder
9
and lower blade
0
for notches and remove
these with a grindstone if necessary.
3. Unscrew internal hexagon screws
A
with an internal hexagon
wrench (5 mm) anticlockwise until the cylinder
0
turns freely.
4. Push the feeler gauge supplied (thin strip of metal)
8
between one blade
9
on the cylinder and the lower blade
0
.
5. Tighten left internal hexagon screw
A
with an internal
hexagon wrench (5 mm) until the feeler gauge
8
is held
gently.
6. Continue turning the cylinder until the blade
9
, already
adjusted on the left side, is exactly above the lower blade
0
on the right side.
7. Tighten the right internal hexagon screw
A
with an internal
hexagon wrench (5 mm) until the feeler gauge
8
is held
gently.
8. Rotate cylinder
9
. If a banging noise is produced during this,
open up the internal hexagon screw
A
slightly on the side
affected.
When the cylinder and the lower blade can hardly be heard
touching each other, the cutting mechanism has been adjusted
correctly.
9. Cutting test:
Place a strip of paper
B
in such a way on the lower blade
0
that it points towards the spindle of the cylinder
9
.
10. Turn cylinder
9
carefully.
If the lower blade is set correctly
0
the paper will be cut off
as if with scissors.
11. Repeat the cutting test on the other blades
9
.
Adjusting the cutting
mechanism:
9
8
0
A
9
B
0